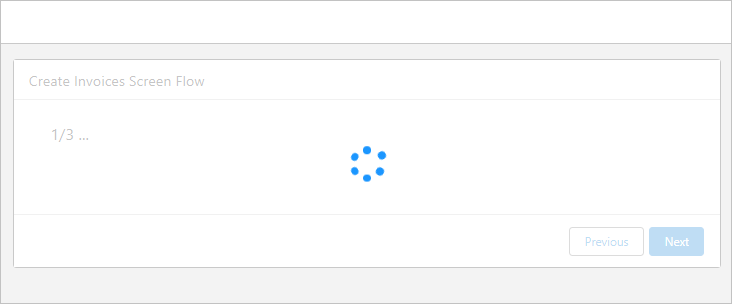
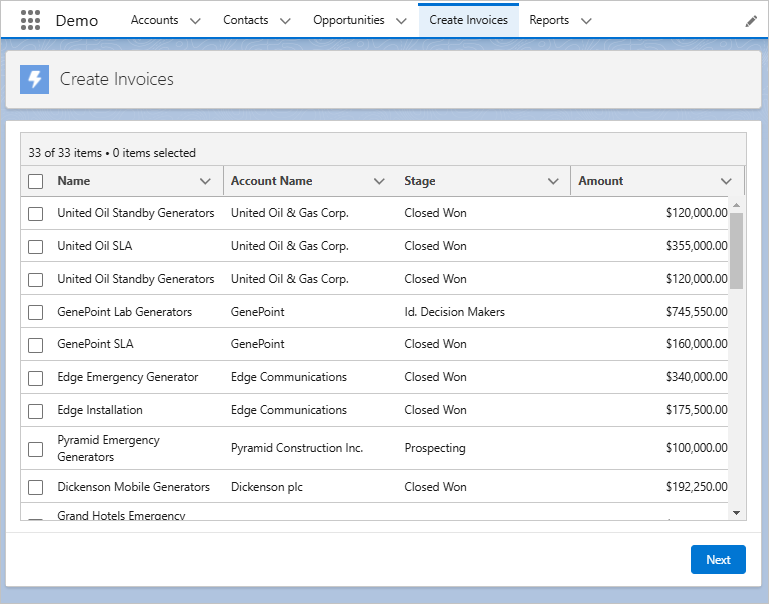
This article will show you how to create a flow to create invoices for selected records in the Flow's data table. To create documents, use the “OfcForFlowScreen” component of Office File Creator in the flow
Completed Flow
Flow Process Overview
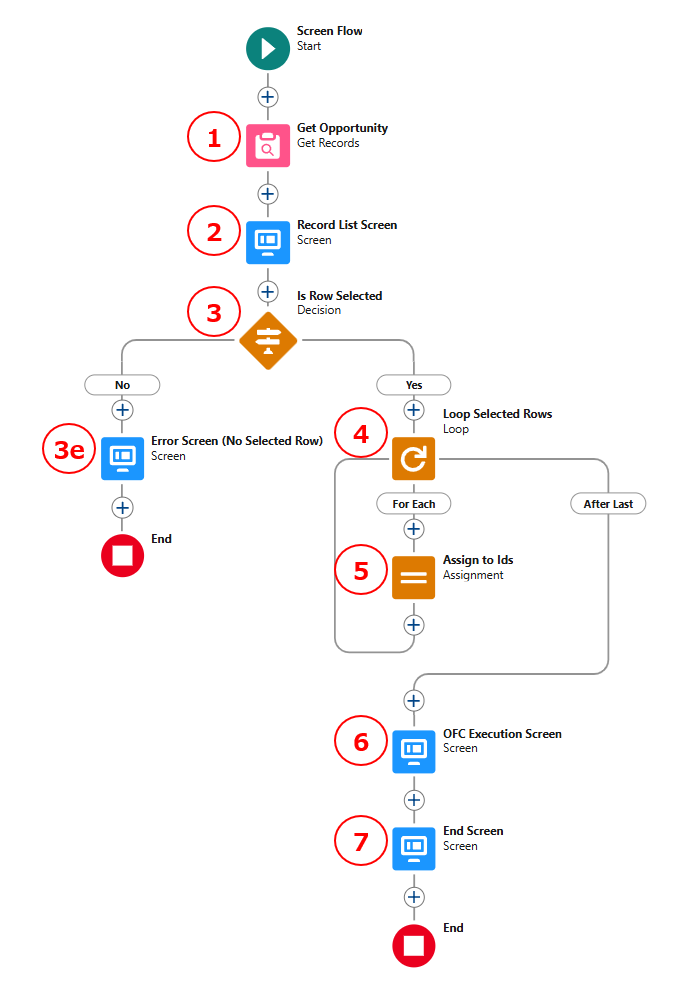
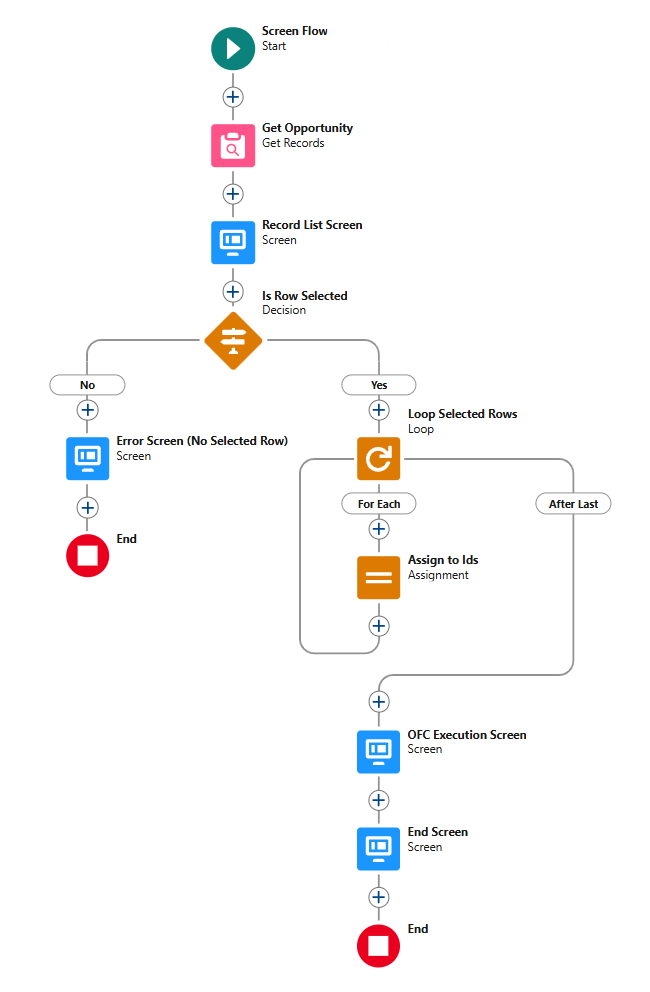
This is the overall picture of the flow.
1. Get Opportunity
Get Opportunity records.
2. Record List Screen
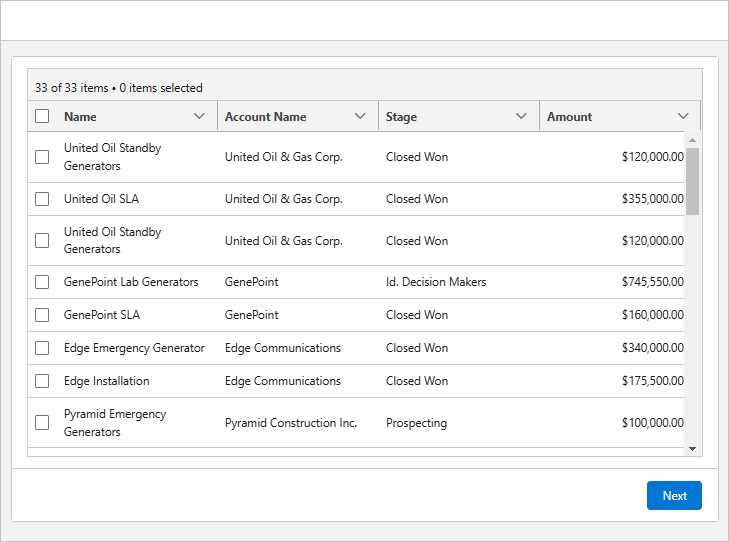
Display the screen of Opportunity record list using the data table.
3. Judge Selected Rows Exist
Judge whether a record is selected or not.
3e. Error Screen (No Selected Row)
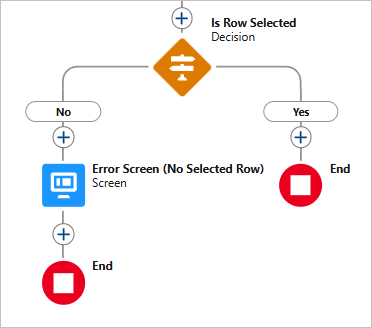
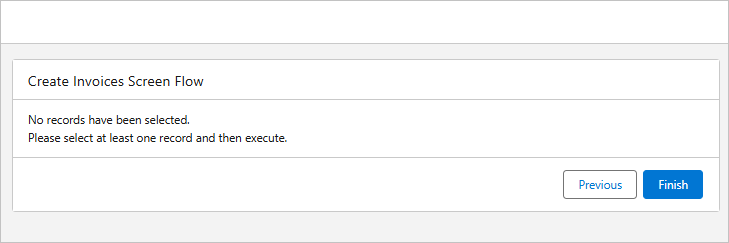
Display the message that no records have been selected and terminate the flow.
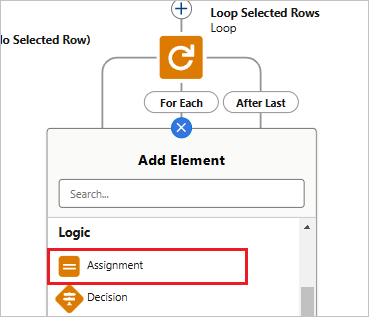
4. Loop Selected Rows
Start a loop of selected rows.
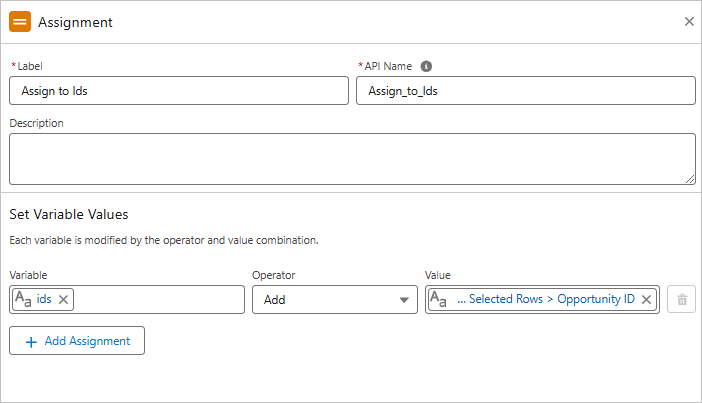
5. Assign to Ids
Add the Id of the selected row to the ids collection variable.
6. OFC Execution Screen
Output documents from the OfcForFlowScreen component.
7. Completion Screen
Display the completion message.
Create the Flow
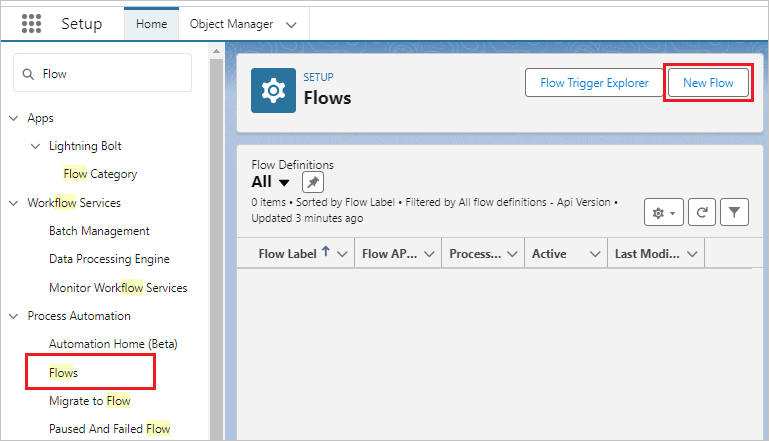
From Setup >Flows, click the "New Flow" button.
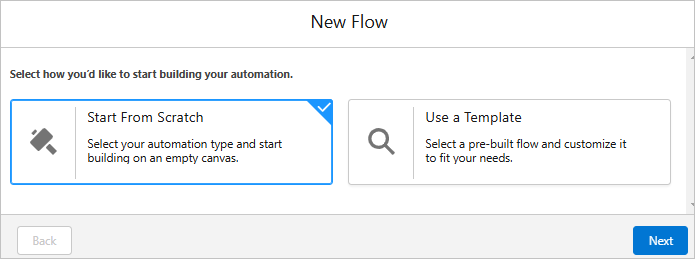
Select "Start From Scratch" and click the "Next" button.
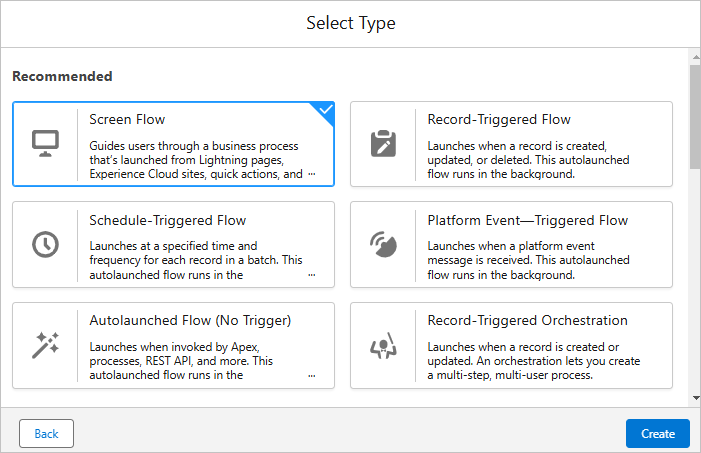
Select "Screen Flow" and click the "Create" button.
Create Variable
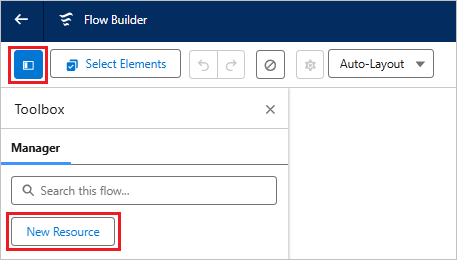
Click the "Toggle Toolbox" button in the upper left corner of the screen, then click the "New Resource" button.
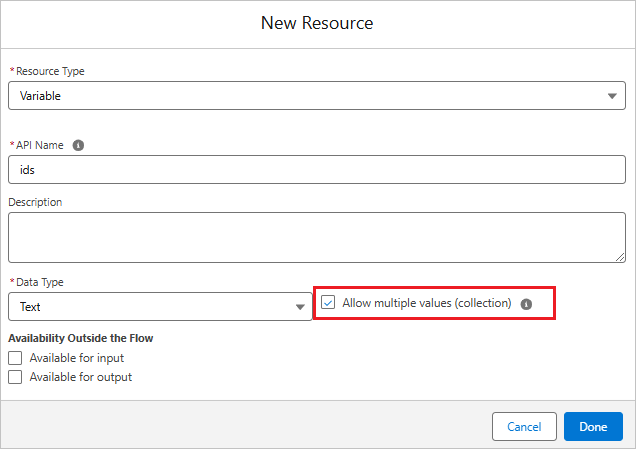
Create the ids variable.
Resource Type: Variable
API Name: ids
Data Type: Text
Allow multiple values (collection): check on
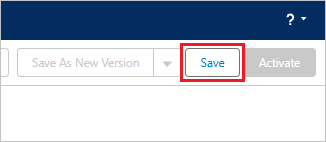
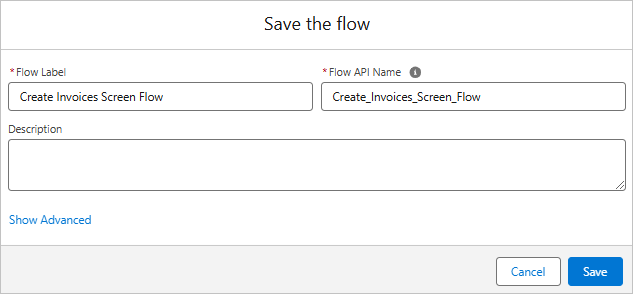
First, save the flow. Click the "Save" button.
Save the Flow under any name. Here it is saved as follows.
Flow Label: Create Invoices Screen Flow
Flow API Name: Create_Invoices_Screen_Flow
1. Get Opportunity
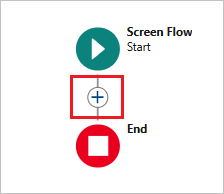
Click the "+" mark under Screen Flow.
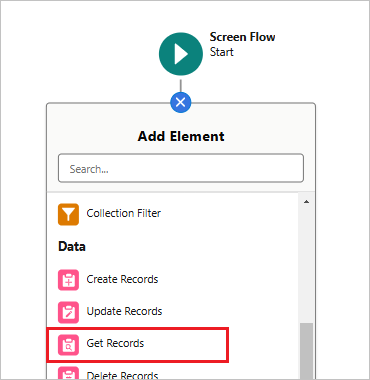
Select "Get Records".
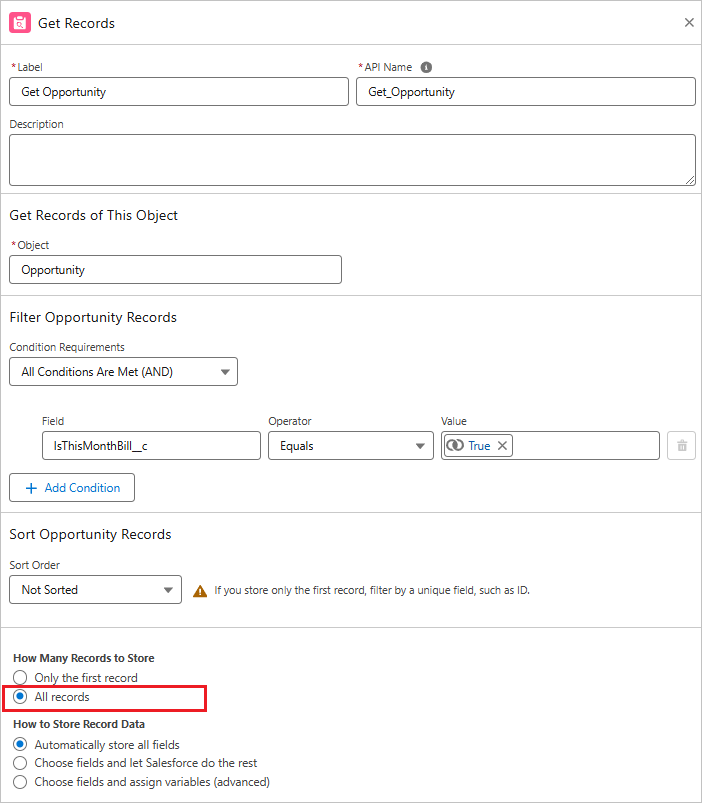
Set the properties.
Label: Get Opportunity
API Name: Get_Opportunity
Object: Opportunity
Condition Requirements: All Conditions Are Met (AND)
Field: IsThisMonthBill__c Operator: Equals Value: {!$GlobalConstant.True}
Sort Order: Not Serted
How Many Records to Store: All records
How to Store Record Data: Automatically store all fields
2. Record List Screen
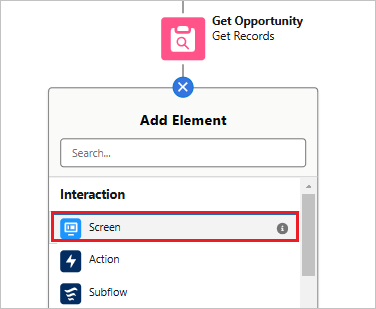
Click the "+" mark under "Get Opportunity" and select "Screen".
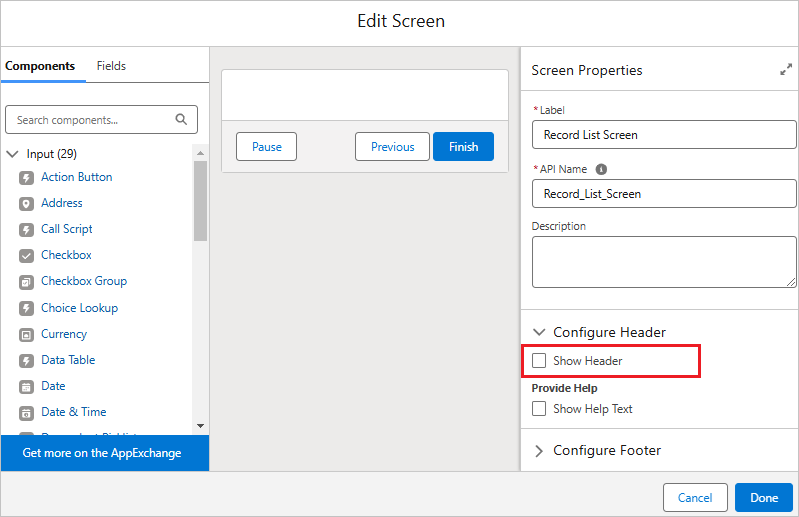
Set the properties.
Label: Record List Screen
API Name: Record_List_Screen
Show Header: check off
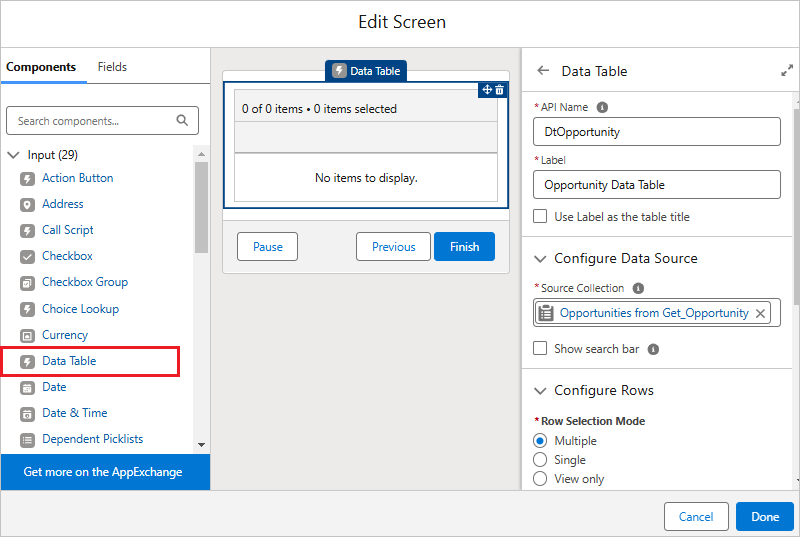
Click "Data Table" in the left component and set the properties.
API Name: DtOpportunity
Label: Opportunity Data Table
Source Collection: {!Get_Opportunity}
Row Selection Mode: Multiple
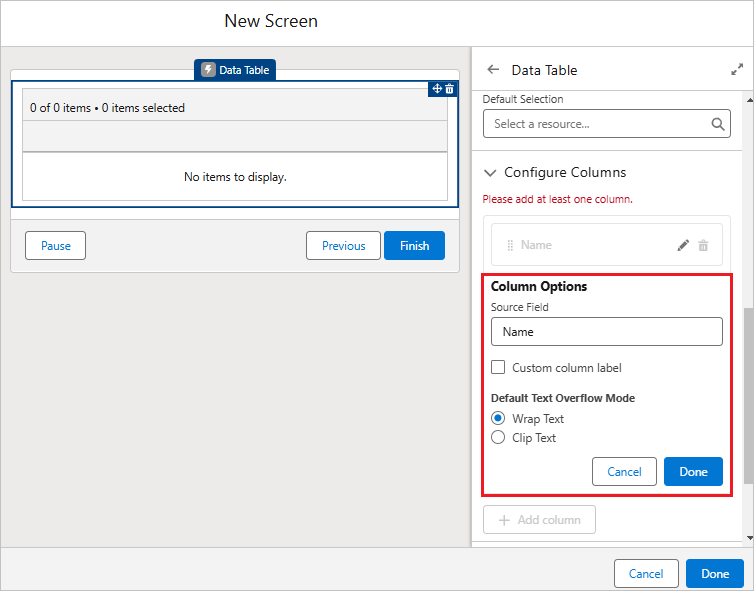
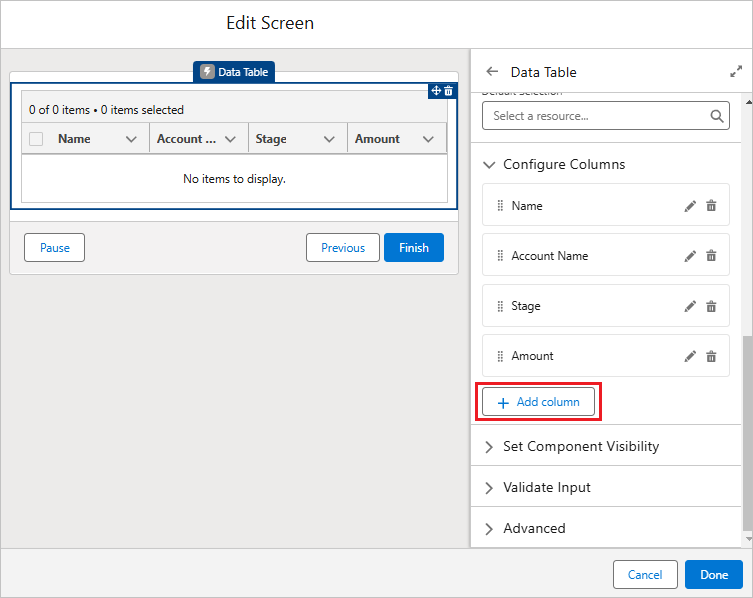
Select the Source Field to display in the Column Options and click the "Done" button.
Click the "Add column" button and add the field to display. After completing the addition of columns, click the "Done" button on the screen component.
3. Judge Selected Rows Exist
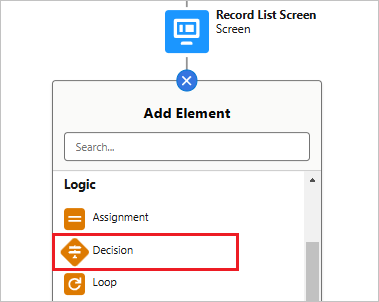
Click the "+" mark under "Record List Screen" and select "Decision".
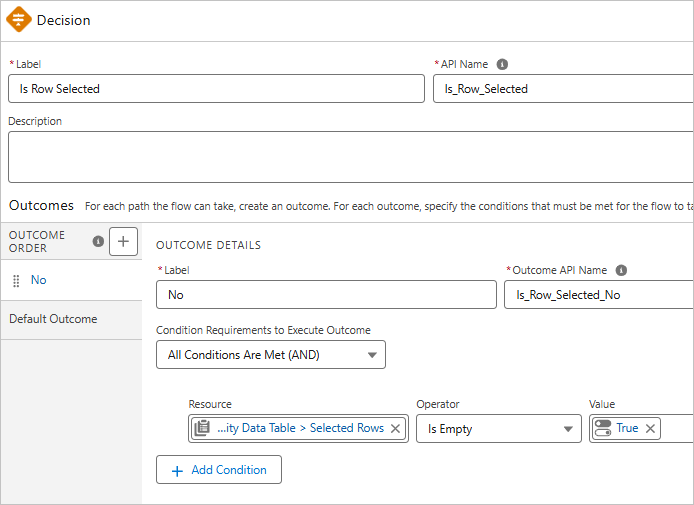
Set the properties.
Label: Is Row Selected
API Name: Is_Row_Selected
-----------------------------------------------------
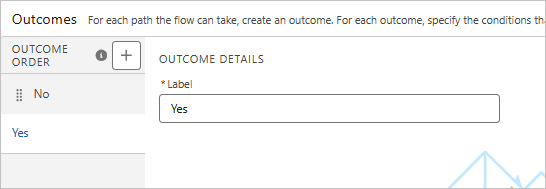
Label: No
Outcome API Name: Is_Row_Selected_No
Condition Requirements to Execute Outcome: All Conditions Are Met (AND)
Recourse: {!DtOpportunity.selectedRows} Operator: Is Empty Value: {!$GlobalConstant.True}
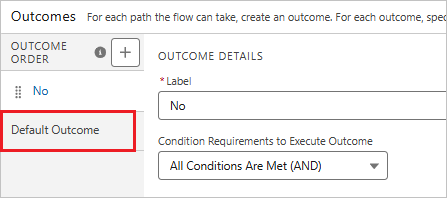
Click "Default Outcome" in the left sidebar.
Set the properties.
Label: Yes
3e. Error Screen (No Selected Row)
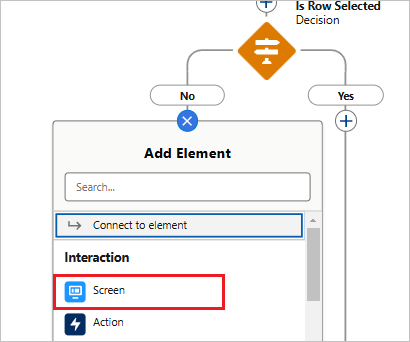
Click the "+" mark under "No" and select "Screen".
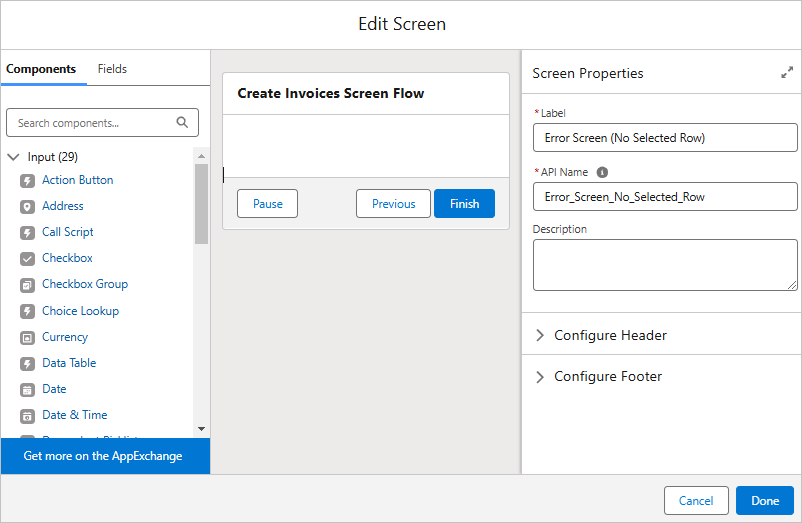
Set Screen properties.
Label: Error Screen (No Selected Row)
API Name: Error_Screen_No_Selected_Row
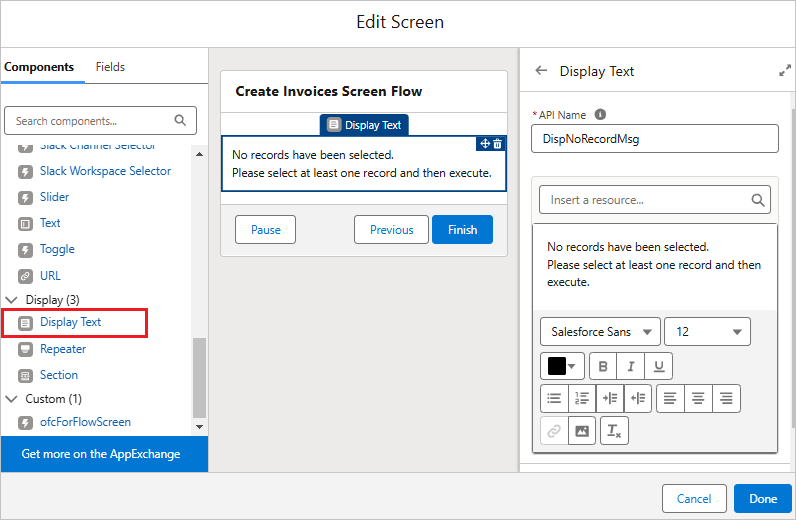
Click "Display Text" in the left component and set the properties.
API Name: DispNoRecordMsg
Text:
No records have been selected.
Please select at least one record and then execute.
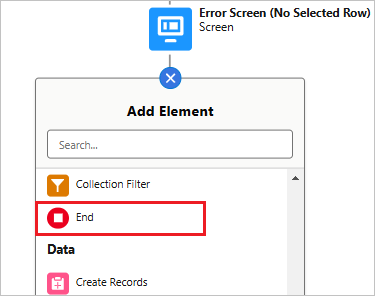
Click the "+" mark under "Error Screen (No Record)" and select "End".
It is branched into two.
4. Loop Selected Rows
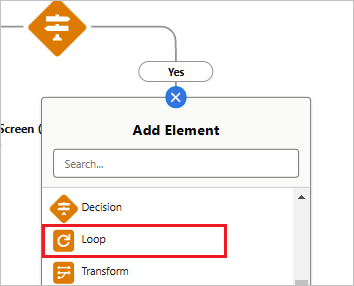
Click the "+" mark under "Yes" and select "Loop".
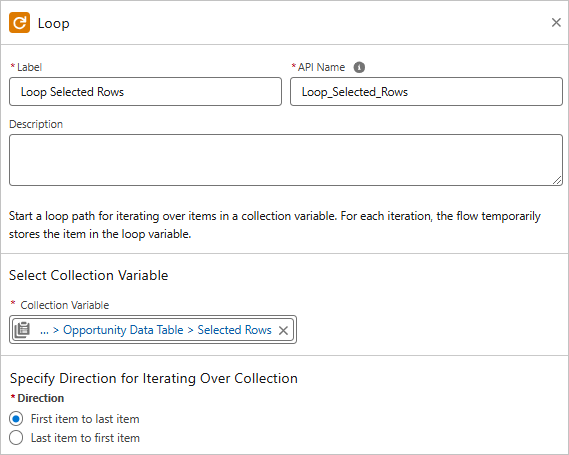
Set the properties.
Label: Loop Selected Rows
API Name: Loop_Selected_Rows
Collection Variable: {!DtOpportunity.selectedRows}
5. Assign to Ids
Click the "+" mark under "For Each" and select "Assignment".
Set the properties.
Label: Assign to Ids
API Name: Assign_to_Ids
Variable: {!ids} Operator: Add Value: {!Loop_Selected_Rows.Id}
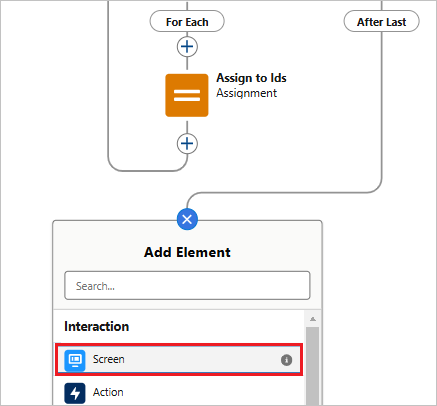
6. OFC Execution Screen
Click the "+" mark under "After Last" and select "Screen".
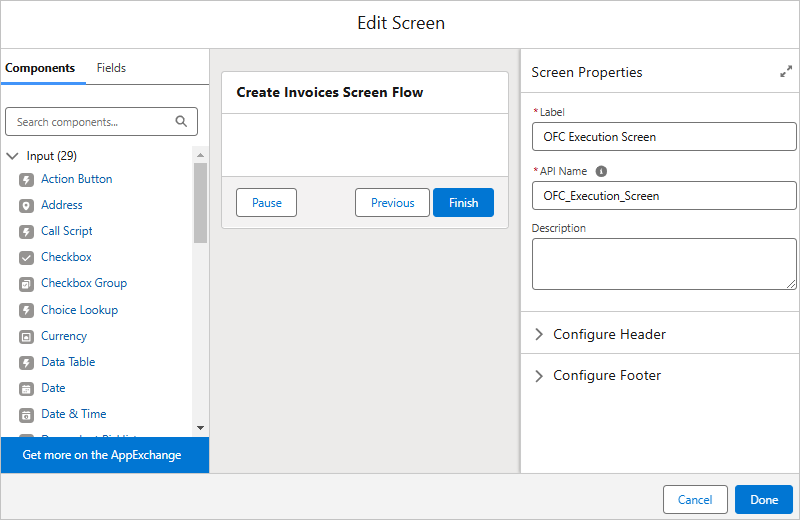
Set the properties.
Label: OFC Execution Screen
API Name: OFC_Execution_Screen
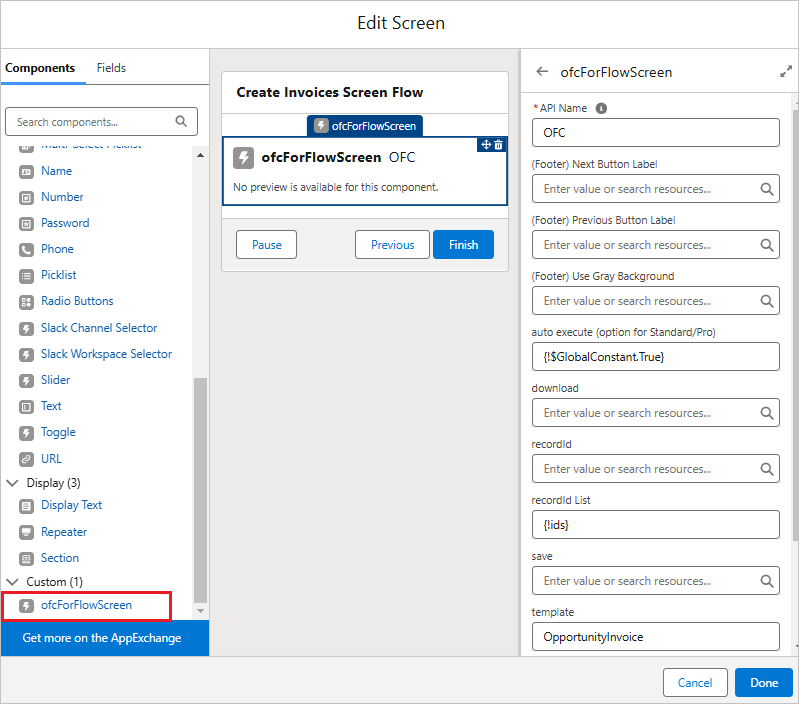
Click "ofcForFlowScreen" in the left component and set the properties. After setting, click the "Done" button.
API Name: OFC
auto execute (option for Standard/Pro): {!$GlobalConstant.True}
recordId List: {!ids}
save: Empty *To save the file, enter "file" or "att".
template: OpportunityInvoice *Enter the Template Api Name of the OFC_Template record.
*For OFC Free, the "auto execute (option for Standard/Pro)" option is not available. The "next" button must be clicked when executing.
7. Completion Screen
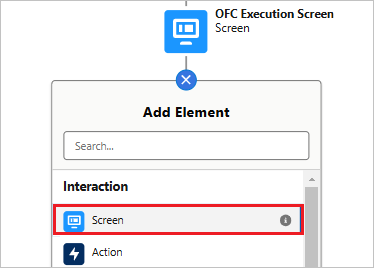
Click the "+" mark under "OFC Execution Screen" and select "Screen".
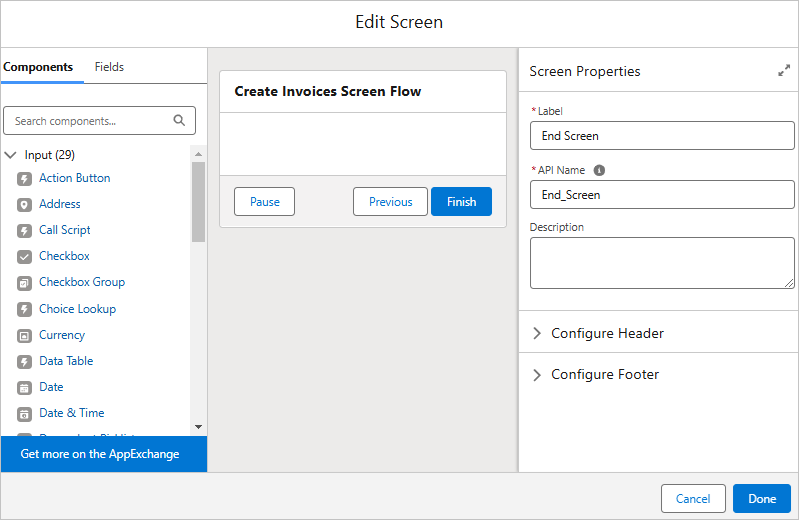
Set Screen properties.
Label: End Screen
API Name: End_Screen
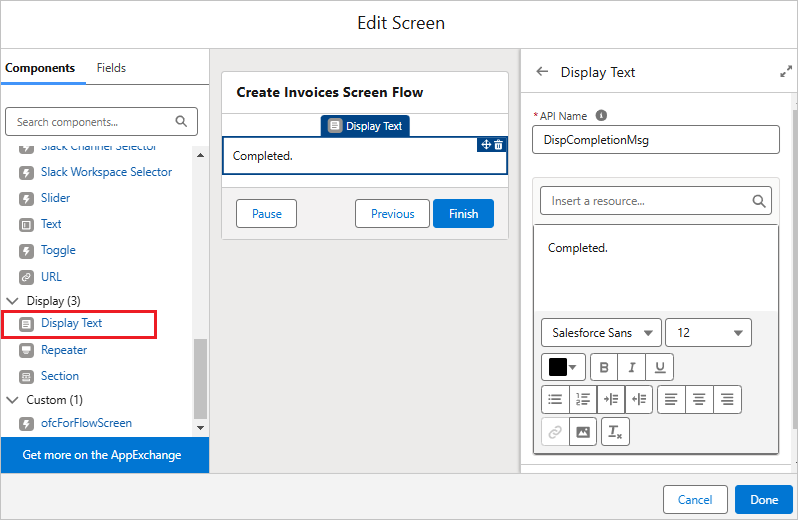
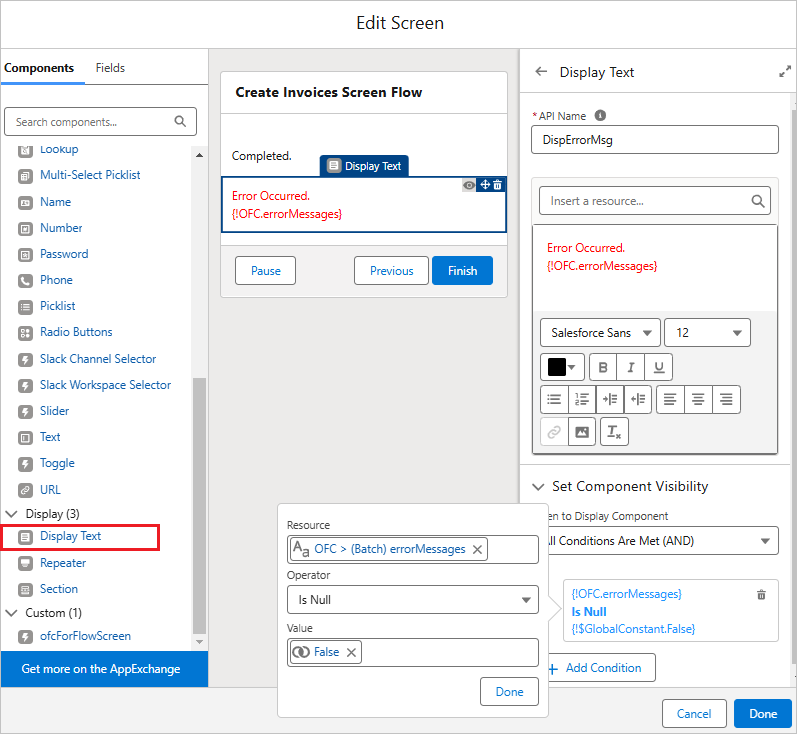
Click "Display Text" in the left component and set the properties.
API Name: DispCompletionMsg
Text: Completed.
Click "Display Text" in the left component and set the properties.
API Name: DispErrorMsg
Text:
Error Occurred.
{!OFC.errorMessages}
*Set text color to red from the color palette.
*Select "errorMessages", not "errorMessage".
Click "Set Component Visibility" and set the conditions.
When to Display Component: All Conditions Are Met (AND)
Resource: {!OFC.errorMessages} Operator: Is Null Value: {!$GlobalConstant.False}
Flow creation is complete.
Click the "Save" button.
Debug the Flow
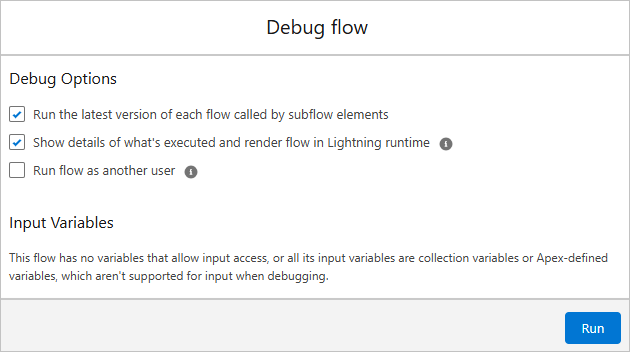
Click the "Debug" button.
Click the "Run" button.
Select nothing and click the "Next" button.
An error message is displayed.
Click the "Run Again" button.
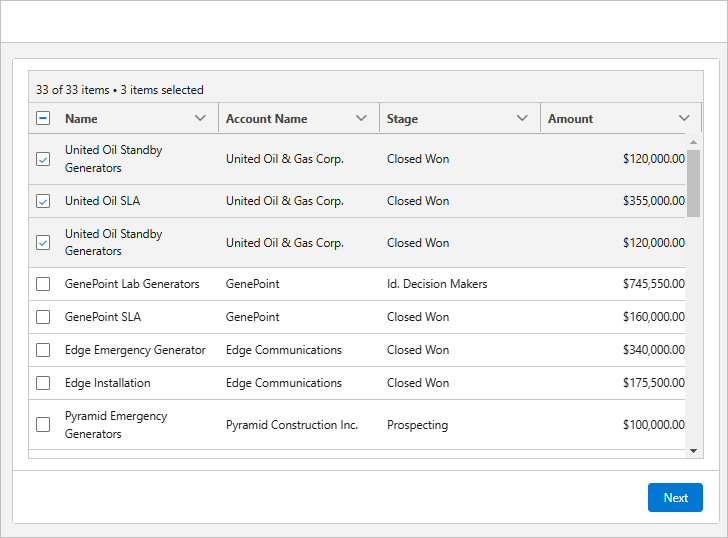
Select the records and click the "Next" button.
Files are output sequentially.
A completion message is displayed. Close the debug screen and return to the flow editing screen.
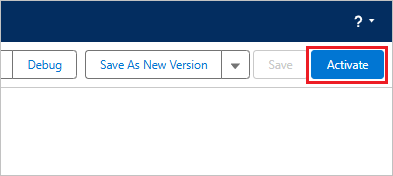
Click the "Activate" button on the flow.
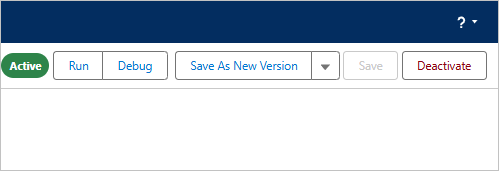
The Flow is activated.
Create Tab
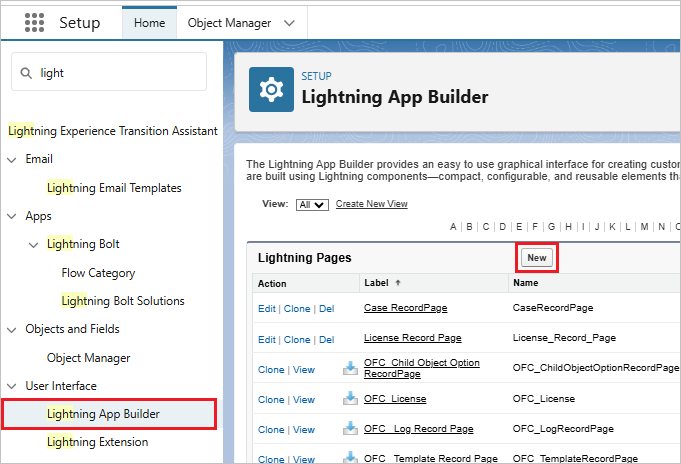
From Setup > Lightning App Builder, click add the "New" button.
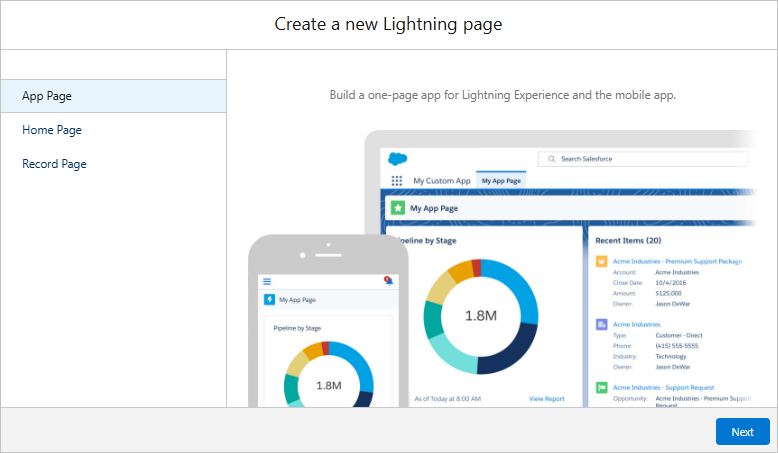
Select "App Page" and click the "Next" button.
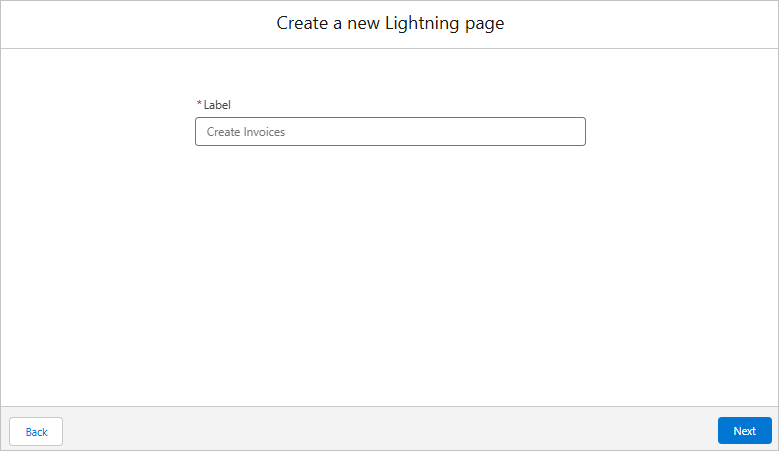
Enter the label and click the "Next" button.
Label: Create Invoices
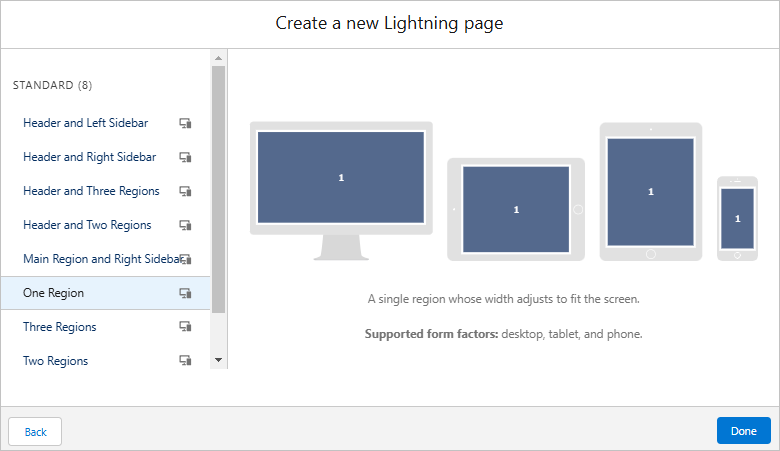
Select "One Region" and click the "Done" button.
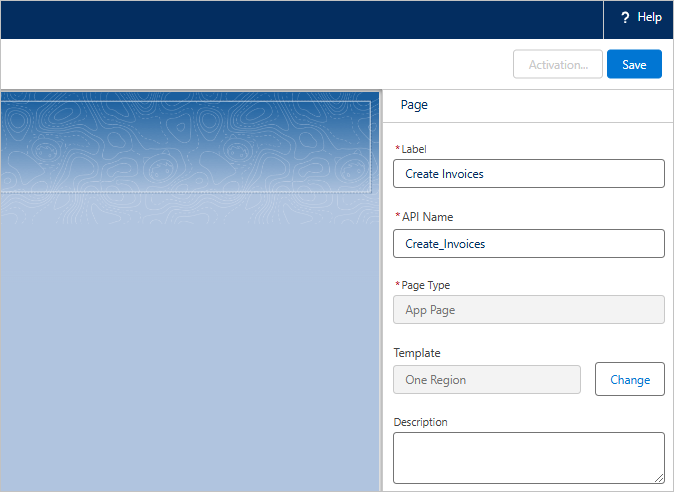
Set the properties.
Label: Create Invoices
API Name: Create_Invoices
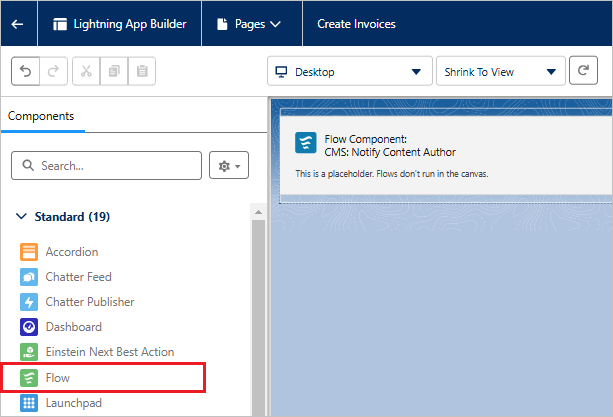
Drag and drop "Flow" from the component.
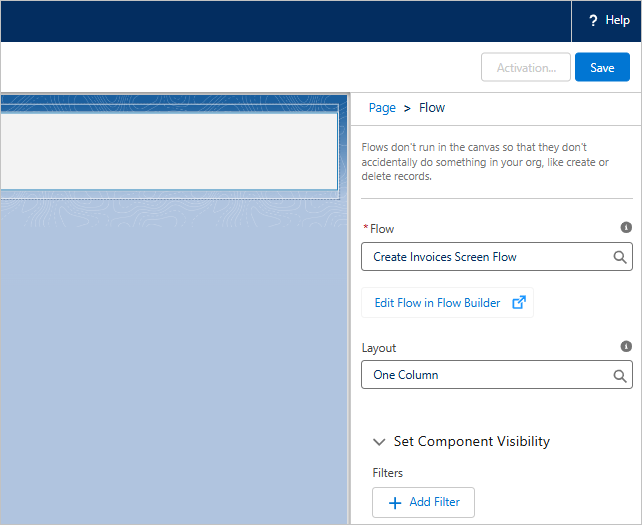
Set the properties and click the "Save" button.
Flow: Create Invoices Screen Flow *Select the created flow.
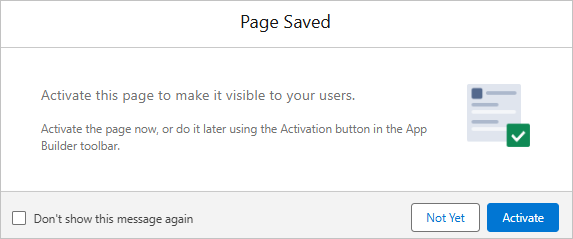
Click the "Activate" button.
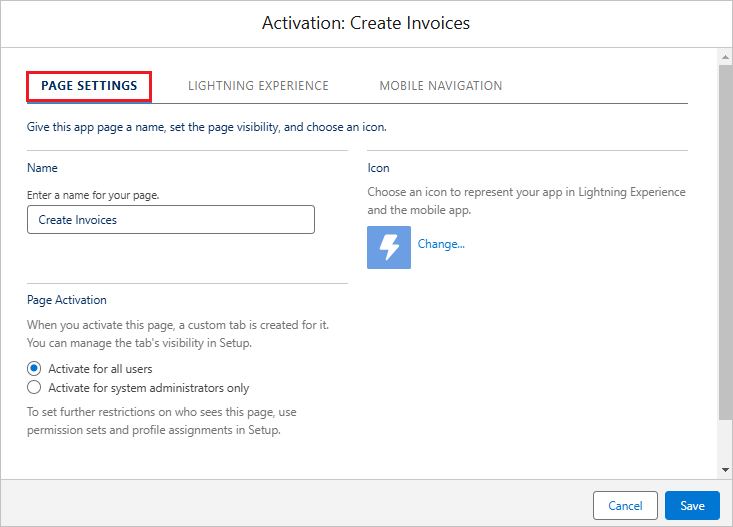
Set settings in the "PAGE SETTINGS" tab.
Name: Create Invoices *Displayed as the tab name.
Page Activaten: Activate for all users
Icon: Lightning
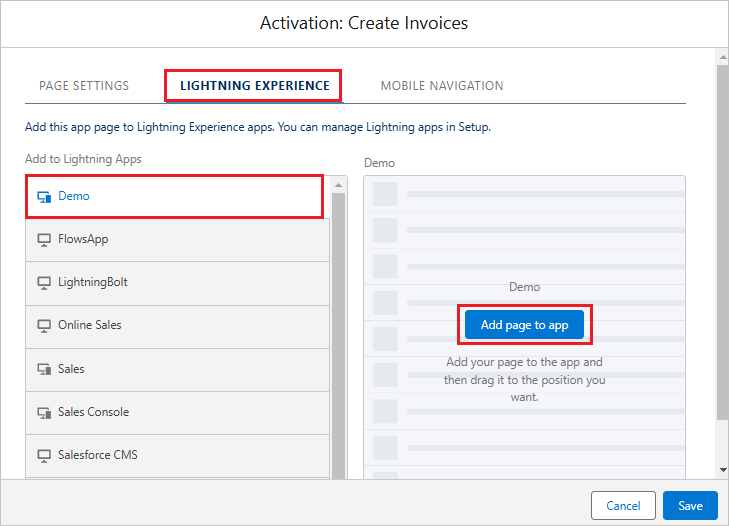
From the "LIGHTNING EXPERIENCE" tab, select the application to which you want to add a tab and click the "Add page to app" button.
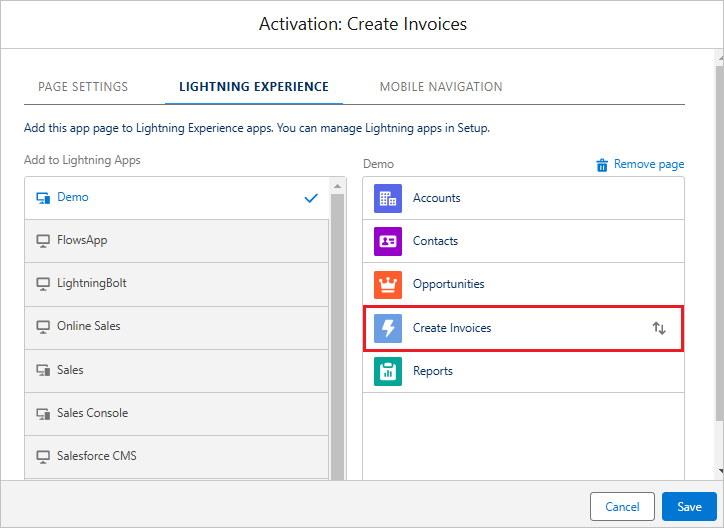
A tab will be added, and you can drag and drop it to any position. Click the "Save" button.
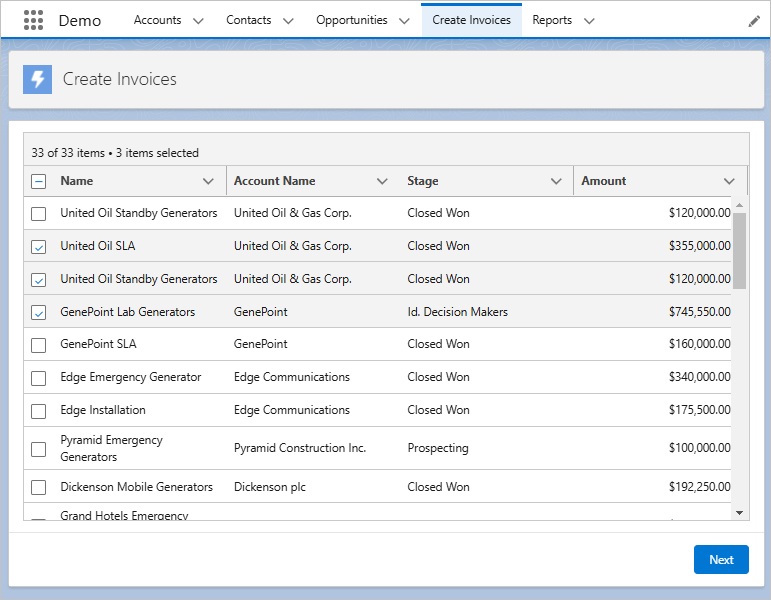
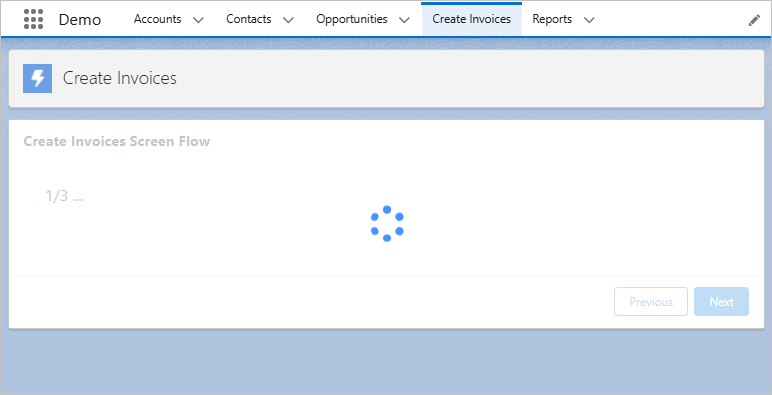
Select the tab you created. A list of records is displayed, select the records, and click the "Next" button.
Files are output sequentially.
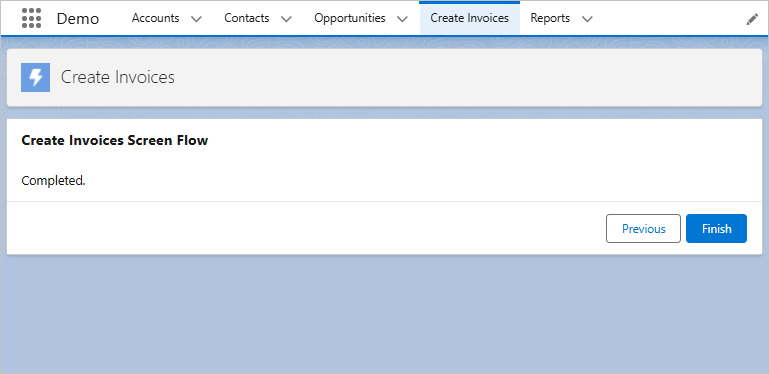
A completion screen is displayed. Click the "Finish" button.
Return to the list of records.
