This article will show you how to create an invoice and to send an email with an attachment in the flow. Office File Creator can be integrated into the Screen Flow. Sending an email attachment calls the Apex class created in Apex class to send an email with attachments callable in Salesforce flow in the flow.
With the Spring '25 release, the "Send Email" action of the flow can send an email with attachments. For the "Send Email" action, refer to the following.
Send Email with Attachments in Salesforce Flow
Send an Email with a PDF Quote in Salesforce Record-Triggered Flow - Office File Creator Advanced -
- Completed Flow
- Key Points for Flow Creation
- Flow Process Overview
- Create the Flow
- Create variables
- 1. Get Opporutnity
- 2. Get Opportunity Contact Role
- 3. Email Send Conditions Decision
- 3e. Error Screen(Email Send Conditions)
- 4. Top Screen
- 5. OFC File Save
- 6. OFC Error Decision
- 6e. Error Screen (OFC)
- 7. Assign Email Parameters
- 8. Send Email with Invoice
- 9. Send Email Error Decision
- 9e. Error Screen (Send Email)
- 10. Update Opportunity
- 10e. Error Screen (Update Opportunity)
- 11.Completion Screen
- Debug the Flow
- Create Custom Button
- Run Flow
Completed Flow
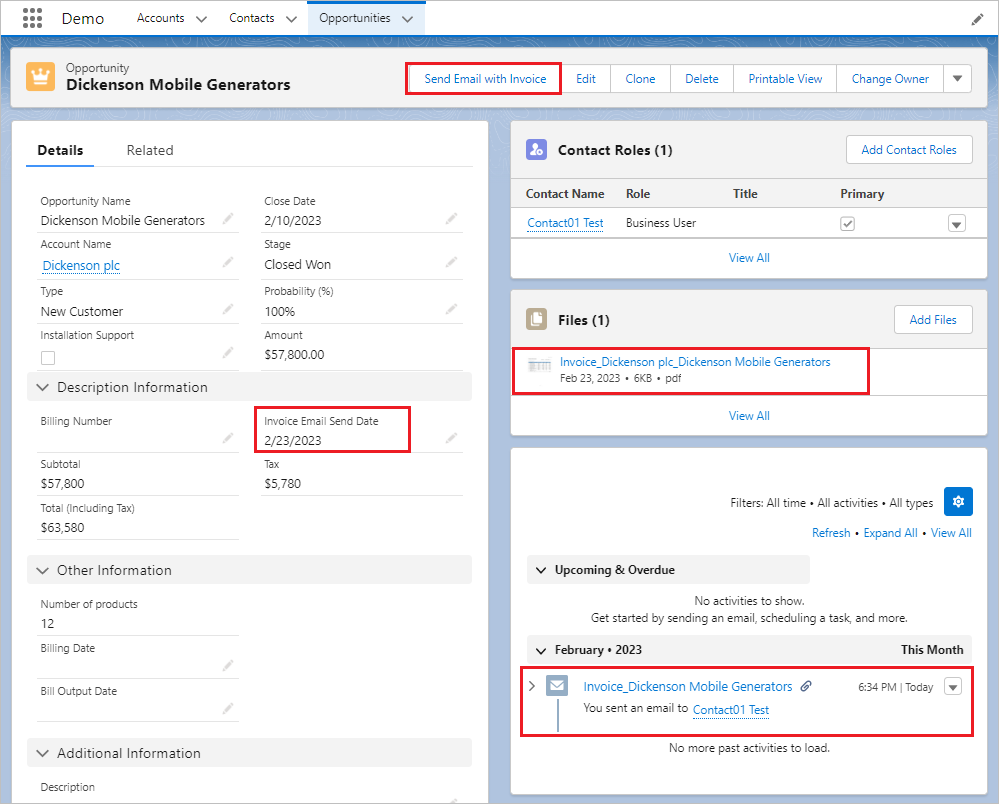
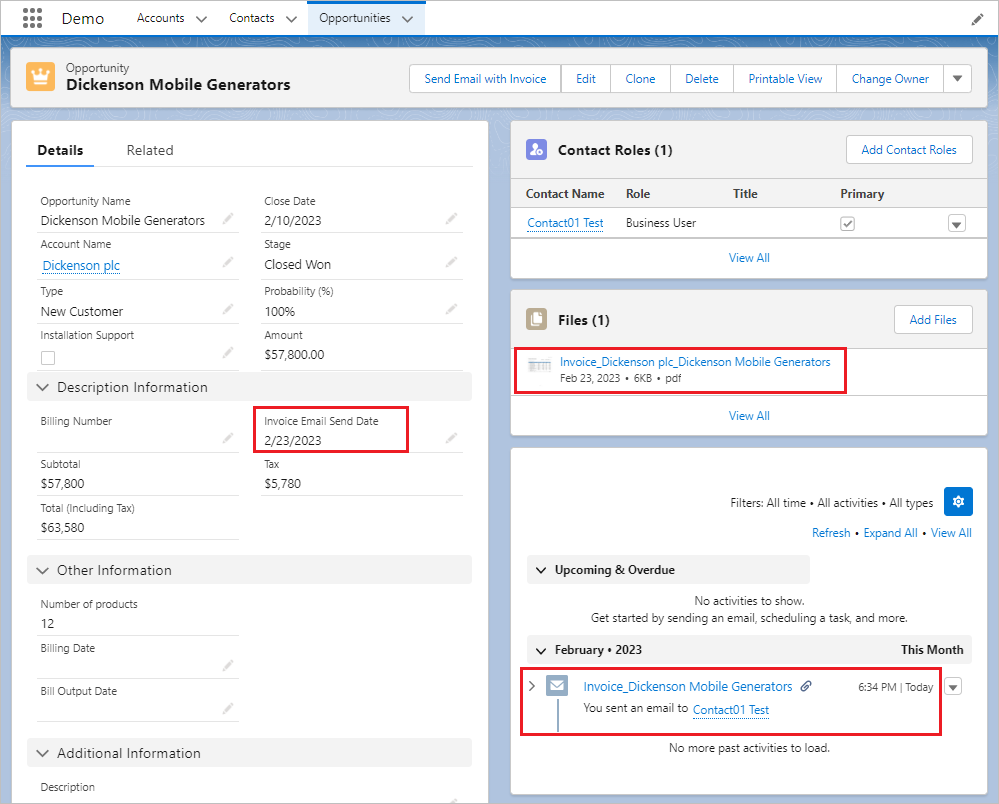
Clicking the "Send Email with Invoice" button on the Opportunity record page displays a pop-up screen, and the following process is performed by executing the flow.
- The invoice PDF is saved as a file.
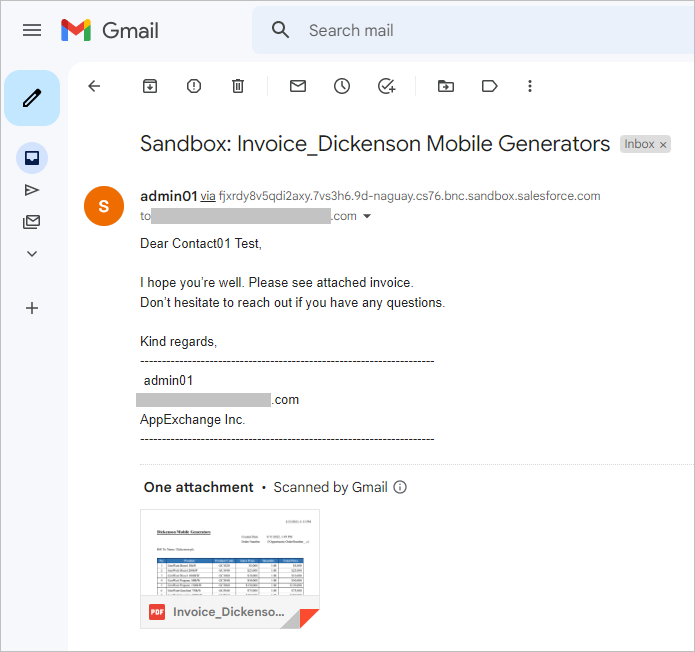
- The email with an attachment will be sent to the Contact. The Contact is that the primary is checked in the Contact Role.
- The date of execution will be set to the "Invoice Email Send Date" of the Opportunity.
- The email is saved as an activity of the Opportunity and the Contact record.
Demo
Key Points for Flow Creation
- The parameter that receives the record Id from the records screen in the flow is "recordId". Create a text type variable "recordId" in the flow. No other variable name can receive the record Id.
- To output a file in Office File Creator, place the officeFileCreatorForFlow component in the screen flow. It returns the result of creating the files (success or failure) and returns an error message in case of failure.
- Sending an email attachment calls the Apex class created in Apex class to send an email with attachments callable in Salesforce flow.
Flow Process Overview
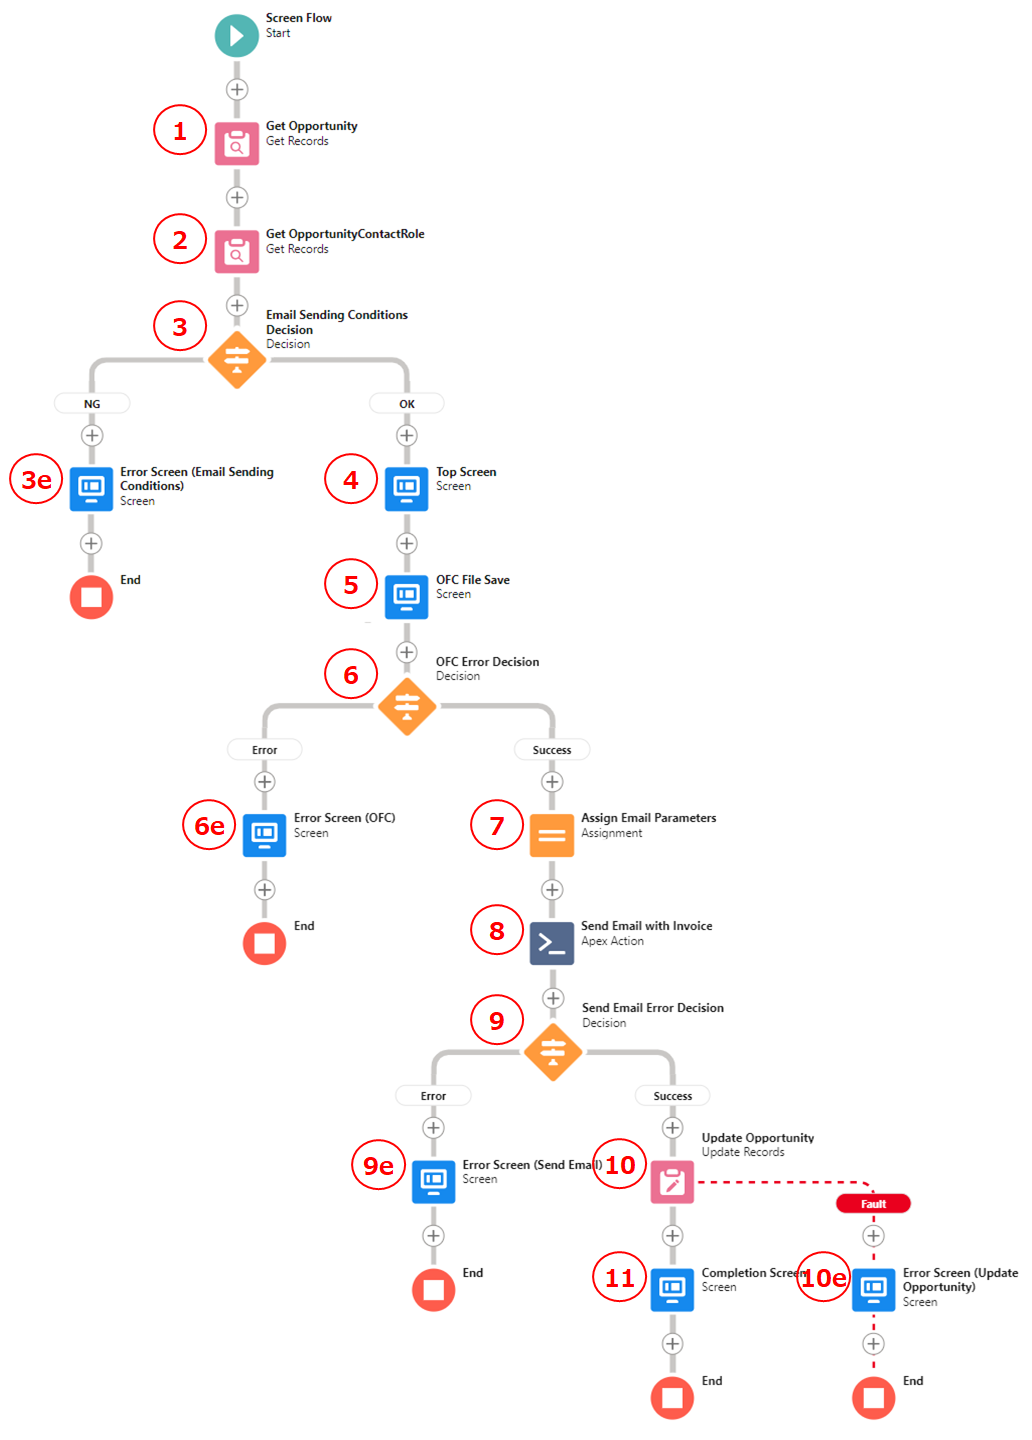
This is the overall picture of the flow.
1. Get Opportunity
Retrieve the Opportunity record. Gets the Invoice Email Send Date, Amount, and Name. The Invoice Email Send Date and Amount are used to check the email sending conditions. The Name is used for the subject of the email.
2. Get OpportunityContactRole
Retrieve the contact whose primary is checked on from the Opportunity Contact Role record related to the Opportunity.
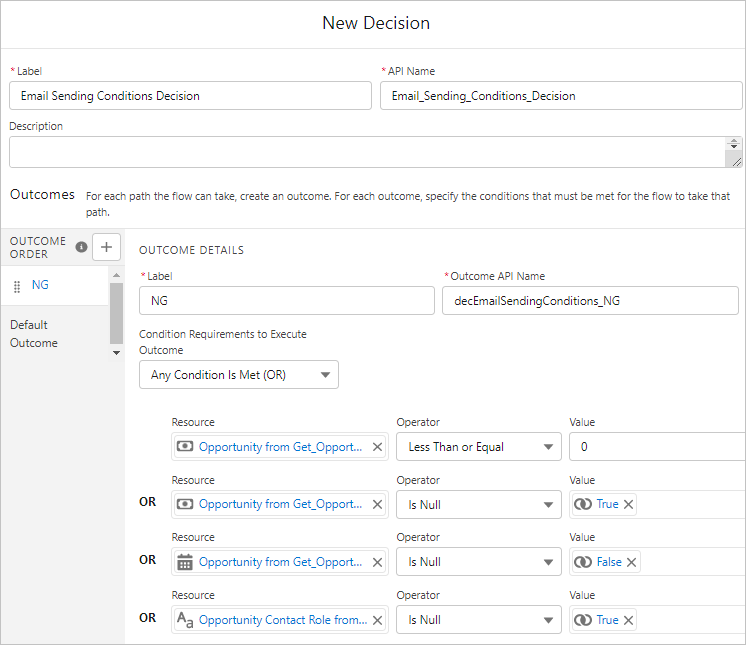
3. Email Sending Conditions Decision
Decide the OK or NG of the email sending conditions. It is NG if the Invoice Email Send Date is not blank, or the Amount is less than 0, or the Email of the contact is blank. In case of OK, got to process 4. In case of NG got to process 3e.
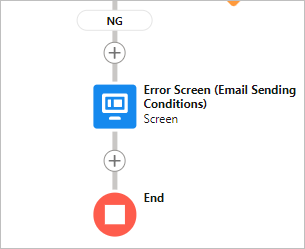
3e. Error Screen (Email Sending Conditions)
Display an error message and end the flow.
4. Top Screen
Display the confirmation message.
5. OFC File Save
Place the officeFileCreatorForFlow component in the screen flow. Office File Creator will create a PDF file and save it to File.
6. OFC Error Decision
Decide the success or error of the output result. In case of success, process 7 is executed. In case of error, process 6e is executed.
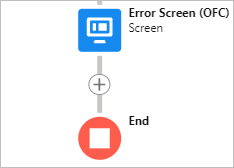
6e. Error Screen (OFC)
Display an error message and end the flow.
7. Assign Email Parameters
Assign the file Id saved by OFC to the collection variable.
8. Send Email with Invoice
Send an email with an invoice to the Contact by calling SendEmailWithAttachment Apex class.
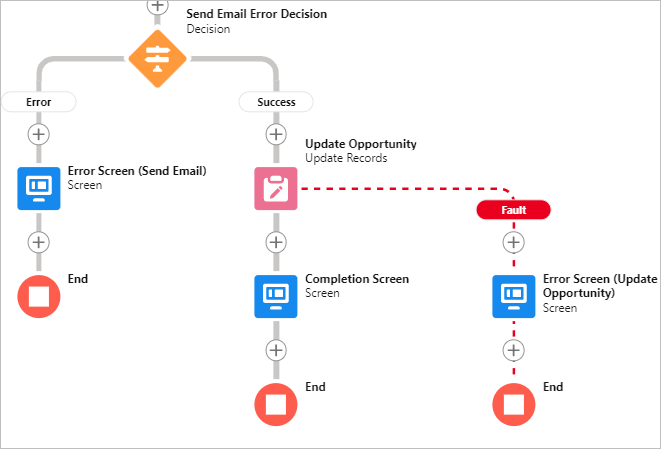
9. Send Email Error Decision
Decide the success or error of sending an email. In case of success, go to process 10. In case of error, go to process 9e.
9e. Error Screen (Send Email)
Displays an error message and end the flow.
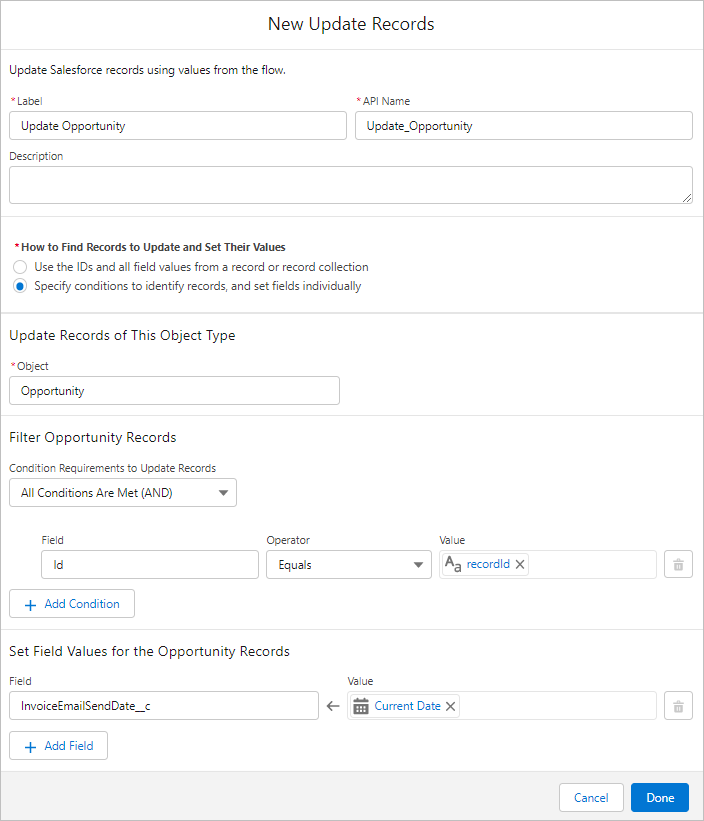
10. Update Opportunity
Update the Invoice Send Email Data in Opportunity. In case of success, go to process 11. In case of error, go to process 10e.
10e. Error Screen (Update Opportunity)
Display an error message and end the flow.
11. Completion Screen
Display the completion message.
Create the Flow
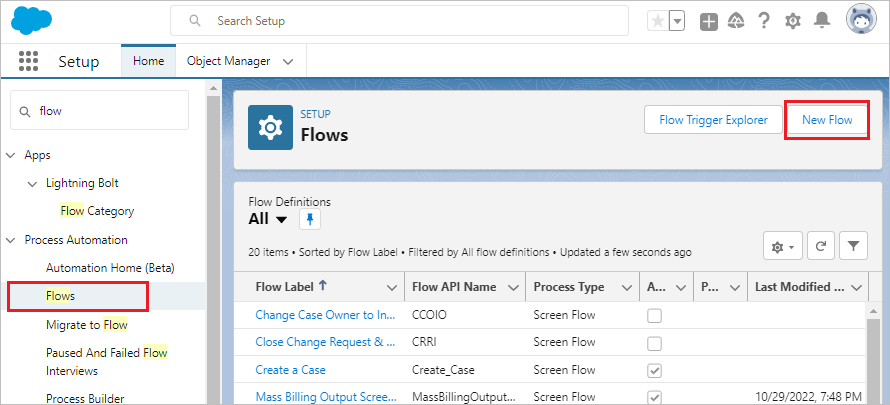
Let's create the flow. Open Flows from Setup and click the "New Flow" button.
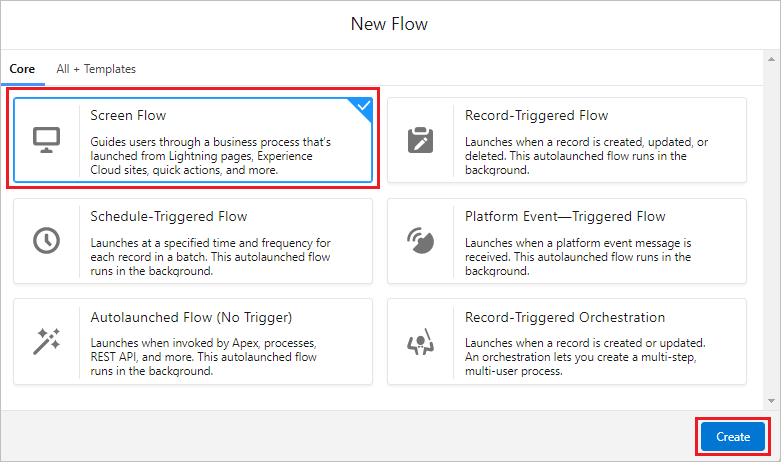
Select "Screen Flow" and click the "Create" button.
Create variables
First, the variables to be used in the flow are created first. Here is a list of variables.
| API Name | Description |
| recordId | Record Id received from the record screen |
| varFileIds | File Ids |
| txtTmplEmailBody | Email body |
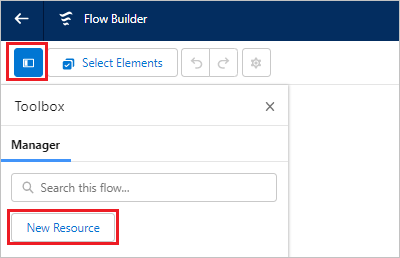
Click the "Toggle Toolbox" button in the upper left corner of the screen, then click the "New Resource" button.
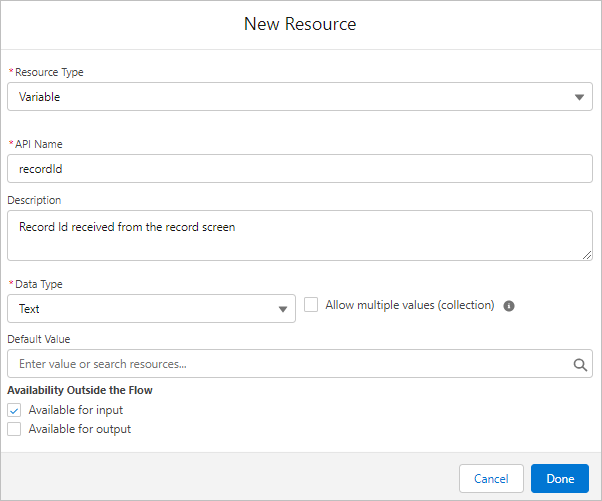
recordId variable
Resource Type: Variable
API Name: recordId
Description: Record Id received from the record screen
Data Type: Text
Available for input: check on
Note: recordId is a variable that receives the record Id from the record screen. Be sure to use "recordId" (only "I" is capitalized). Other variable names cannot receive the record Id.
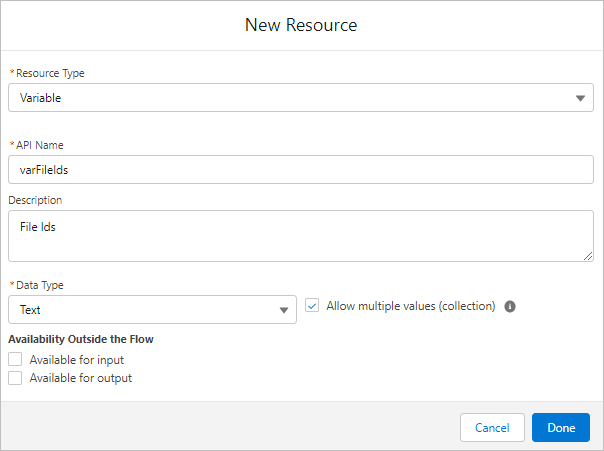
varFileIds collection variable
Resource Type: Variable
API Name: varFileIds
Description: File Ids
Data Type: Text
Allow multiple values (collection): check on
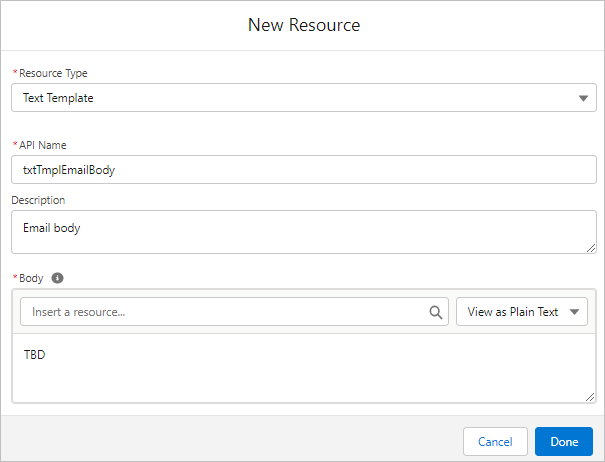
txtTmplEmailBody text template
Resource Type: Text Template
API Name: txtTmplEmailBody
Description: Email body
Body: Select "View as Plain Text"
TBD
The text will be set later, so we will leave it as "TBD" for now.
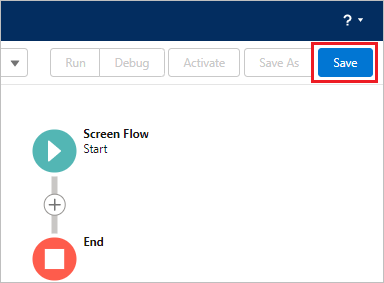
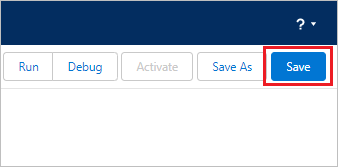
First, save the flow. Click the "Save" button.
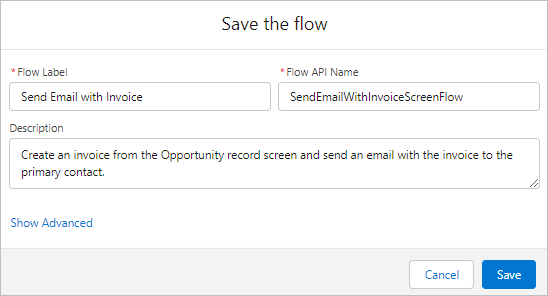
Save the Flow under any name.
Flow Label: Send Email with Invoice
Flow API Name: SendEmailWithInvoiceScreenFlow
Description: Create an invoice from the Opportunity record screen and send an email with the invoice to the primary contact.
1. Get Opporutnity
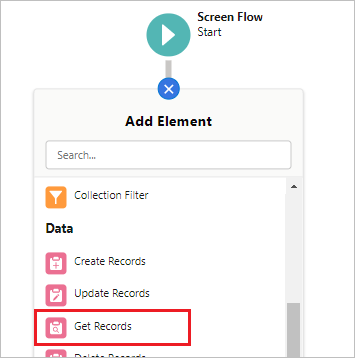
Click the "+" mark under "Screen Flow" and select "Get Records".
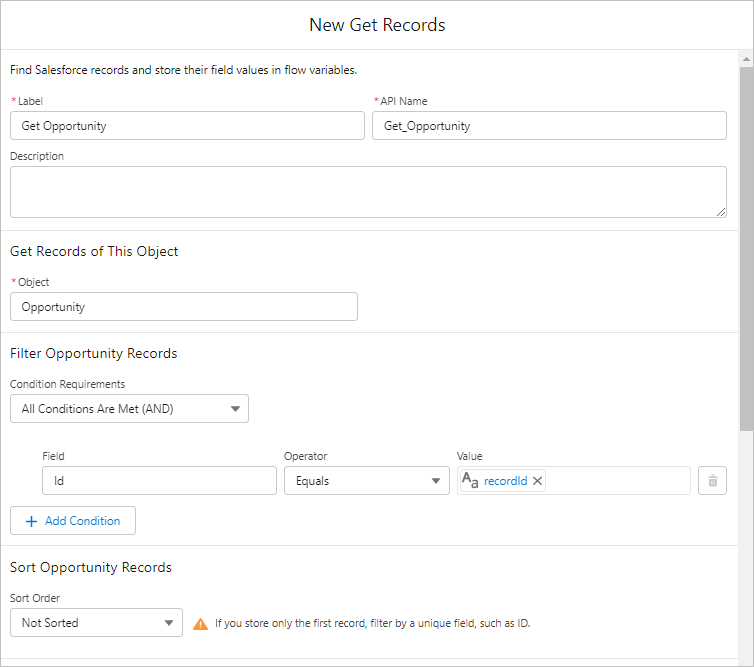
Set the properties.
Label: Get Opportunity
API Name: Get_Opportunity
Object: Opportunity
Condition Requirements: All Conditions Are Met (AND)
Field: Id Operator: Equals Value: {!recordId}
Sort Order: Not Sorted
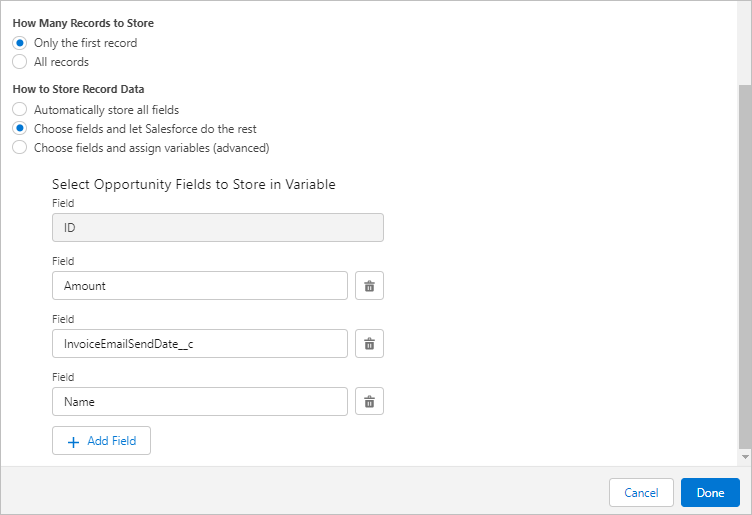
How Many Records to Store: Only the first record
How to Store Record Data: Choose fields and let Salesforce do the rest
Field: ID
Field: Amount
Field: InvoiceEmailSendDate__c
Field: Name
2. Get Opportunity Contact Role
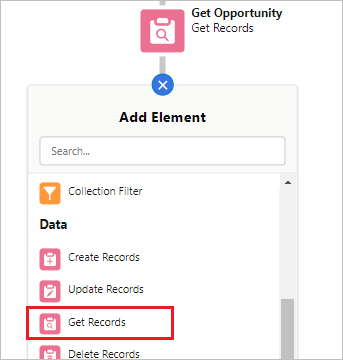
Click the "+" mark under "Get Opportunity" and select "Get Records".
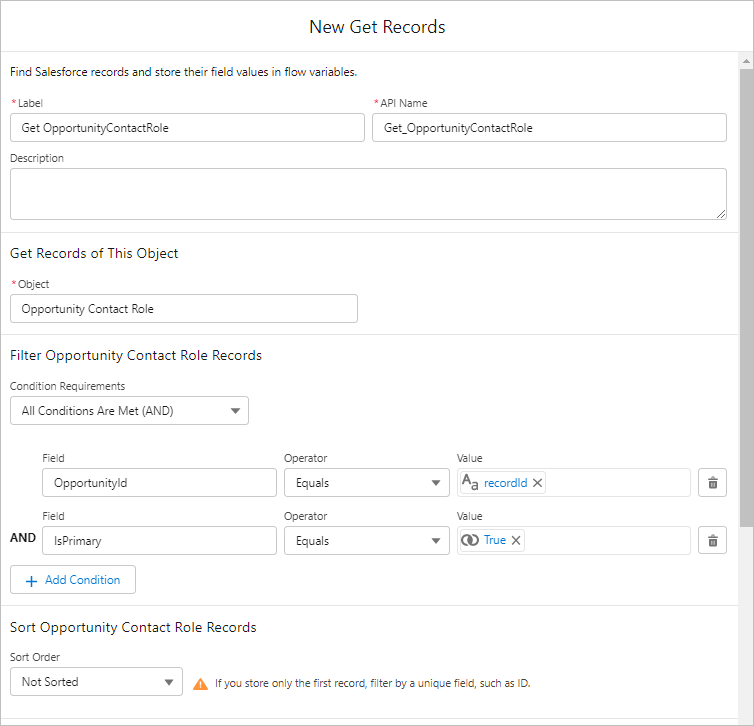
Set the properties.
Label: Get OpportunityContactRole
API Name: Get_OpportunityContactRole
Object: Opportunity Contact Role
Condition Requirements: All Conditions Are Met (AND)
Field: OpportunityId Operator: Equals Value: {!recordId}
Field: IsPrimary Operator: Equals Value: {!$GlobalConstant.True}
Sort Order: Not Sorted
How Many Records to Store: Only the first record
How to Store Record Data: Automatically store all fields
3. Email Send Conditions Decision
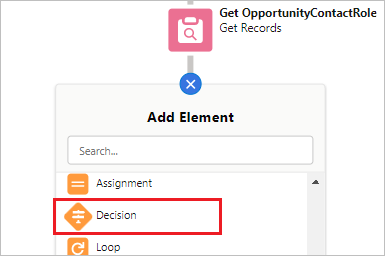
Click the "+" mark under "Get OpportunityContactRole" and select "Decision".
Set the properties.
Label: Email Sending Conditions Decision
API Name: Email_Sending_Conditions_Decision
Label: NG
Outcome API Name: decEmailSendingConditions_NG
Condition Requirements to Execute Outcome: Any Condition Is Met (OR)
Resource: {!Get_Opportunity.Amount} Operator: Less Than or Equal Value: 0
Resource: {!Get_Opportunity.Amount} Operator: Is Null Value: {!$GlobalConstant.True}
Resource: {!Get_Opportunity.InvoiceEmailSendDate__c} Operator: Is Null Value: {!$GlobalConstant.False}
Resource: {!Get_OpportunityContactRole.Contact.Email} Operator: Is Null Value: {!$GlobalConstant.True}
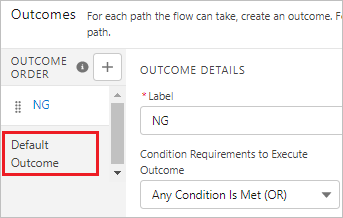
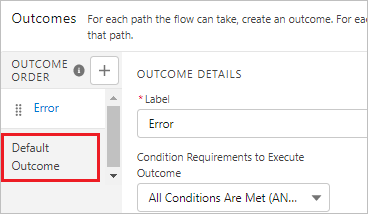
Click "Default Outcome" in the left sidebar.
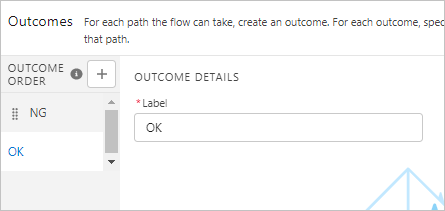
Set the properties.
Label: OK
3e. Error Screen(Email Send Conditions)
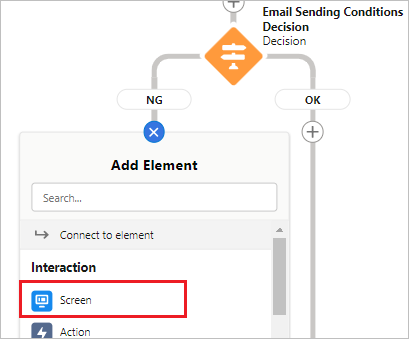
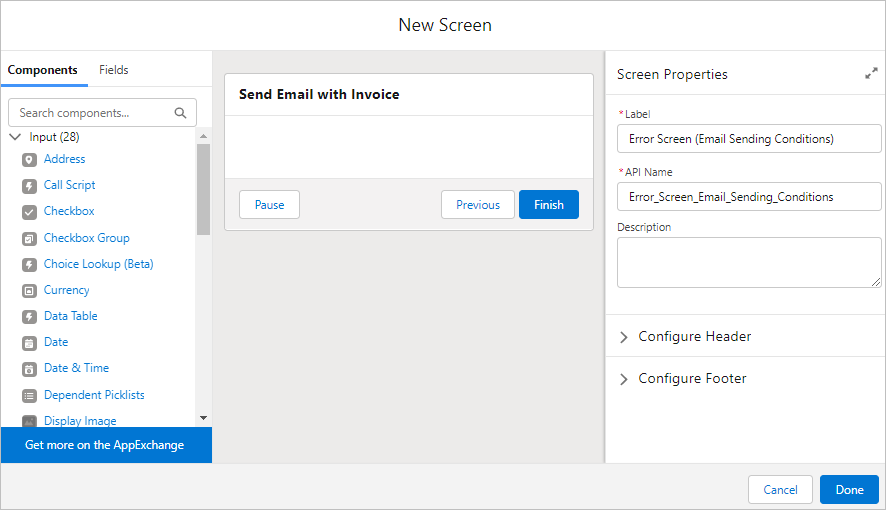
Click the "+" mark under "NG" and select "Screen".
Set the properties.
Label: Error Screen (Email Sending Conditions)
API Name: Error_Screen_Email_Sending_Conditions
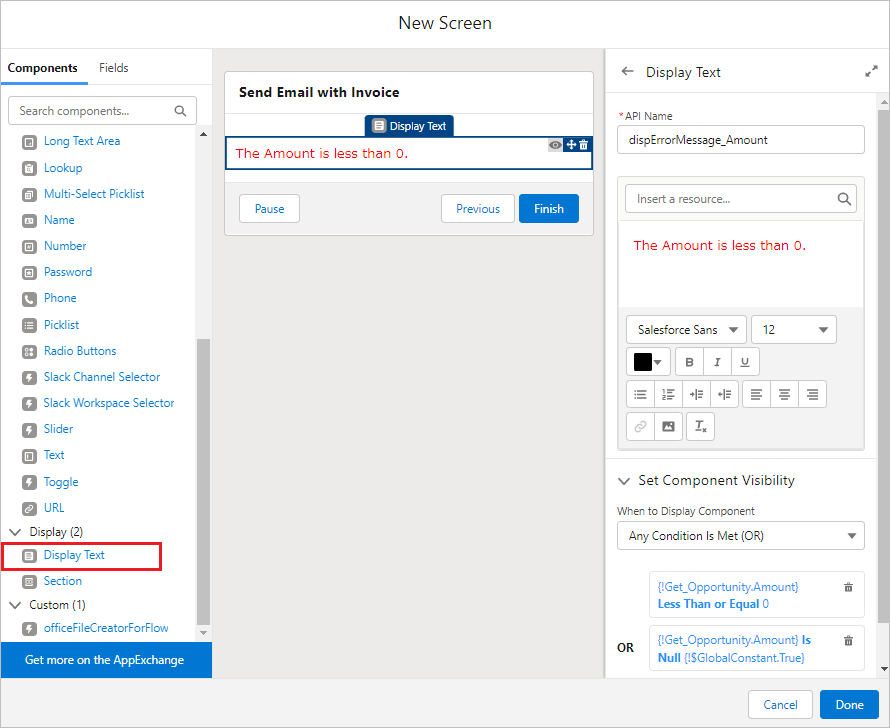
Drag and drop "Display Text" from Components and set the properties.
API Name: dispErrorMessage_Amount
Text: The Amount is less than 0.
When to Display Component: Any Conditions Is Met (OR)
Resource: {!Get_Opportunity.Amount} Operator: Less Than or Equal Value: 0
Resource: {!Get_Opportunity.Amount} Operator: Is Null Value: {!$GlobalConstant.True}
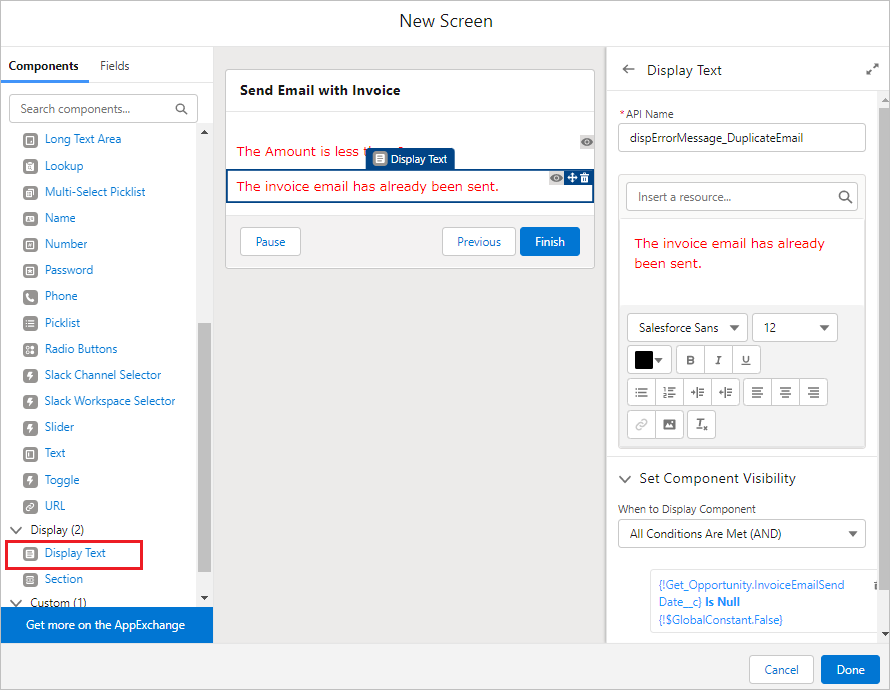
Drag and drop "Display Text" from Components and set the properties.
API Name: dispErrorMessage_DuplicateEmail
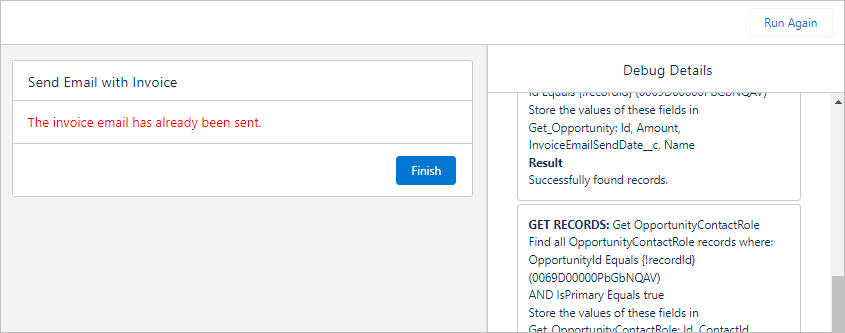
Text: The invoice email has already been sent.
When to Display Component: All Conditions Are Met (AND)
Resource: {!Get_Opportunity.InvoiceEmailSendDate__c} Operator: Is Null Value: {!$GlobalConstant.False}
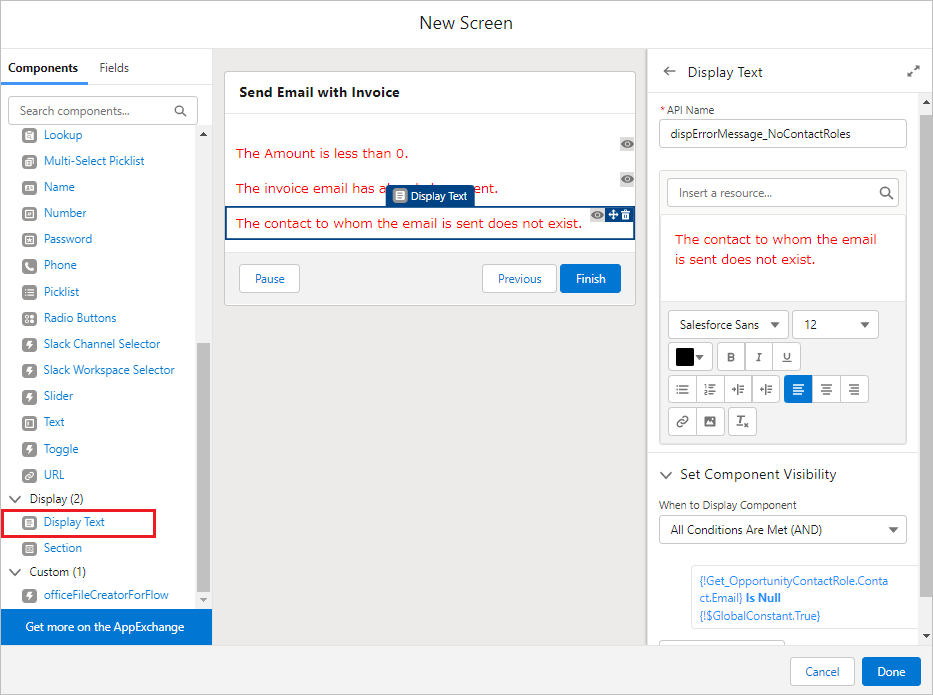
Drag and drop "Display Text" from Components and set the properties.
API Name: dispErrorMessage_NoContactRoles
Text: The contact to whom the email is sent does not exist.
When to Display Component: All Conditions Are Met (AND)
Resource: {!Get_OpportunityContactRole.Contact.Email} Operator: Is Null Value: {!$GlobalConstant.True}
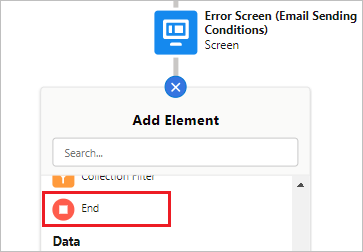
Click the "+" mark under "Error Screen (Email Sending Conditions)" and select "End".
4. Top Screen
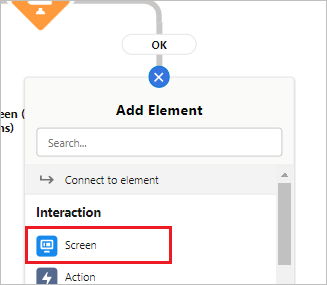
Click the "+" mark under "OK" and select "Screen".
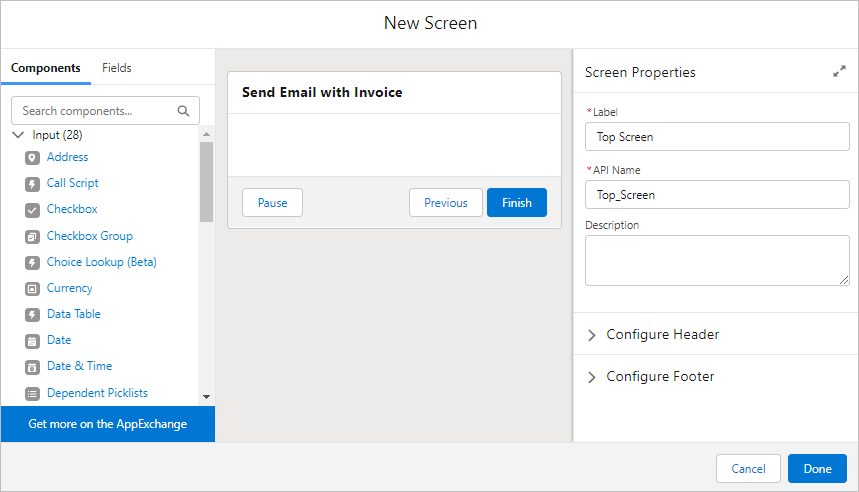
Set the properties.
Label: Top Screen
API Name: Top_Screen
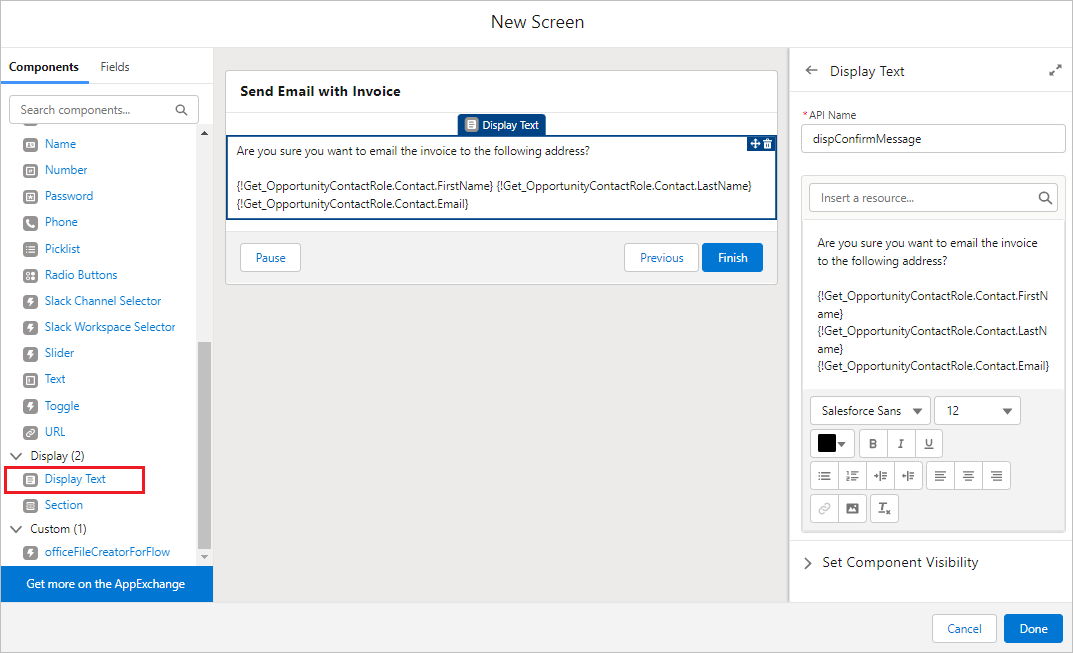
Drag and drop "Display Text" from Components and set the properties.
API Name: dispConfirmMessage
Text:
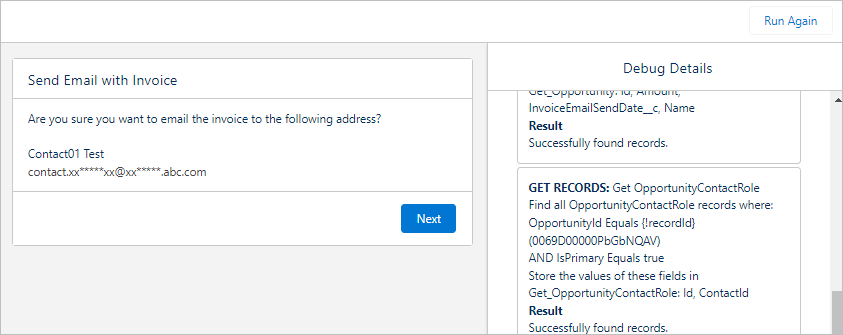
Are you sure you want to email the invoice to the following address?
{!Get_OpportunityContactRole.Contact.FirstName} {!Get_OpportunityContactRole.Contact.LastName}
{!Get_OpportunityContactRole.Contact.Email}
5. OFC File Save
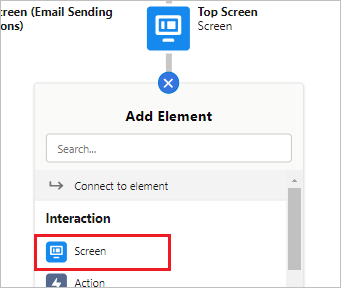
Click the "+" mark under "Top Screen" and select "Screen".
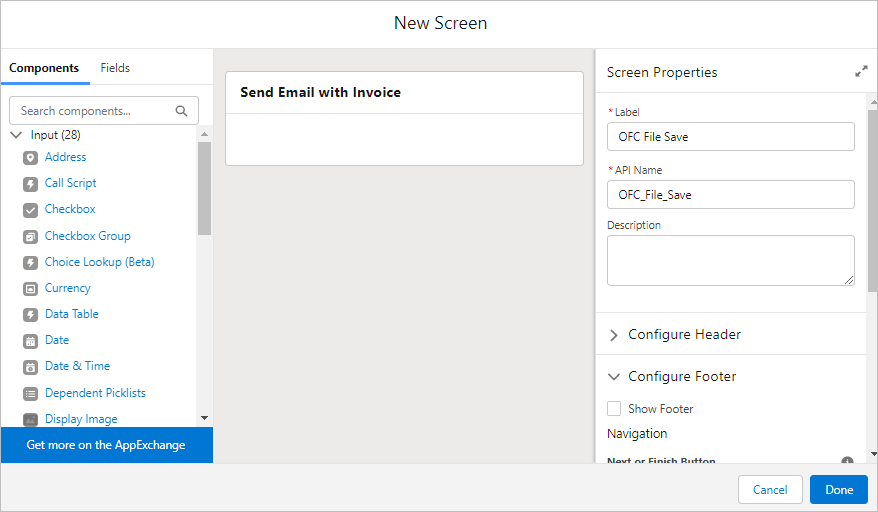
Set the properties.
Label: OFC File Save
API Name: OFC_File_Save
Show Footer: check off
Note: The footer is hidden so that users do not click the "Next" or "Previous" button while officeFileCreatorForFlow is running.
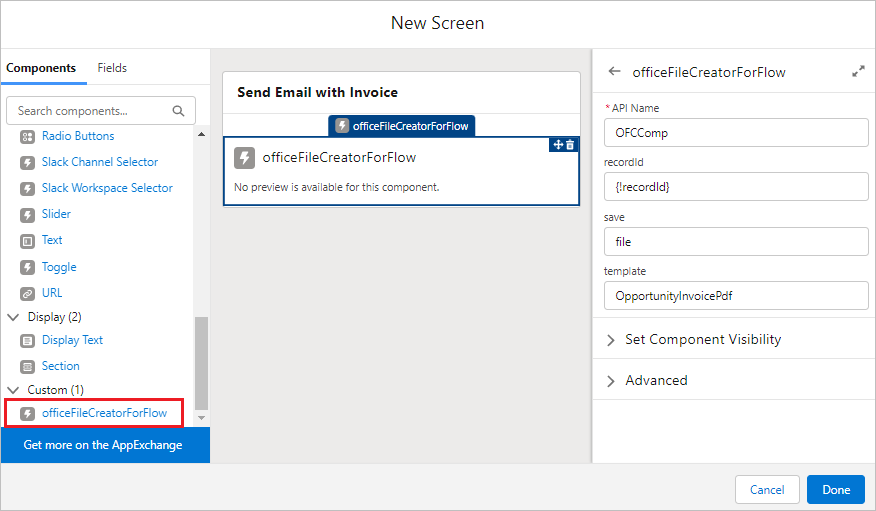
Drag and drop "officeFileCreatorForFlow" from Components and set the properties.
API Name: OFCComp
recordId: {!recordId}
save: file
template: OpportunityInvoicePdf *Enter the Template Api Name of the OFC_Template.
6. OFC Error Decision
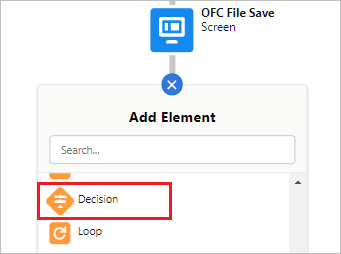
Click the "+" mark under "OFC File Save" and select "Decision".
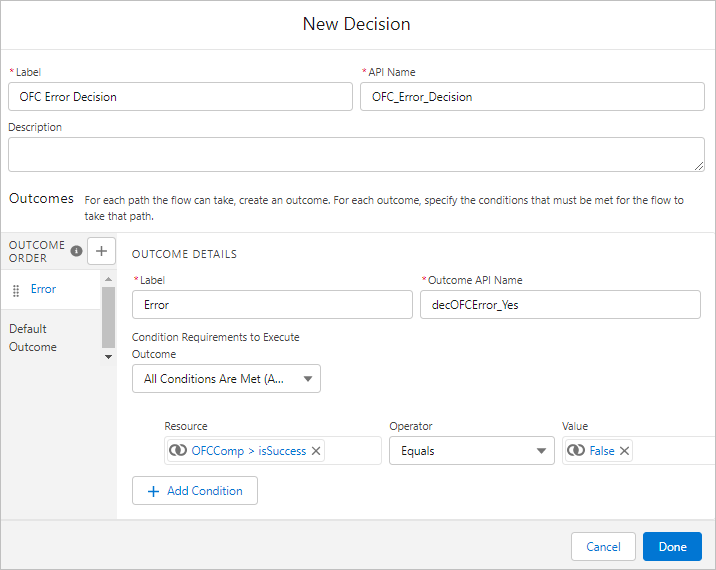
Set the properties.
Label: OFC Error Decision
API Name: OFC_Error_Decision
Label: Error
Outcome API Name: decOFCError_Yes
Condition Requirements to Execute Outcome: All Conditions Are Met (AND)
Resource: {!OFCComp.isSuccess} Operator: Equals Value: {!$GlobalConstant.False}
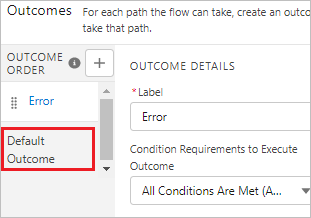
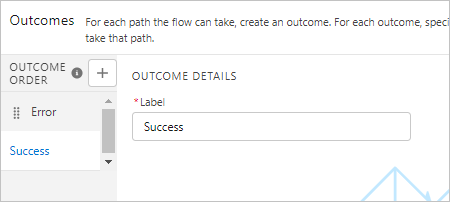
Click "Default Outcome" in the left sidebar.
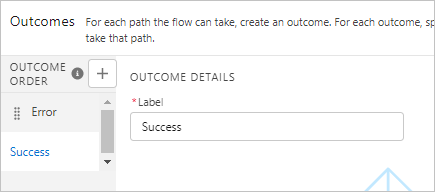
Set the properties.
Label: Success
6e. Error Screen (OFC)
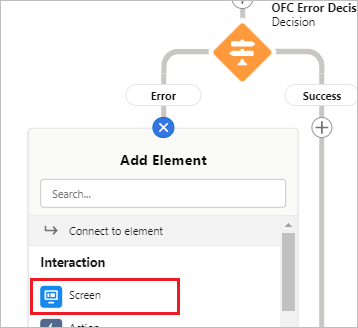
Click the "+" mark under "Error" and select "Screen".
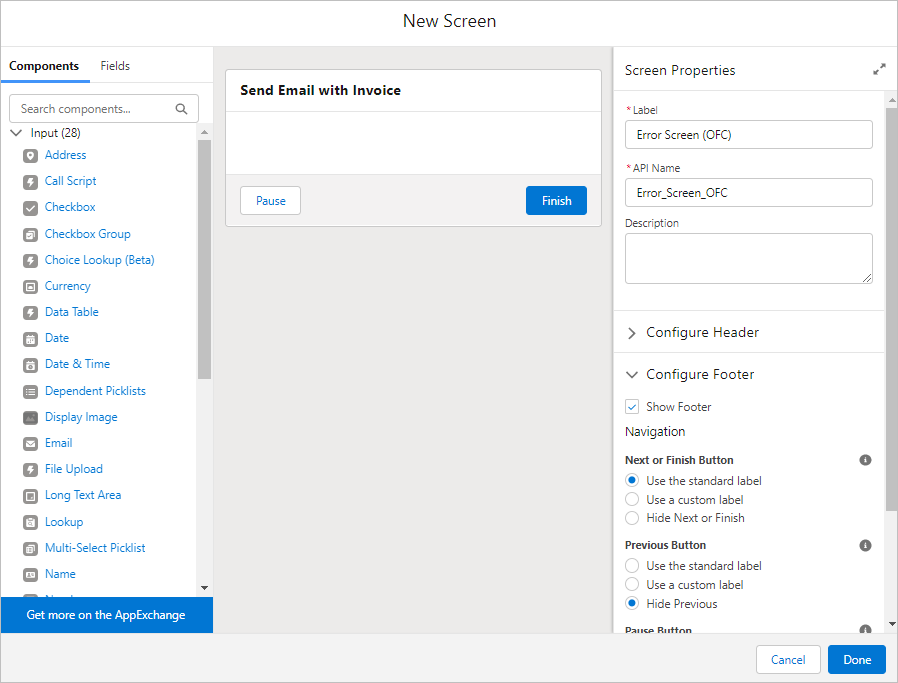
Set the properties.
Label: Error Screen (OFC)
API Name: Error_Screen_OFC
Previous Button: Hide Previous
*To prevent duplicate emails from being sent and duplicate forms from being created in OFC, the Previous Button in the footer will be hidden on all screens from now on.
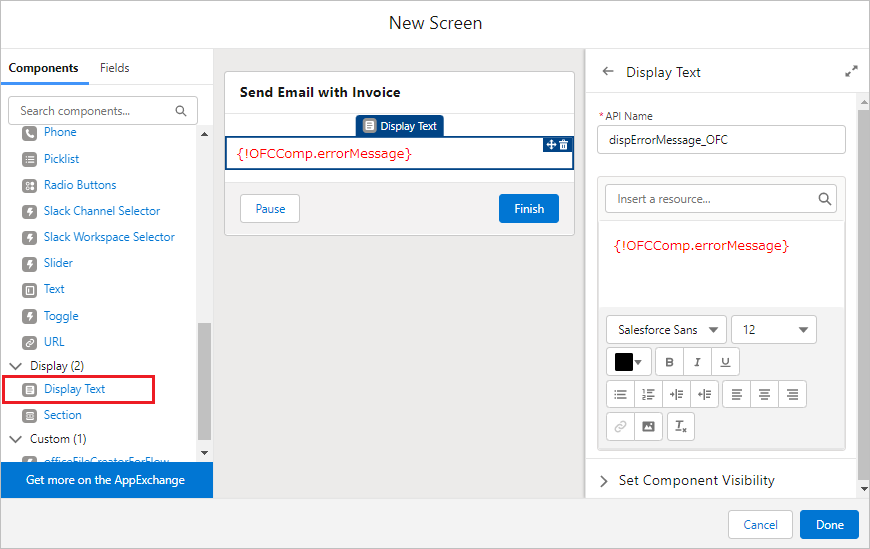
Drag and drop "Display Text" from Components and set the properties.
API Name: dispErrorMessage_OFC
Text: {!OFCComp.errorMessage}
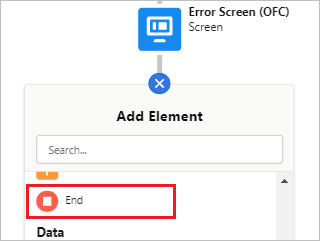
Click the "+" mark under "Error Screen (OFC)" and select "End".
7. Assign Email Parameters
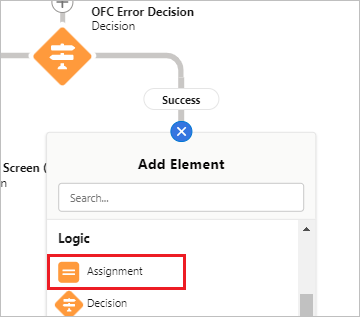
Click the "+" mark under "Success" and select "Assign".
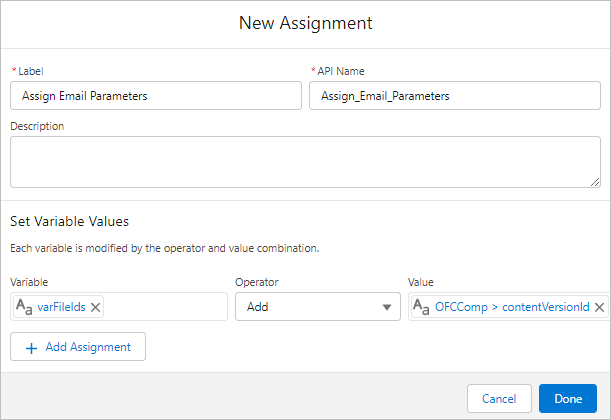
Set the properties.
Label: Assign Email Parameters
API Name: Assign_Email_Parameters
Variable: {!varFileIds} Operator: Add Value: {!OFCComp.contentVersionId}
8. Send Email with Invoice
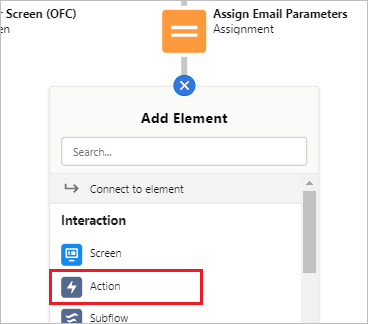
Click the "+" mark under "Assign Email Parameters" and select "Action".
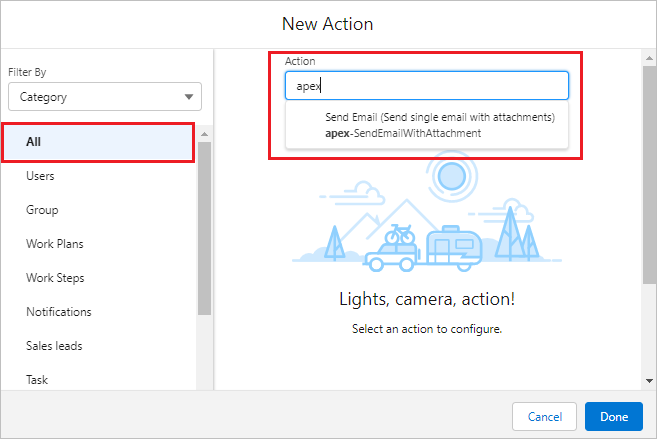
Select "All" for the category, enter "apex" for the action, and select "Send Email (Send single email with attachments)".
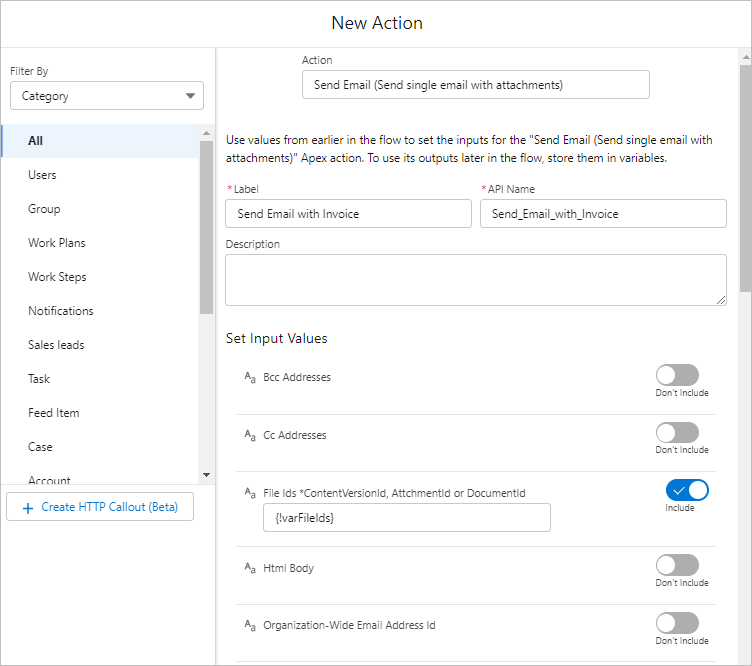
Set the properties.
Label: Send Email with Invoice
API Name: Send_Email_with_Invoice
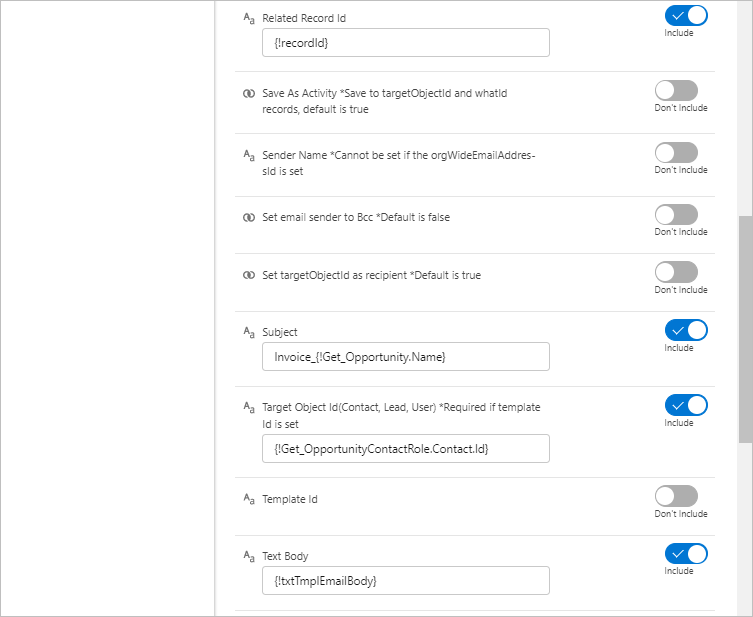
[Input Values]
File Ids *ContentVersionId, AttchmentId or DocumentId: {!varFileIds}
Related Record Id: {!recordId}
Subject: Invoice_{!Get_Opportunity.Name}
Target Object Id(Contact, Lead, User) *Required if template Id is set: {!Get_OpportunityContactRole.Contact.Id}
Text Body: {!txtTmplEmailBody}
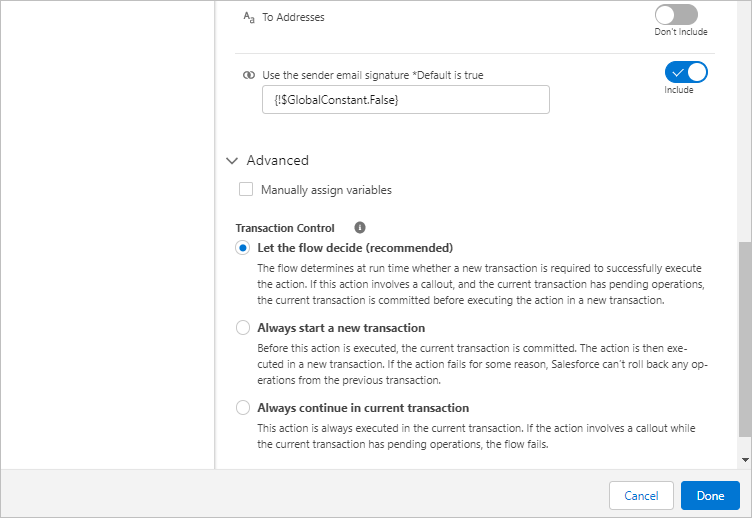
Use the sender email signature *Default is true: {!$GlobalConstant.False}
[Advanced]
Transaction Control: Let the flow decide (recommended)
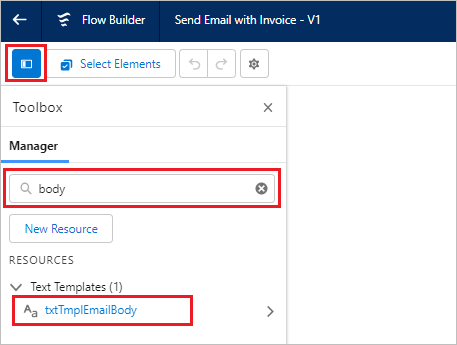
Click the "Toggle Toolbox" button in the upper left corner of the screen, enter "body" in the search box, and select "txtTmplEmailBody".
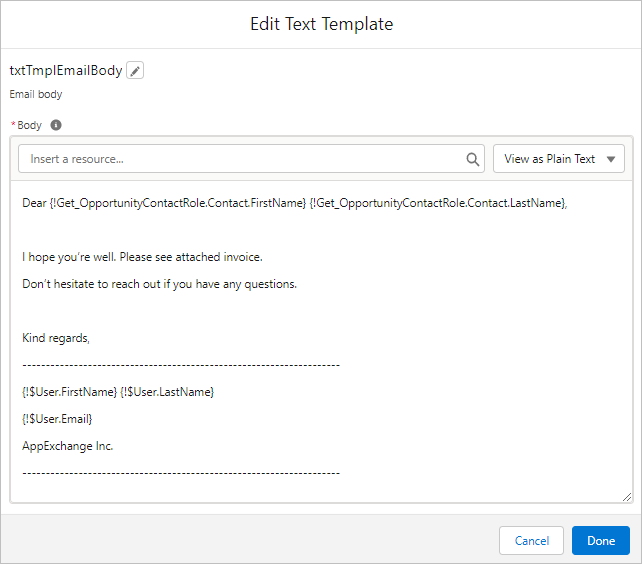
Set the Body.
Body:
Dear {!Get_OpportunityContactRole.Contact.FirstName} {!Get_OpportunityContactRole.Contact.LastName},
I hope you’re well. Please see attached invoice.
Don’t hesitate to reach out if you have any questions.
Kind regards,
--------------------------------------------------------------------
{!$User.FirstName} {!$User.LastName}
{!$User.Email}
AppExchange Inc.
--------------------------------------------------------------------
9. Send Email Error Decision
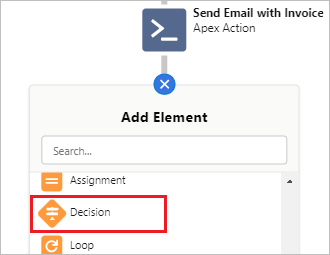
Click the "+" mark under "Send Email with Invoice" and select "Decision".
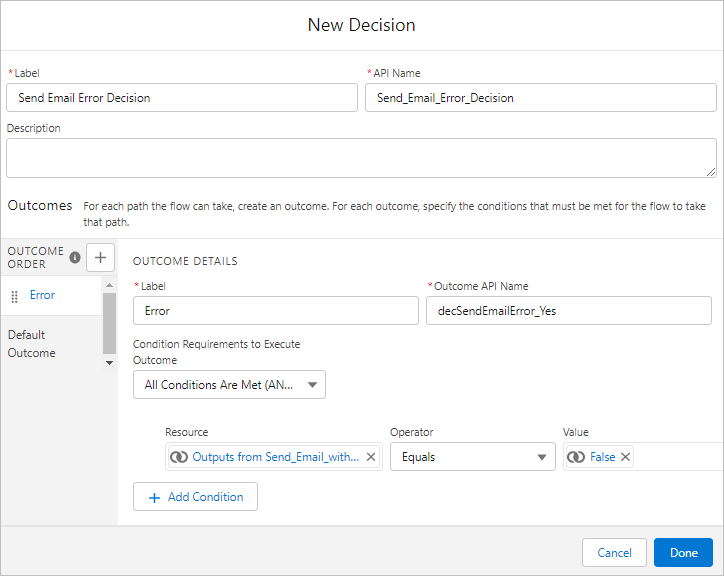
Set the properties.
Label: Send Email Error Decision
API Name: Send_Email_Error_Decision
Label: Error
Outcome API Name: decSendEmailError_Yes
Condition Requirements to Execute Outcome: All Conditions Are Met (AND)
Resource: {!Send_Email_with_Invoice.isSuccess} Operator: Equals Value: {!$GlobalConstant.False}
Click "Default Outcome" in the left sidebar.
Set the properties.
Label: Success
9e. Error Screen (Send Email)
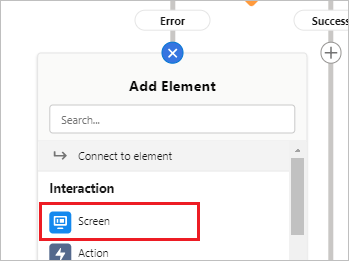
Click the "+" mark under "Error" and select "Screen".
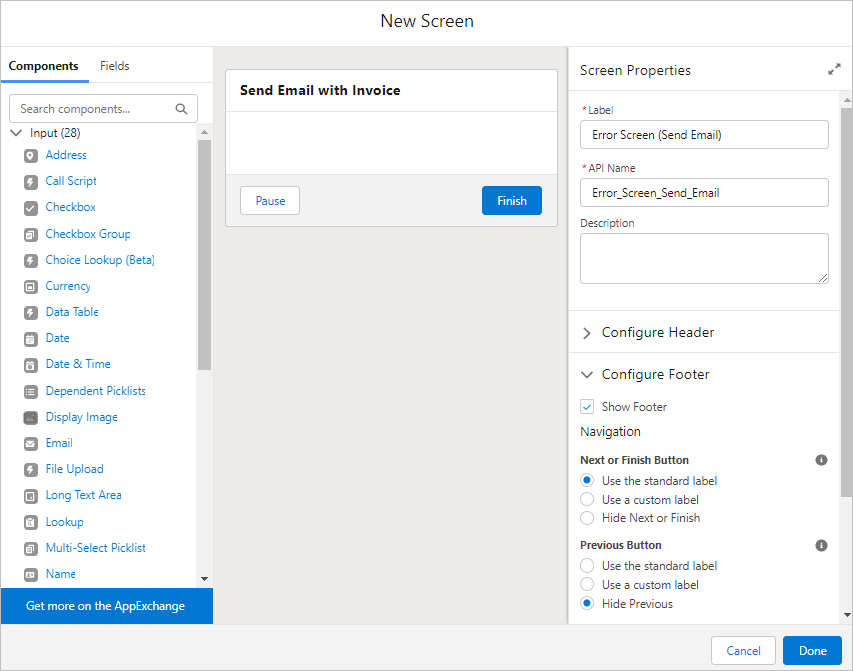
Set the properties.
Label: Error Screen (Send Email)
API Name: Error_Screen_Send_Email
Previous Button: Hide Previous
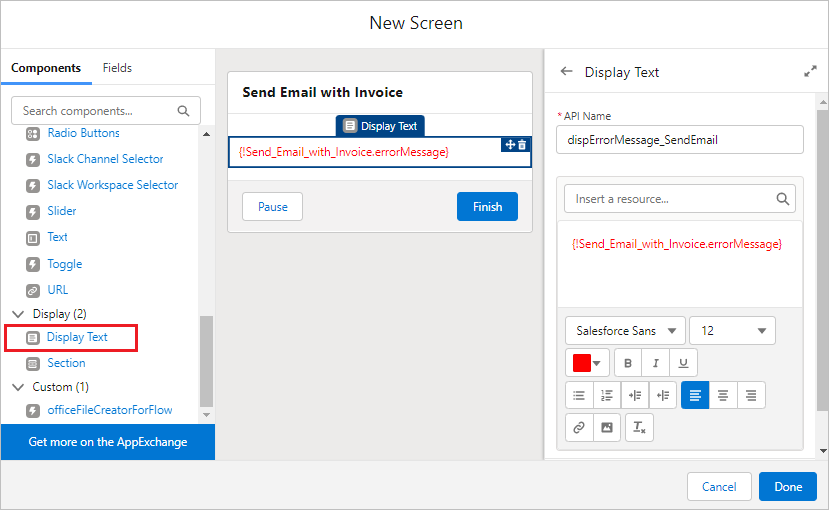
Drag and drop "Display Text" from Components and set the properties.
API Name: dispErrorMessage_SendEmail
Text: {!SendEmailWithAttachment.errorMessage}
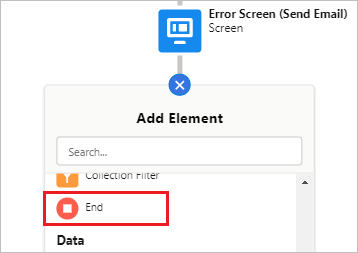
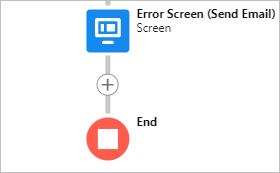
Click the "+" mark under "Error Screen (Send Email)" and select "End".
10. Update Opportunity
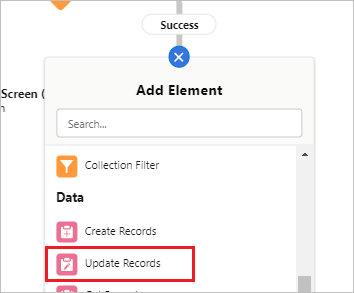
Click the "+" mark under "Success" and select "Update Records".
Set the properties.
Label: Update Opportunity
API Name: Update_Opportunity
How to Find Records to Update and Set Their Values: Specify conditions to identify records, and set fields individually
Object: Opportunity
Condition Requirements to Update Records: All Conditions Are Met (AND)
Field: Id Operator: Equals Value: {!recordId}
------------------------------------------------------------
Field: InvoiceEmailSendDate__c Value: {!$Flow.CurrentDate}
*Create a custom field (date type) for the Invoice Email Send Date (API name: InvoiceEmailDate__c) in the Opportunity.
10e. Error Screen (Update Opportunity)
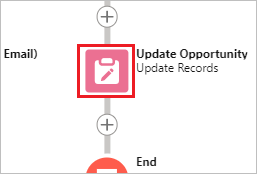
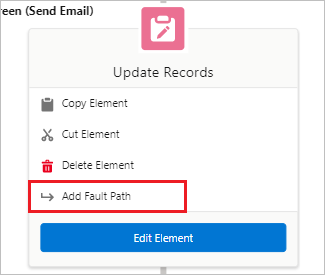
Click "Update Opportunity".
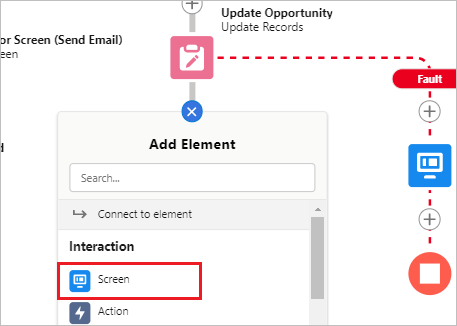
Click "Add Fault Path".
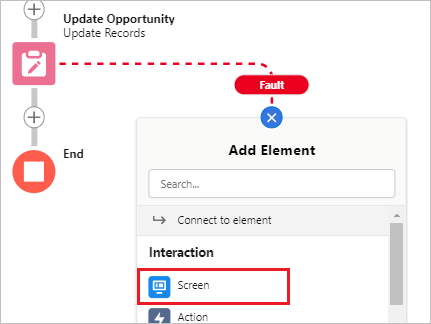
Click "+" mark under "Fault" and select "Screen".
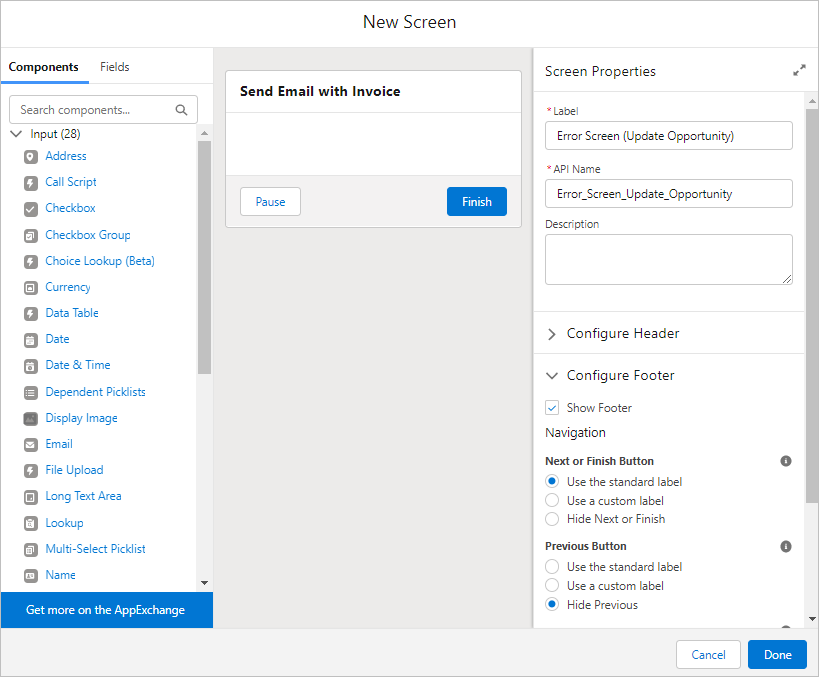
Set the properties.
Label: Error Screen (Update Opportunity)
API Name: Error_Screen_Update_Opportunity
Previous Button: Hide Previous
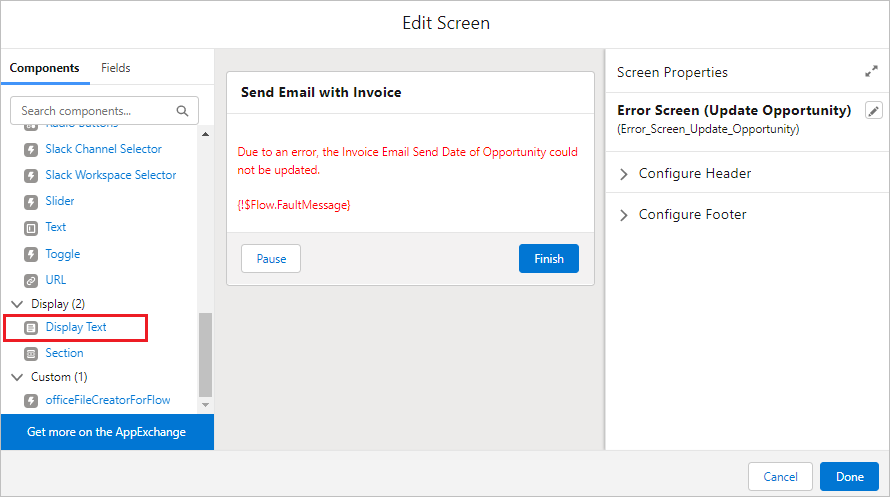
Drag and drop "Display Text" from Components and set the properties.
API Name: dispErrorMessage_UpdateOpportunity
Text:
Due to an error, the Invoice Email Send Date of Opportunity could not be updated.
{!$Flow.FaultMessage}
11.Completion Screen
Click the "+" mark under "Update Opportunity" and select "Screen".
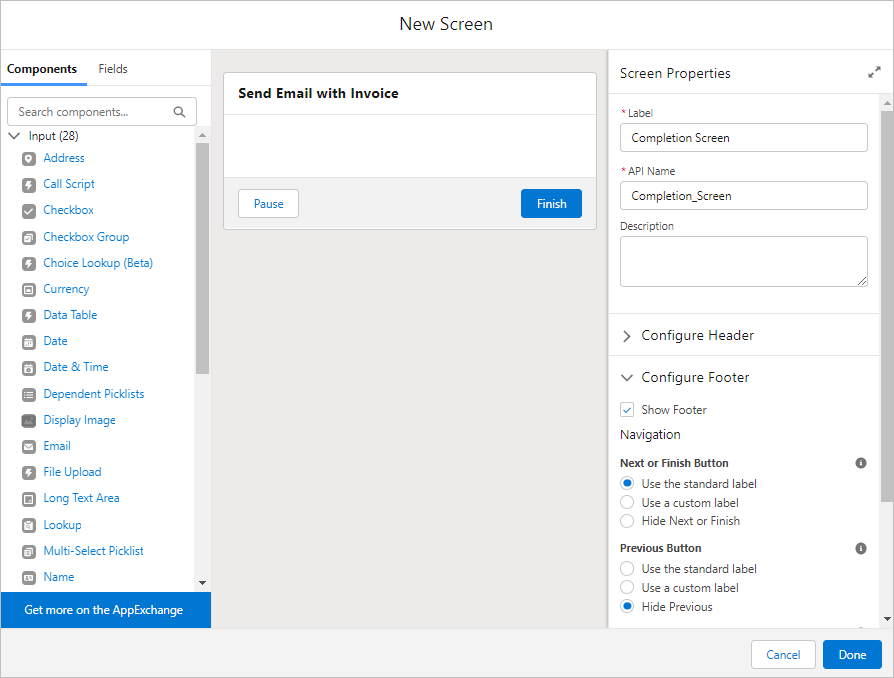
Set the properties.
Label: Completion Screen
API Name: Completion_Screen
Previous Button: Hide Previous
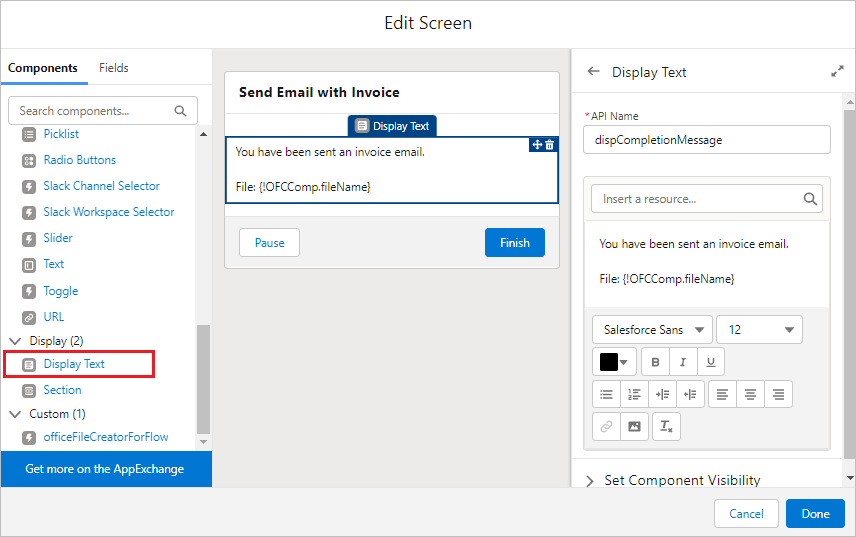
Drag and drop "Display Text" from Components and set the properties.
API Name: dispCompletionMessage
Text:
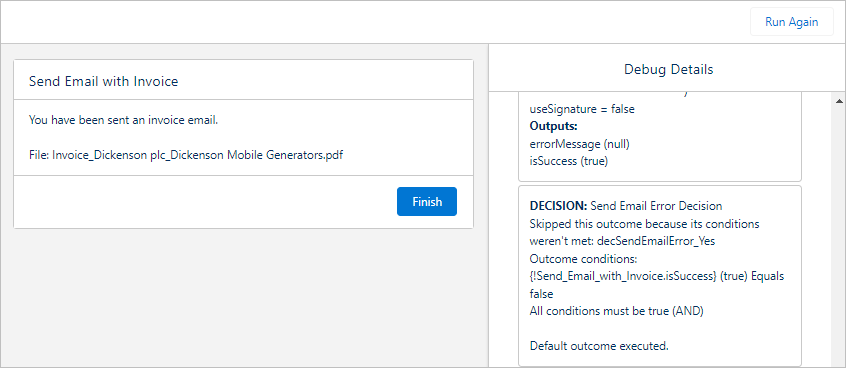
You have been sent an invoice email.
File: {!OFCComp.fileName}
The flow is complete. Good job.
Click the "Save" button.
Debug the Flow
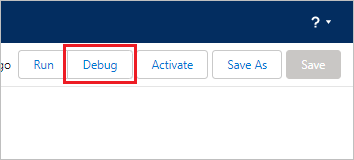
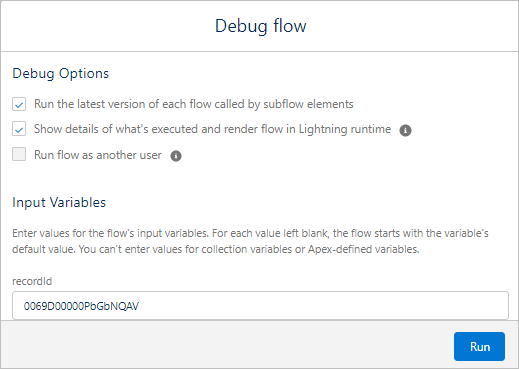
Click the "Debug" button.
Enter the Opportunity record Id and click the "Run" button.
The debug screen will be displayed. Click the "Next" button.
Running the flow will ensure that the invoice file is saved, the attached email is sent, and the Invoice Email Send Date is updated in Opportunity.
If you click the "Run again" button, an error message will appear. To re-run, set the Invoice Email Send Date in Opportunity blank.
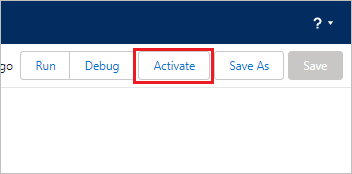
After the test is complete, click the "Activate" button on the flow and close the flow screen.
Create Custom Button
Create a custom button for outputting files to be placed on the record screen.
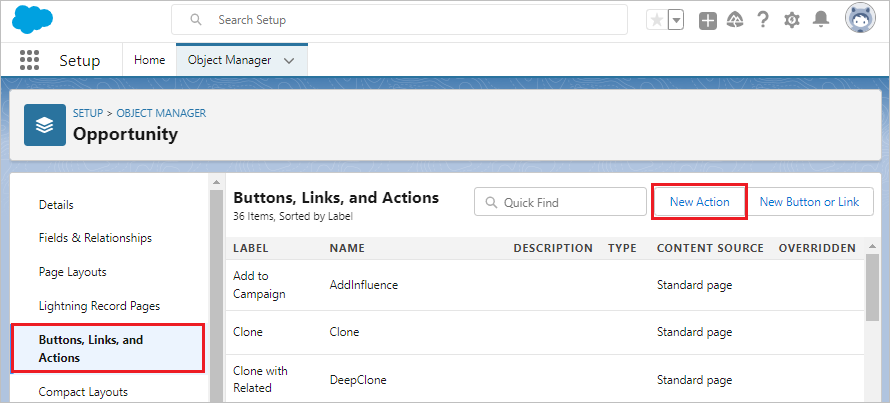
Open the target object from the Object Manager in Settings. Click "Buttons, Links, and Actions" in the left sidebar, then click the "New Action" button.
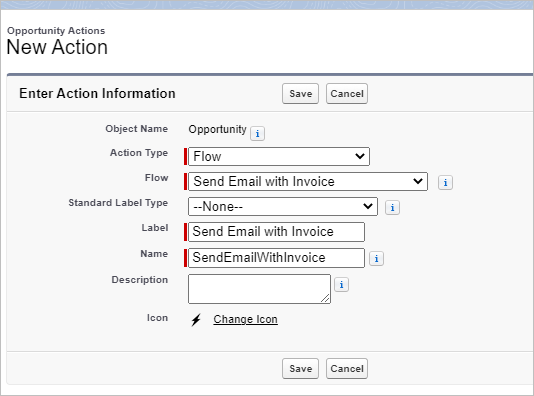
Set the Action Information. After setting, click the "Save" button.
Action Type: Flow
Flow: SendEmailWithInvoice
Label: Send Email with Invoice
Name: SendEmailWithInvoice
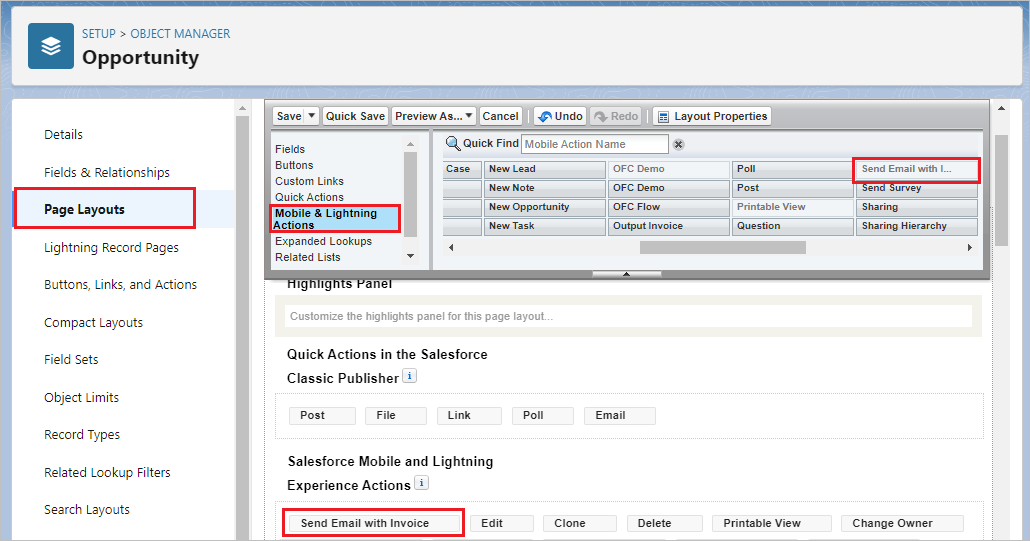
Click "Page Layout" on the left sidebar, place the Output Invoice button, and click the "Save" button.
Run Flow
By click the "Send Email with Invoice" button on the record page, the file is saved and the execution date is set to the Invoice Email Send Date. An email with an invoice is sent to the contact.
