This article shows how to check the monthly number of files output of Office File Creator by the Field History Report. Office File Creator can be used in a screen flow. Combined with the flow, it is possible to update records at the time of file output and save the field history.
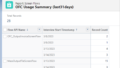
Report Sample
You can view output by month, by day, when and by whom. Up to 18 months in the past can be displayed.
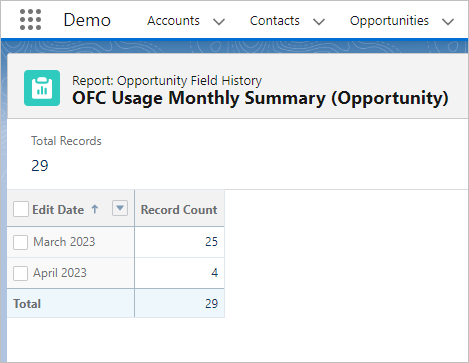
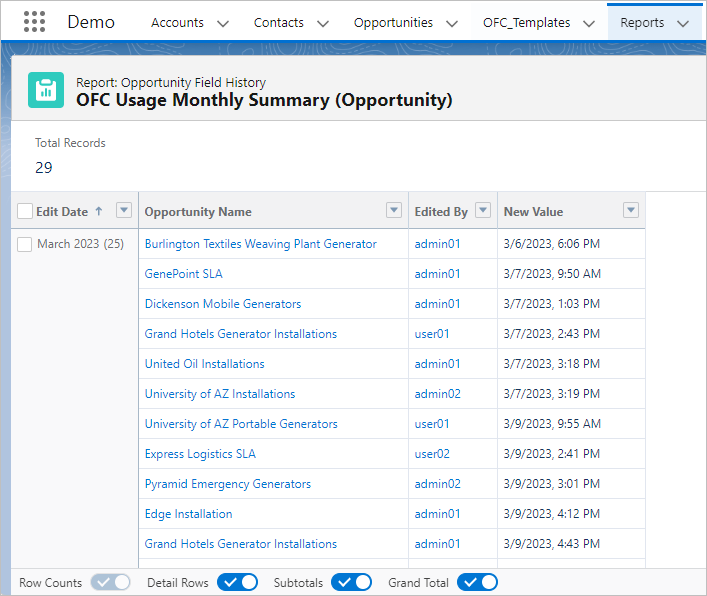
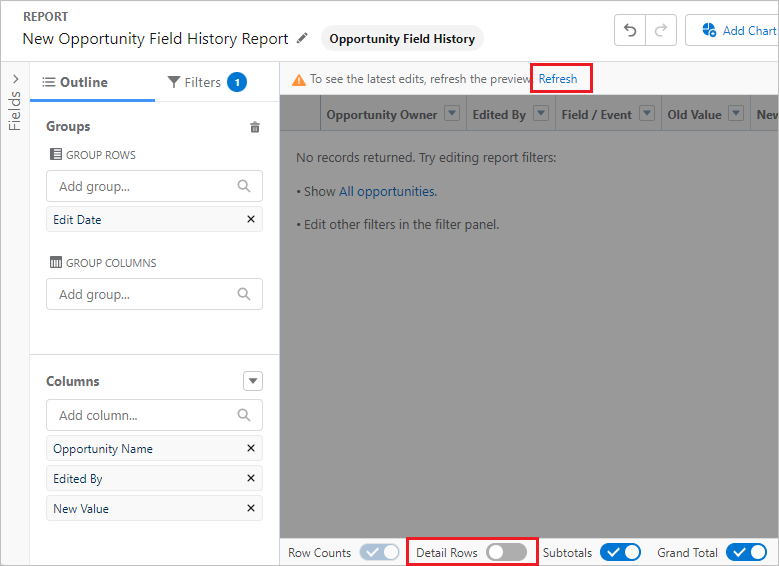
The editor and the date and time of the edit are displayed by turning on the "Detail Rows" at the bottom of the screen.
Overview
Create the field for the Field History
Create the date/time field "OFC file output date/time" in the target object and check on the "Track old and new values" in the File History.
Create the Summary Report of the Field History
Create the OFC file output monthly summary report.
Create the Flow
Call the OFC component in the screen flow and output the file. After outputting the file, set the current date and time to the "OFCFileOutputDateTime__c" field you created, and update the record.
Please refer to the following article for flow creation procedures.
Output files and update Opportunity records in Salesforce Flow – Office File Creator Advanced –
Considerations
- The maximum amount of item history data that can be viewed in the report is the last 18 months.
- Salesforce starts tracking field history from the date and time that you enable it on a field. Changes made before this date and time aren’t included.
- Field history tracking data doesn’t count against your data storage limits.
For more information, see the below.
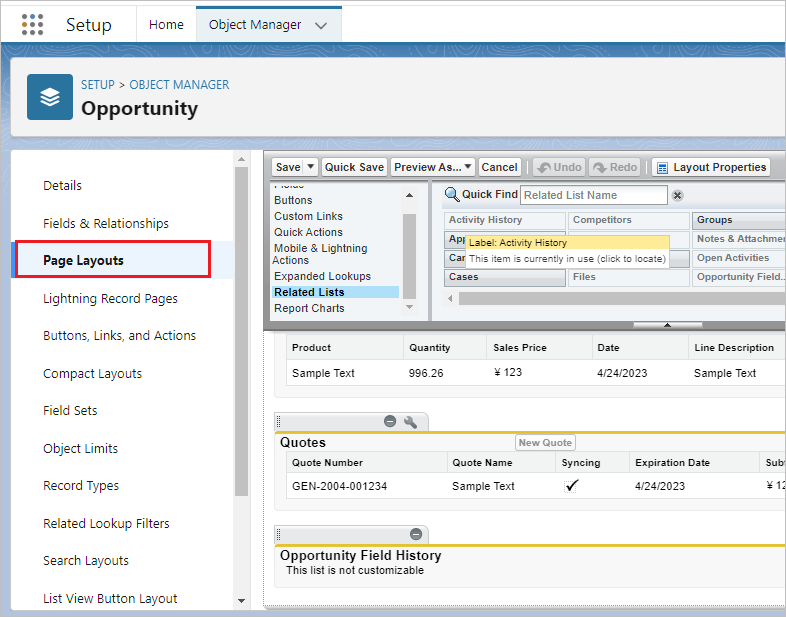
Create the field for the Field History
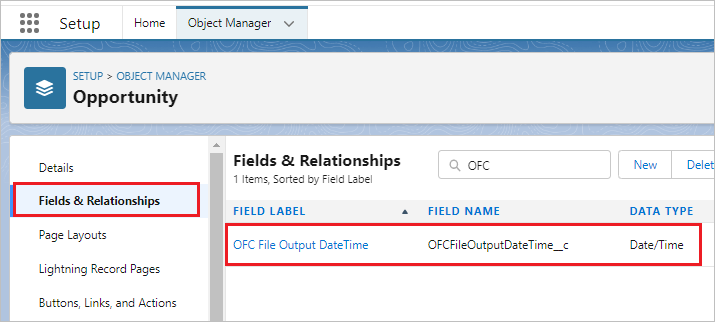
In this procedure, the Opportunity object is used as an example. From Object Manager > Opportunity, create a field in the Opportunity by clickiking the "New" button from the "Fields & Relationships".
Field Label: OFC File Output DateTime
Field API Name: OFCFileOutputDateTime__c
Data Type: Date/Time
Click the "Set History Tracking" button in the "Fields & Relationships".
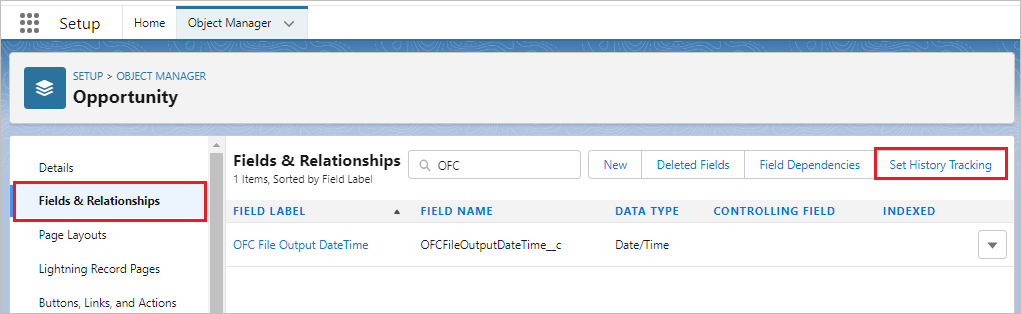
Check on "Enable Opportunity Field History" and "OFC file output date and time". Click the "Save" button. 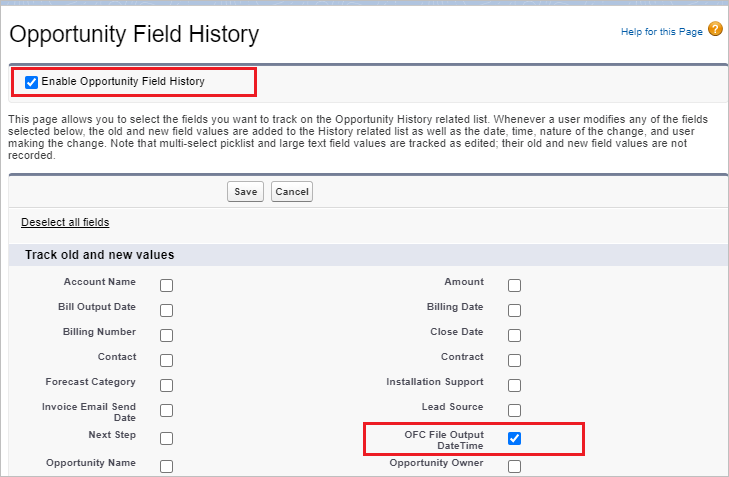
For a Custom object
Select "Details" of the target custom object and click the "Edit" button.
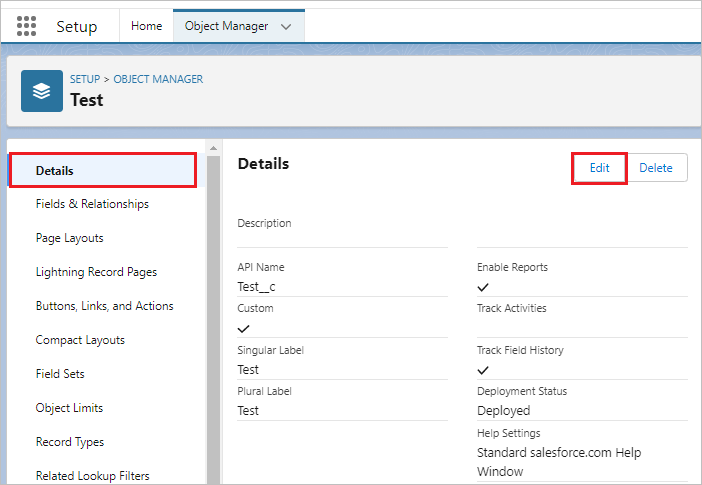
For a Custom object
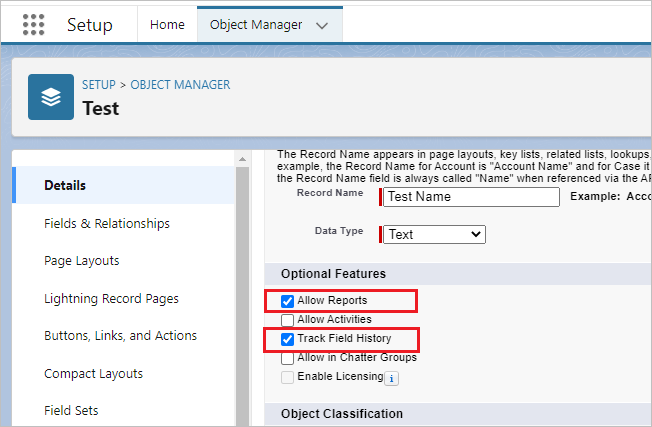
Check on "Allow Reports" and "Track Field History " in the "Optional Features" section and save.
To display " OFC File Output DateTime" and the related list of Field History on the page layout, select "Page Layouts" and place it on the target page layout.
This procedure is not necessary if you want to check the history only in the report.
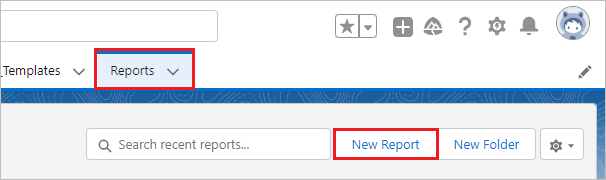
Create the Summary Report of the Field History
Click the Reports tab and click the "New Report" button.
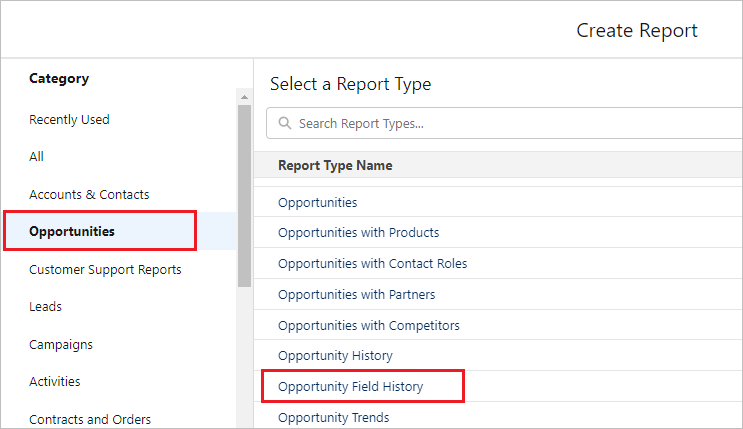
Select the category "Opportunity" and click "Opportunity Field History". For objects other than Opportunity, select the category "All", enter the object name in the search box, and click on "xxx history".
e.g.; If the object name is "Test", the report type name is "Test History".
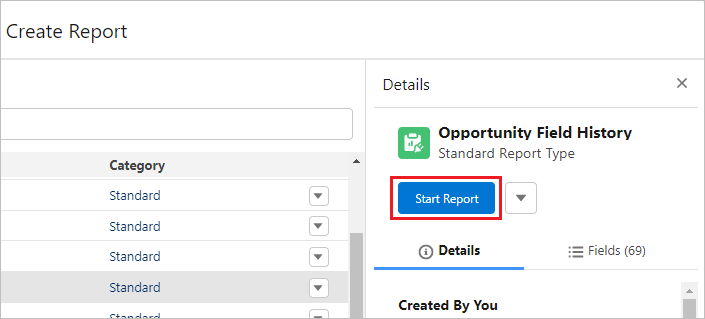
Click the "Start Report" button.
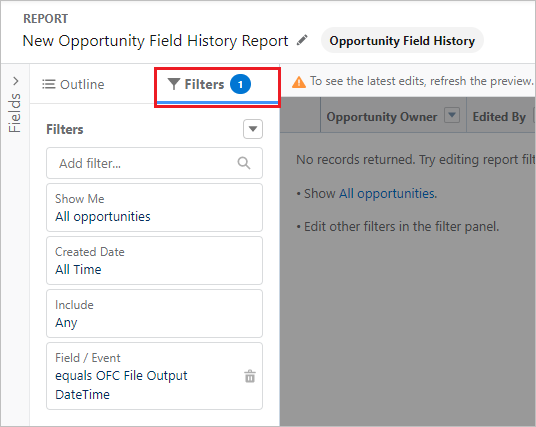
Select "Filters". Set the desired criteria for "Show Me", "Date", and "Include".
From "Add filter", select "Field / Event" and set the filter.
Operator: equals
Value: OFC File Output DateTime *Name of the label for the field you created
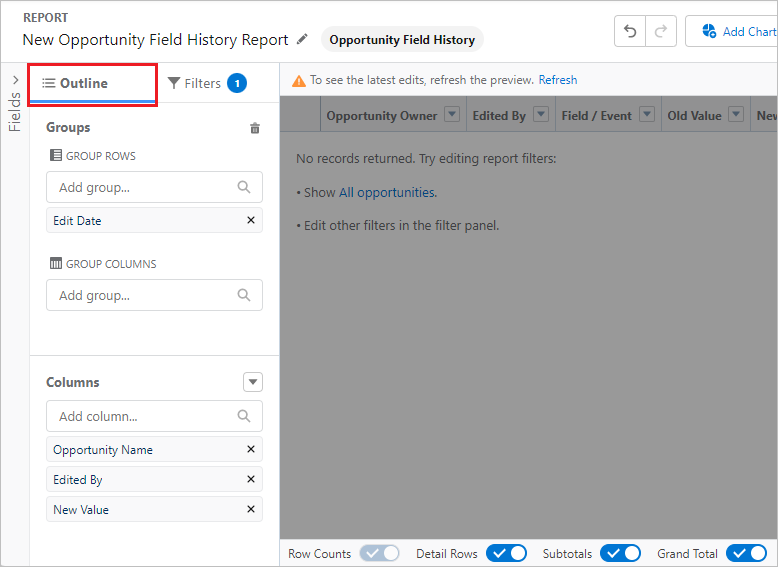
Select "Outline" and set the following.
GROUP ROWS
Edit Date
Columns
Opportunity Name
Edited By
New Value
Turn off the "Detail Rows" at the bottom of the screen and click "Refresh".
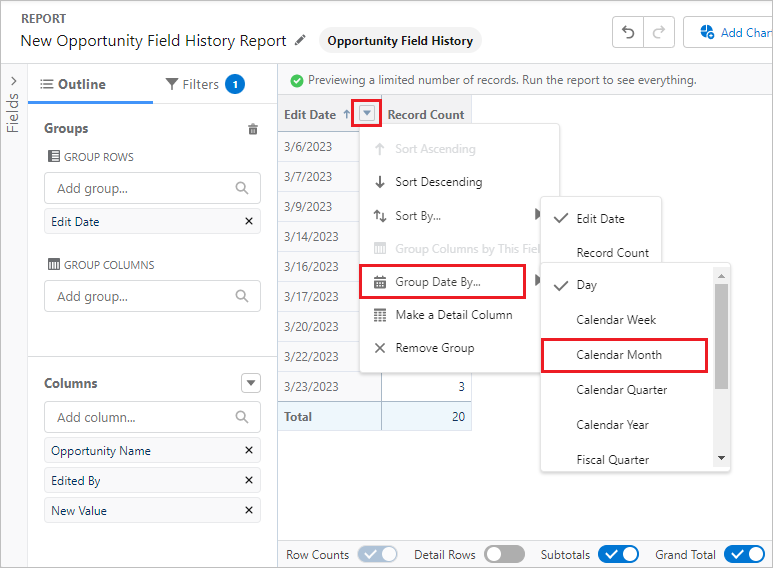
Click the "▼" mark under "Edit Date" in the preview and select Group Date By > Calendar Month.
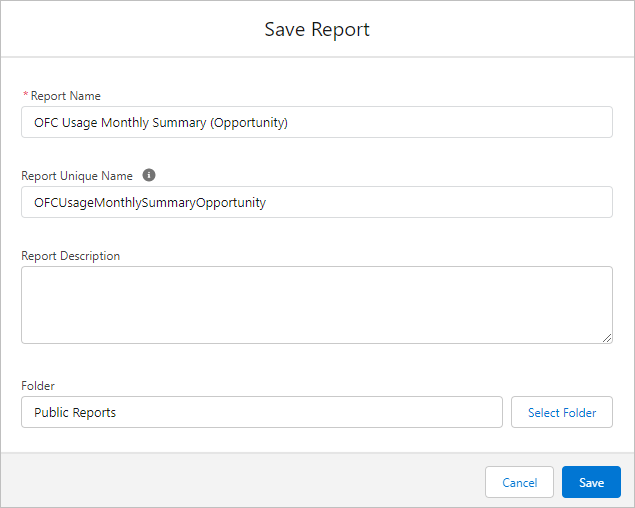
Save the report under any name. In this example, I will save the report as follows.
Report Name: OFC Usage Monthly Summary (Opportunity)
Report Unique Name: OFCUsageMonthlySummaryOpportunity
Run the report, the report shows the number of outputs per month.
*The history is saved after the field history is turned on, so data will not be displayed immediately after the field history is turned on.
The editor and the date and time of the edit are displayed by turning on the "Detail Rows" at the bottom of the screen.