This article will show you how to output files using Office File Creator and update Opportunity records in Salesforce Flow. Office File Creator can be integrated into the Screen Flow.
*This procedure is for Office File Creator Ver.2. If you are using Ver.1, please refer to Output files and update Opportunity records in Salesforce Flow (for OFC Ver.1) – Office File Creator Advanced –.
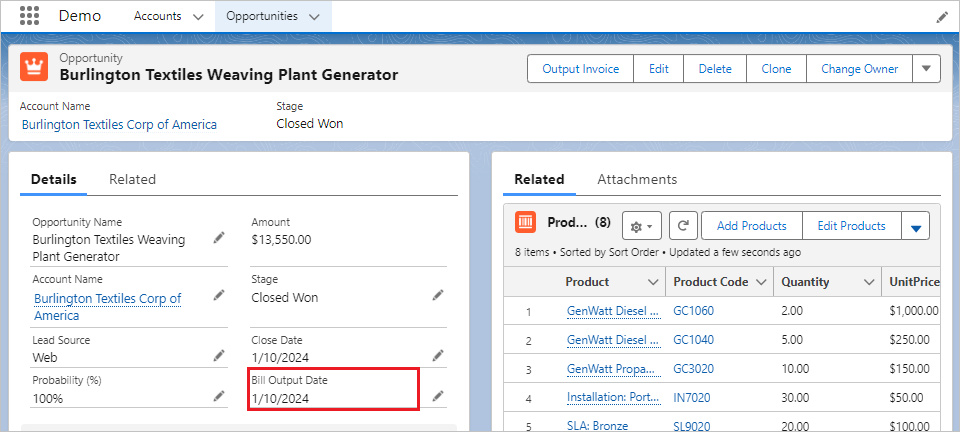
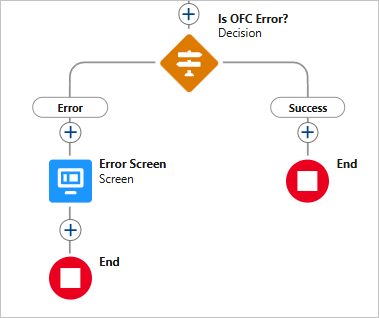
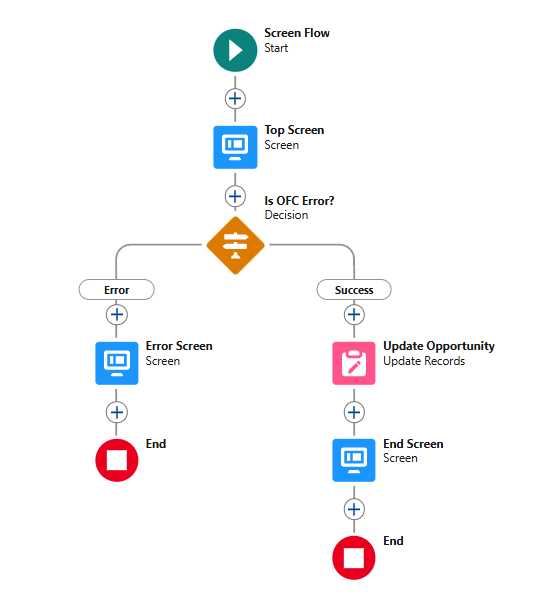
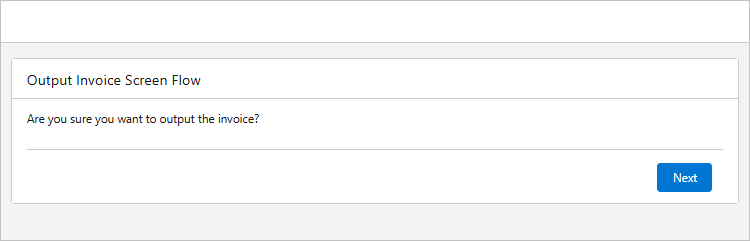
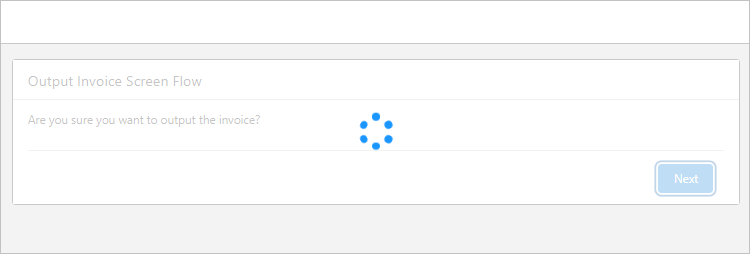
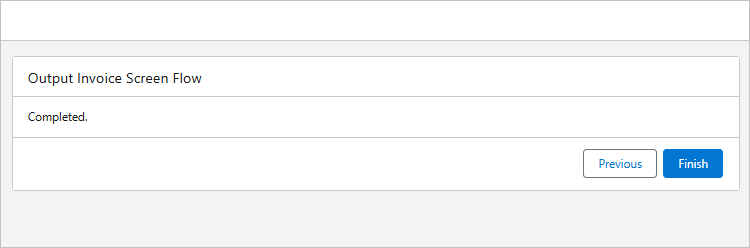
Completed Flow
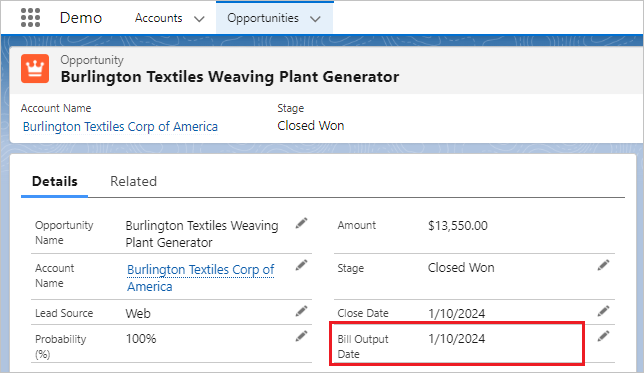
By clicking on the "Output Invoice" button, a pop-up window will appear, and when the flow is executed, output files and update the field "Bill Output Date".
Demo
Key Points for Flow Creation
- The parameter that receives the record Id from the records screen in the flow is "recordId". Create a text type variable "recordId" in the flow. No other variable name can receive the record Id.
- To output a file in Office File Creator, place the ofcForFlowScreen component in the screen flow. It returns the result of creating the files (success or failure) and returns an error message in case of failure.
- For details on the parameters and return values of the ofcForFlowScreen component, refer to Use with Screen Flow in the Instruction manual.
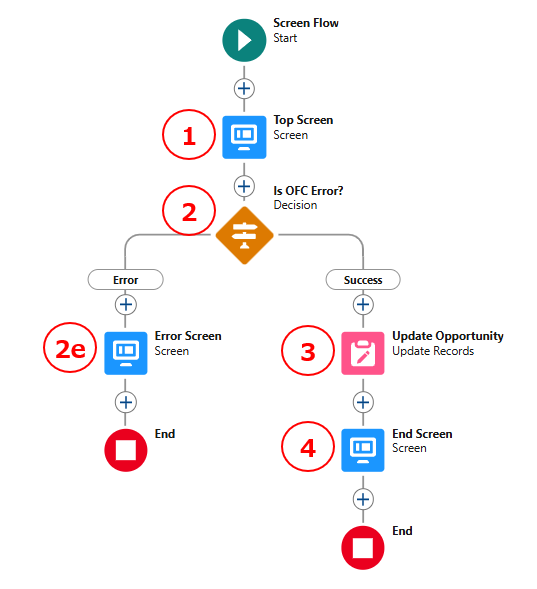
1. Top Screen
Display the confirmation message.
Place ofcForFlowScreen component in the screen flow and output the file.
2. OFC Is Error?
Judge the success or error of the output result. In case of success, go to process 3. In case of error, go to process 2e.
2e. Error Screen
Displays an error message and end the flow.
3. Update Opportunity
Update the Bill Output Date of the Opportunity.
4. End Screen
Display the completion message.
Create the Flow
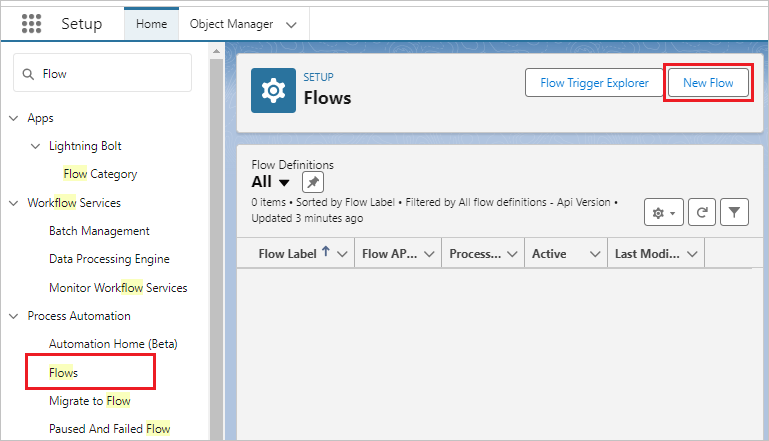
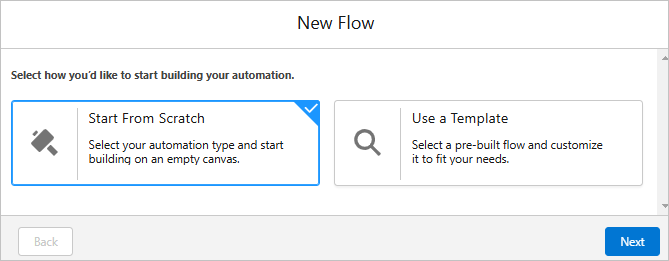
Let's create the flow. Open Flows from Setup and click the "New Flow" button.
Select "Start From Scratch" and click the "Next" button.
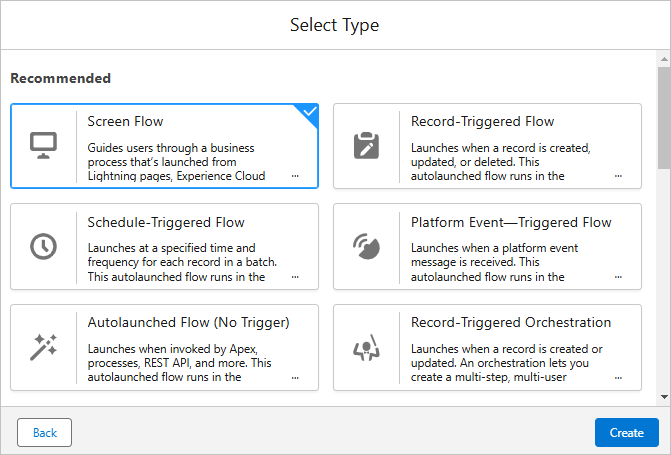
Select "Screen Flow" and click the "Create" button.
Create recordId Variable
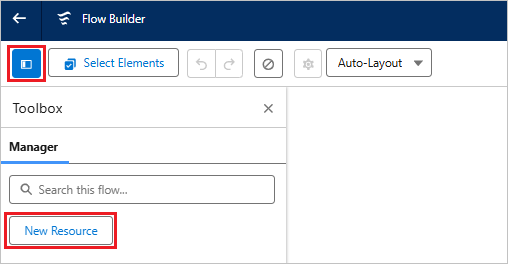
Click the "Toggle Toolbox" button in the upper left corner of the screen, then click the "New Resource" button.
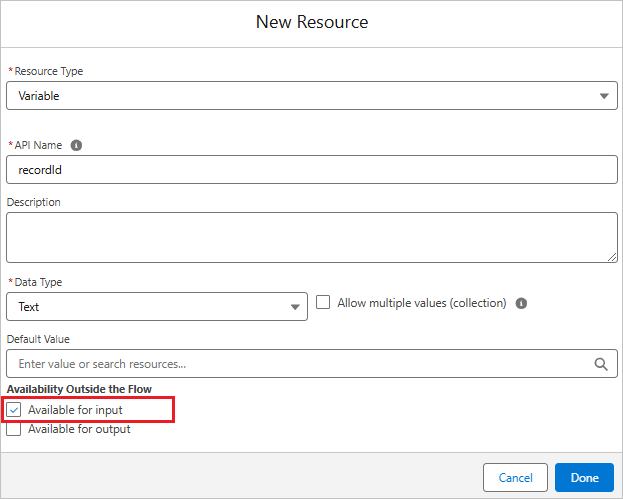
Create the Record Id variable. After setting, click the "Done" button.
Resource Type: Variable
API Name: recordId
Data Type: Text
Available for input: check on
Note: recordId is a variable that receives the record Id from the record screen. Be sure to use "recordId" (only "I" is capitalized). Other variable names cannot receive the record Id.
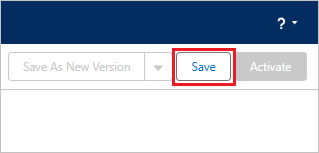
First, save the flow. Click the "Save" button. Save your edits as needed.
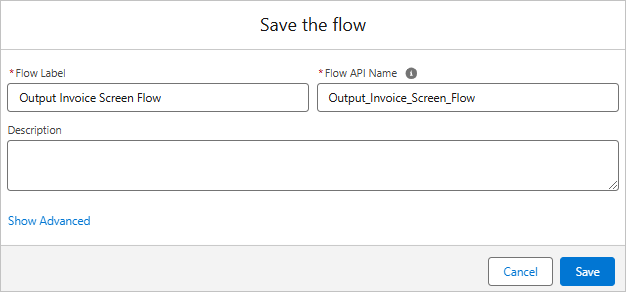
Save the Flow under any name. Here it is saved as follows.
Flow Label: Output Invoice Screen Flow
Flow API Name: Output_Invoice_Screen_Flow
1. Top Screen
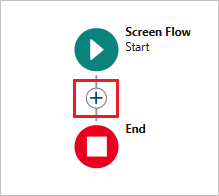
Click the "+" mark under Screen Flow.
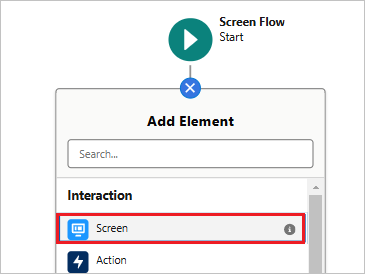
Select "Screen".
Set the properties.
Label: Top Screen
API Name: Top_Screen
Show Footer: check off

Click "Display Text" in the left component and set the properties.
API Name: DispConfirmMsg
Text: Are you sure you want to output the invoice?

Click "ofcForFlowScreen" in the left component and set the properties.
API Name: OFC
recordId: {!recordId}
save: Empty *To save the file, enter "file" or "att".
template: OpportunityInvoice *Enter the Template API Name of the OFC_Template record.
Note: Select the variable {!recordId} from the candidate resources. In the same manner thereafter, settings of the form {!xxx} will be selected from the resources.

2. Is OFCError?
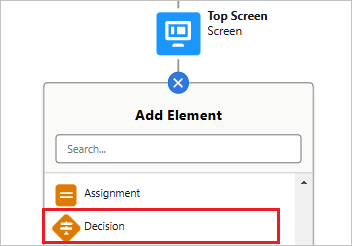
Click the "+" mark under "Top Screen" and select "Decision".
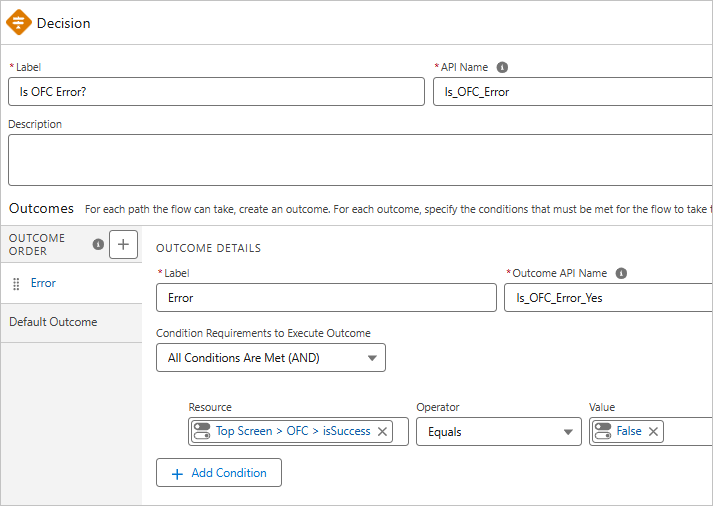
Sets the properties.
Label: Is OFC Error?
API Name: Is_OFC_Error
Label: Error
Outcome API Name: Is_OFC_Error_Yes
Condition Requirements to Execute Outcome: All Conditions Are Met (AND)
Recourse: {!OFC.isSuccess} Operator: Equals Value: {!$GlobalConstant.False}
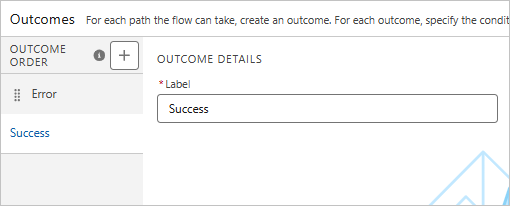
Click "Default Outcome" in the left sidebar.
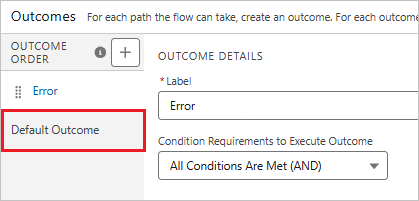
Set the properties.
Label: Success
2e. Error Screen
Click the "+" mark under "Error" and select "Screen".
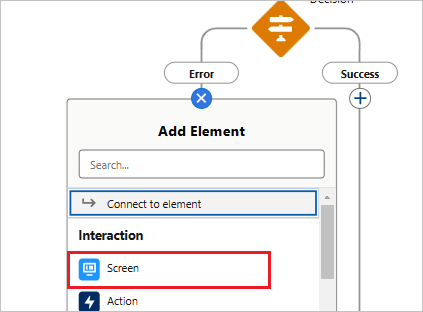
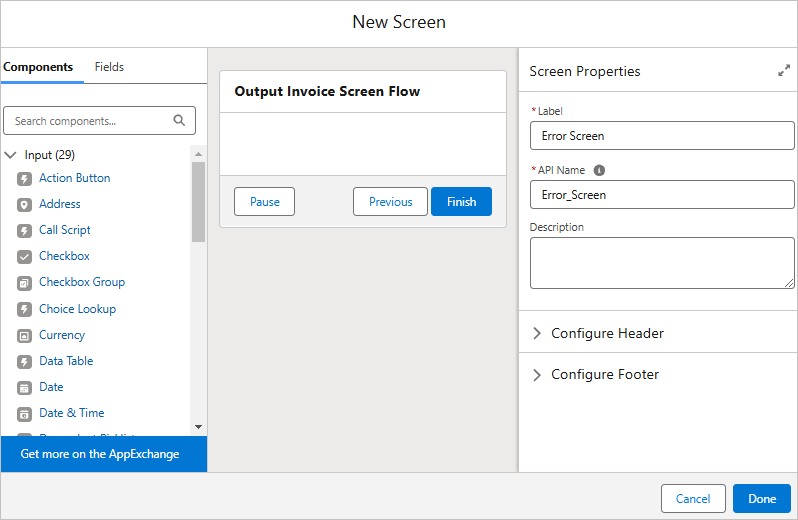
Set the properties.
Label: Error Screen
API Name: Error_Screen
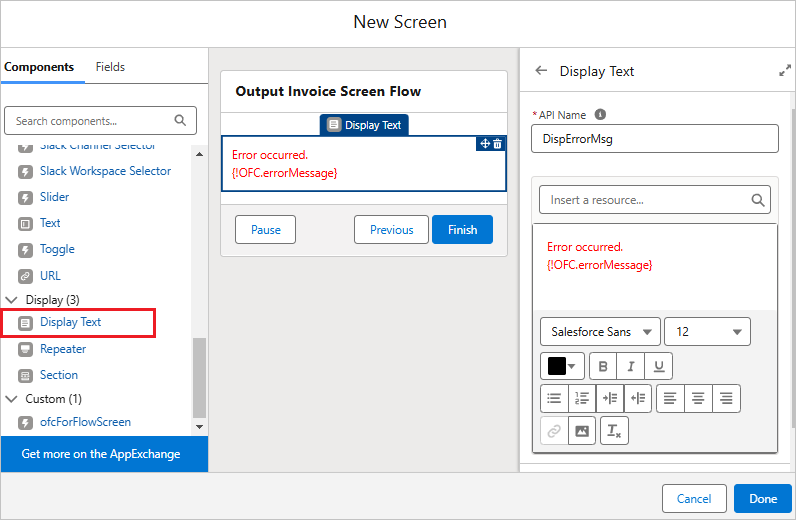
Click "Display Text" in the left component and set the properties.
API Name: DispErrorMsg
Text:
Error occurred.
{!OFC.errorMessage}
*Set text color to red from the color palette.
*Select "errorMessages", not "errorMessages". "errorMessages" is the return value when outputting multiple files at once.
Click the "+" mark under "Error Screen" and select "End".
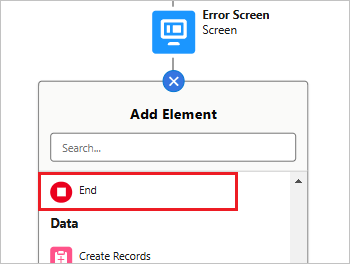
It is branched into two.
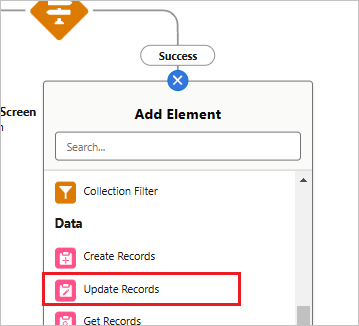
3. Update Opportunity
Click the "+" mark under "Success" and select "Update Records".
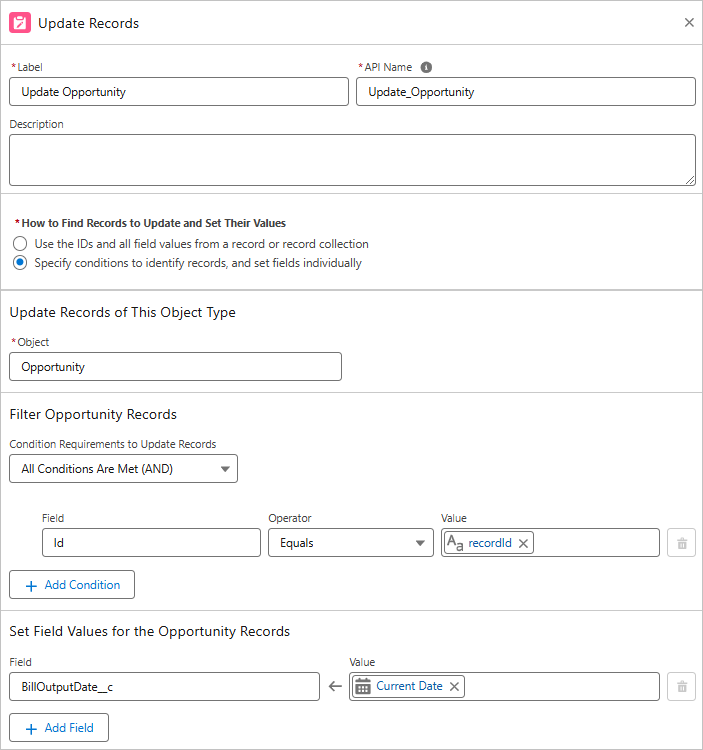
Set the properties.
Label: Update Opportunity
API Name: Update_Opportunity
How to Find Records to Update and Set Their Values: Specify conditions to identify records, and set fields individually
Object: Opportunity
Condition Requirements to Update Records: All Conditions Are Met (AND)
Field: Id Operator: Equals Value: {!recordId}
--- Set Field Values for the Opportunity Records ---
Field: BillOutputDate__c Value: {!$Flow.CurrentDate}
*A custom fields named Bill Output Date (API Name: BillOutputDate__c) is created in Opportunity.
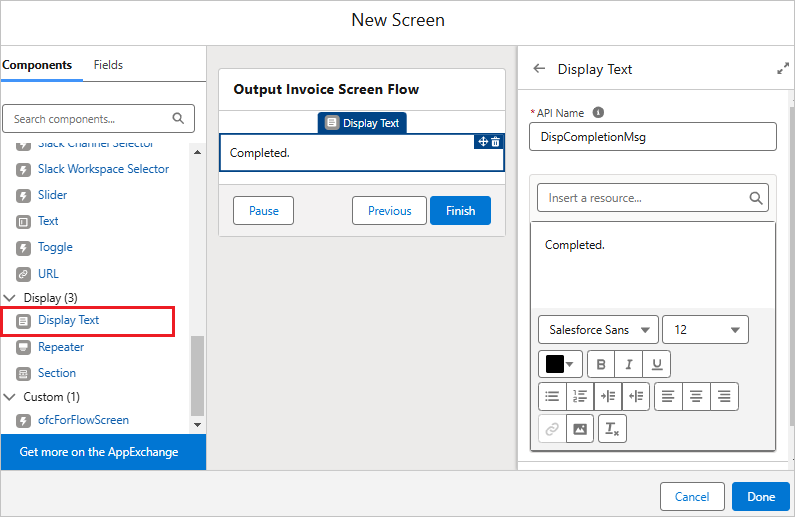
4. End Screen
Click the "+" mark under "Update Opportunity" and select "Screen".
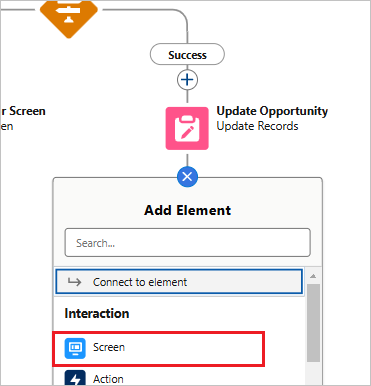
Set the properties.
Label: End Screen
API Name: End_Screen

Click "Display Text" in the left component and set the properties.
API Name: DispCompletionMsg
Text: Completed.
Flow creation is complete.
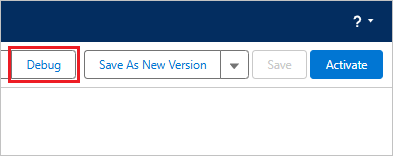
Click the "Save" button.

Debug the Flow
Click the "Debug" button.
Enter the Opportunity record Id and click the "Run" button.
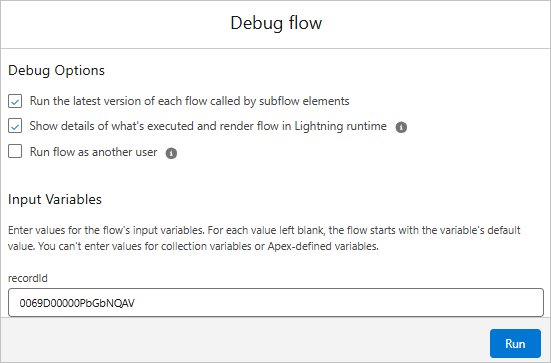
The debug screen will appear. Click the "Next" button.
File output is started.
Confirm that the file is output.
Confirm the date is set to the Bill Output Date in the Opportunity record screen.
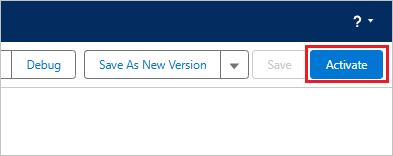
Click the "Activate" button on the flow and close the Flow screen.
Create Custom Button
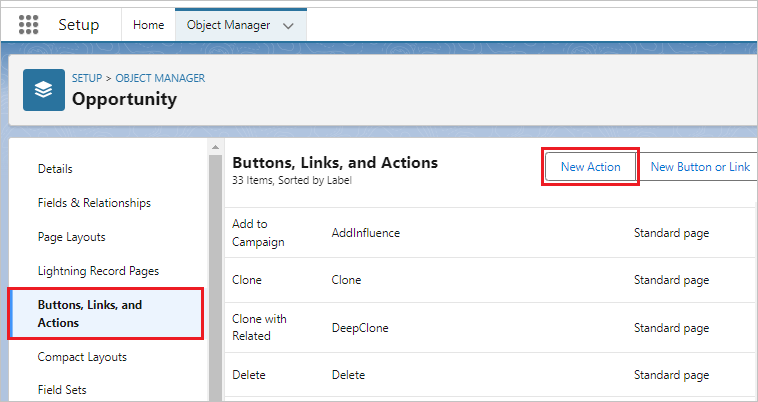
Create a custom button to be placed on the record screen. From Setup > Object Manager, select the target object. Select "Buttons, Links, and Actions" in the left sidebar and click the "New Action" button.
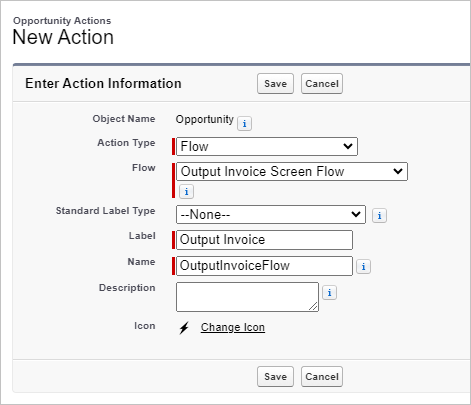
Set the Action Information. After setting, click the "Save" button.
Action Type: Flow
Flow: Output Invoice Screen Flow
Label: Output Invoice
Name: OutputInvoiceFlow
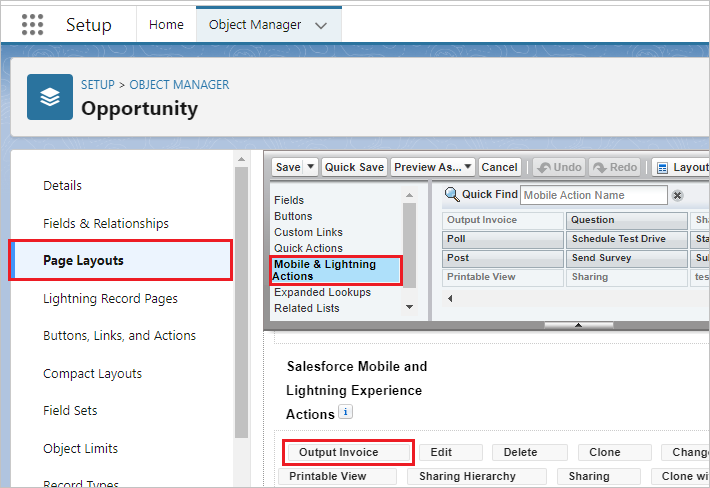
Click "Page Layout" on the left sidebar, place the Output Invoice button, and click the "Save" button.
Run Flow
By clicking the "Output Invoice" button on the Opportunity record page, the invoice file is output and the Bill Output Date is updated with today's date.