This article will show you how to output documents and update Opportunity from the List View in Salesforce Flow. Office File Creator can be integrated into the Screen Flow.
*This procedure is for Office File Creator Ver.1. If you are using Ver.2, please refer to Output documents and update Opportunity from the List View in Salesforce Flow (for OFC Ver.2) - Office File Creator Advanced -.
Completed Flow
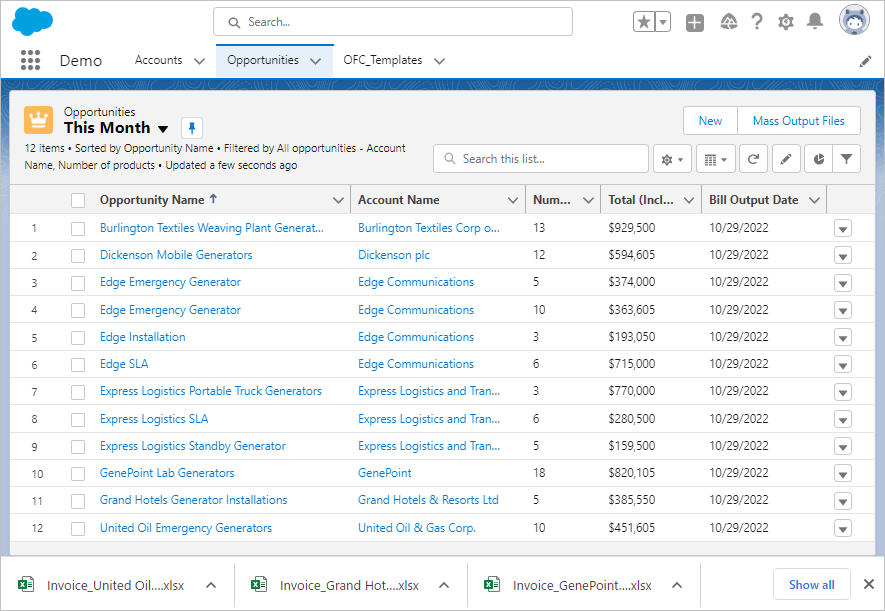
After selecting records from the list view, click the "Mass Output Files" button to display the flow execution screen, execute the flow to output files, and update Opportunity.
Demo
Key Points for Flow Creation
- The parameter that receives the record Id selected from the list view in the flow is "ids". Create a text type variable "ids" and a collection variable in the flow with a check on. Other variable names cannot receive the record Id from the list view.
- To output a file in Office File Creator, place the officeFileCreatorForFlow component in the screen flow. It returns the result of creating the files (success or failure) and returns an error message in case of failure.
- The Opportunity records are not updated within the loop, but the record Id of successful file creation is stored in a collection variable and updated collectively when the loop ends.
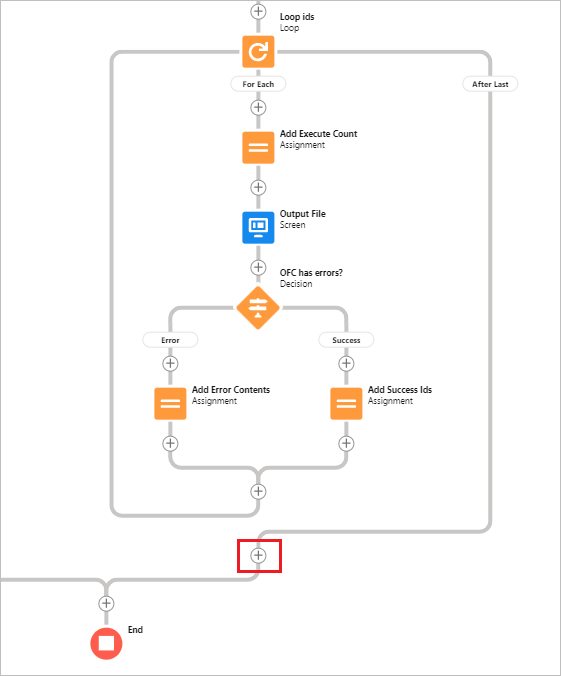
Flow Process Overview
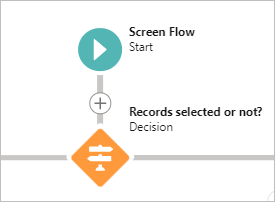
This is the overall picture of the flow.
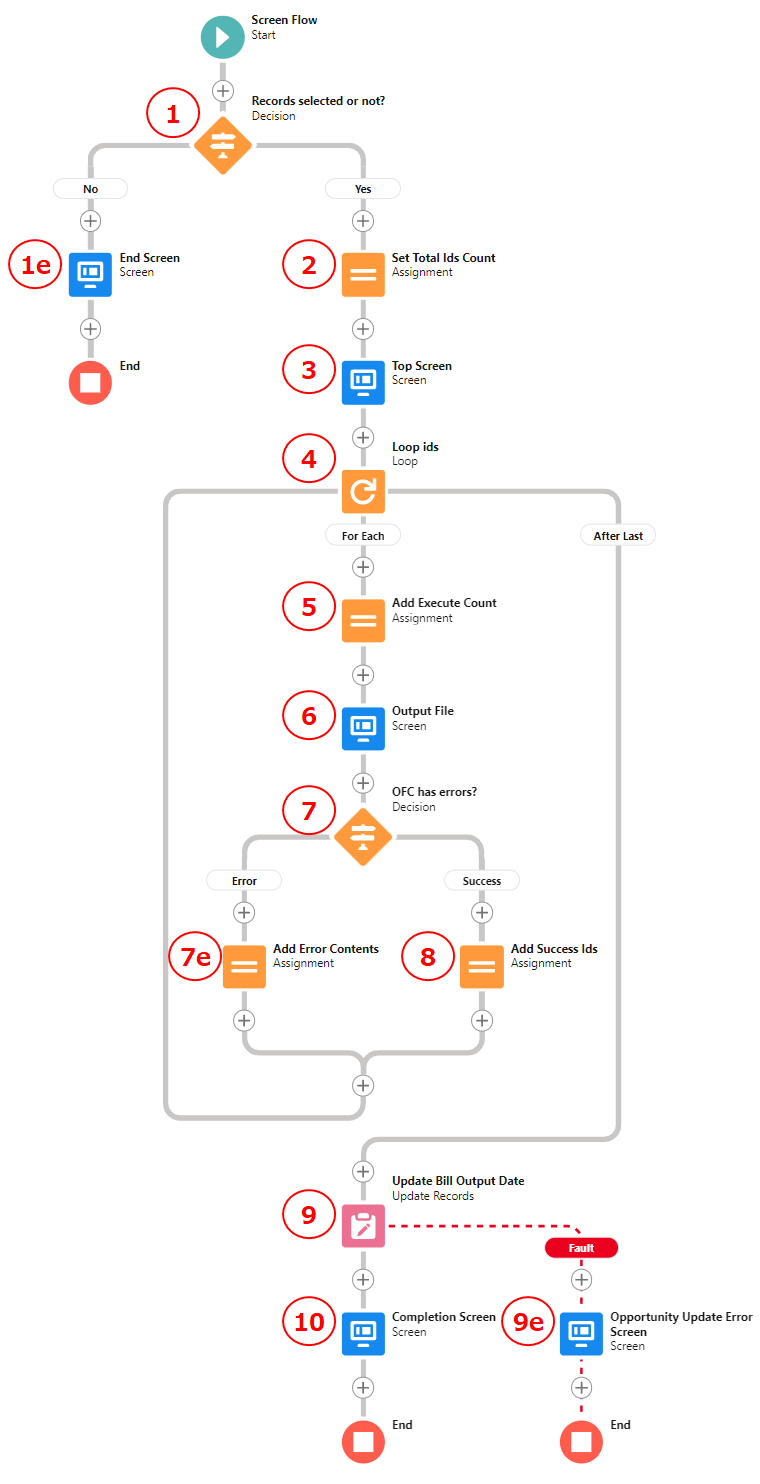
1. Record selection judgment
Judge whether or not a record is selected from the list view. If one or more records are selected, go to process 2. If there are no records, go to process 1e.
1e. End Screen
Display an exit screen with a message that no record is selected and end the flow.
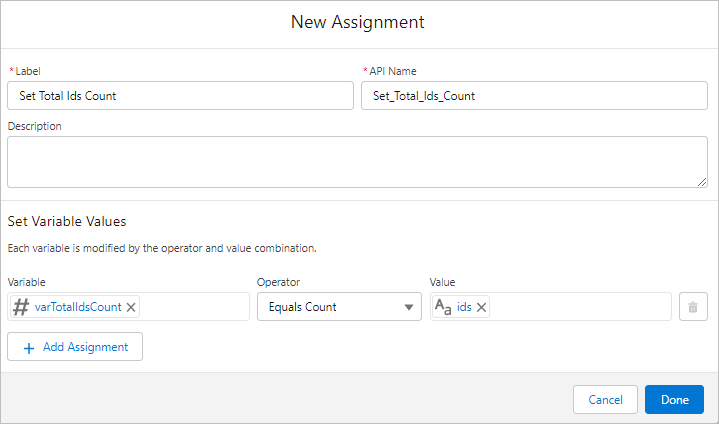
2. Set Total Ids Count
Sets the total number of records selected from the list view to a variable.
3. Top Screen
Display the confirmation message.
4. Loop ids
Start a loop process for each record Id selected from the list view.
5. Add Execute Count
Add 1 to the number of executions.
6. Output File
Place the officeFileCreatorForFlow component in the screen flow and output the file.
7. OFC error judgment
Judge the success or error of the output result. In case of success, go to process 8. In case of error, go to process 7e.
7e. Add Error Contents
Add 1 to the number of error and the error message and go to process 9.
8. Add Success Ids
Add 1 to the number of success.
9. Update Bill Output Date
Update the Bill Output Date of the Opportunity.
9e. Opportunity Update Error Screen
Display the completion message. If there are errors in output files, error messages are also displayed.
10. Completion Screen
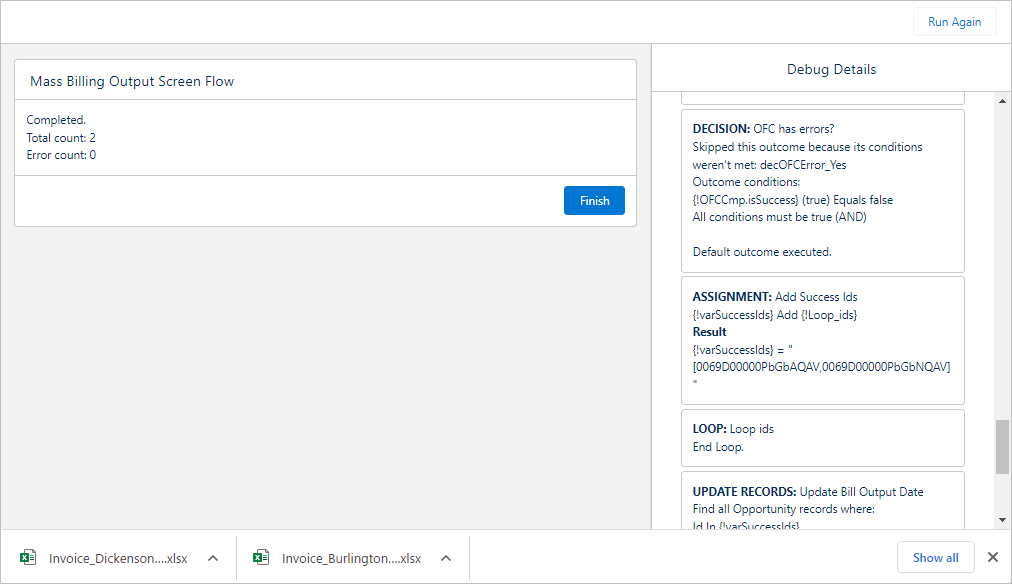
Display the completion message. If there are errors in output files, error messages are also displayed.
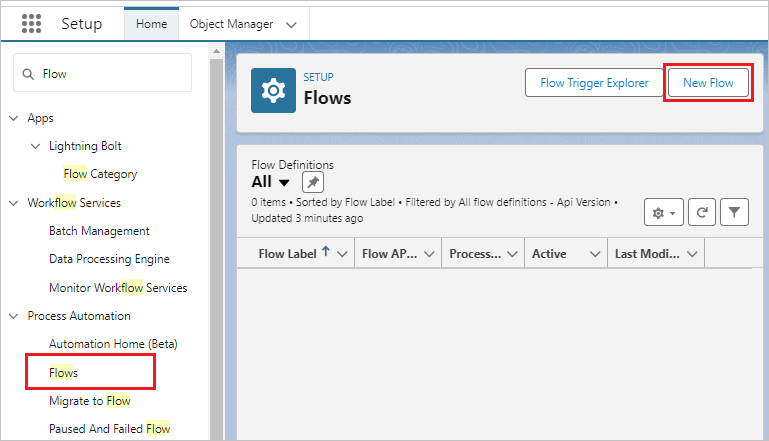
Create the Flow
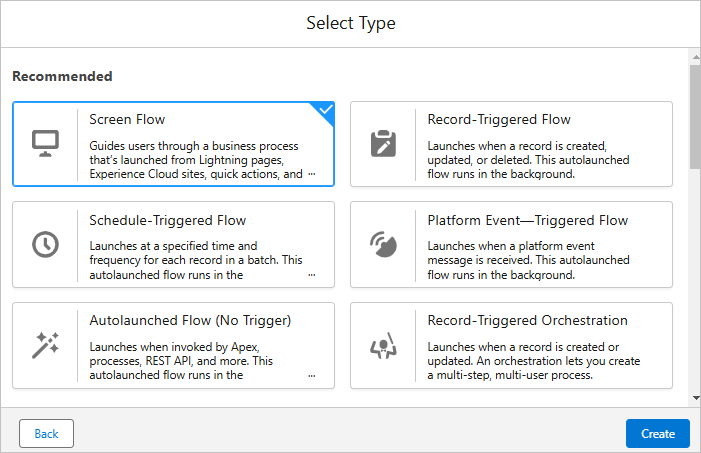
Now let's create the flow. Open Flows from Setup and click the "New Flow" button.
Select "Screen Flow" and click the "Create" button.
Create Resources
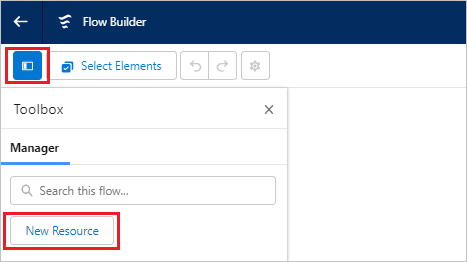
Create the variables to be used in the flow. Click the "Toggle Toolbox" button in the upper left corner of the screen, then click the "New Resource" button.
Create three resources by selecting Variable as the resource type and Text as the Data Type.
|
API Name |
Description |
Allow multiple values (collection) |
Available for input |
|
ids |
Selected record Id list in list view. |
Check |
Check |
|
varSuccessIds |
Record Id list that was successfully processed. |
Check |
- |
|
varErrorMessage |
Error message |
- |
- |
*The "ids" is a variable that receives the record Id from the list view. Be sure to use "ids" (All lowercase). Other variable names cannot receive the record Id from the list view.
Create three resources by selecting Variable as the resource type and Number as the Data Type.
|
API Name |
Description |
Allow multiple values (collection) |
Decimal Places |
Default Value |
Available for input |
|
varTotalIdsCount |
Total record count |
- |
0 |
- |
- |
|
varExecuteCount |
Executed count |
- |
0 |
0 |
- |
|
varErrorCount |
Error count |
- |
0 |
0 |
- |
*Be sure to set the default value to 0.
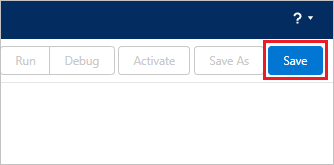
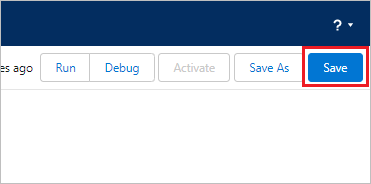
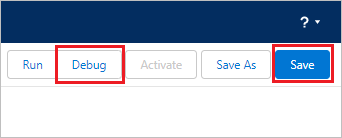
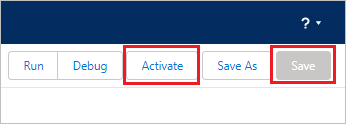
First, save the flow. Click the "Save" button.
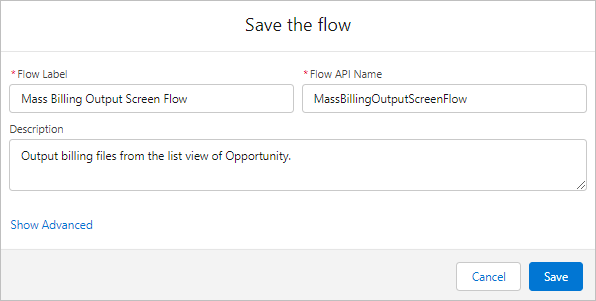
Save the Flow under any name. Here it is saved as follows.
Flow Label: Mass Billing Output Screen Flow
Flow API Name: MassBillingOutputScreenFlow
Description: Output billing files from the list view of Opportunity.
1. Record selection judgment
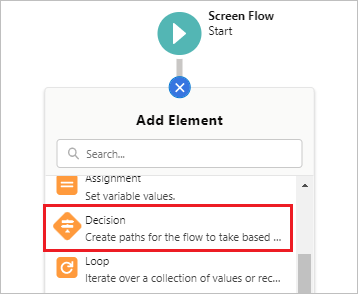
Click the "+" mark under "Screen Flow" and select "Decision".
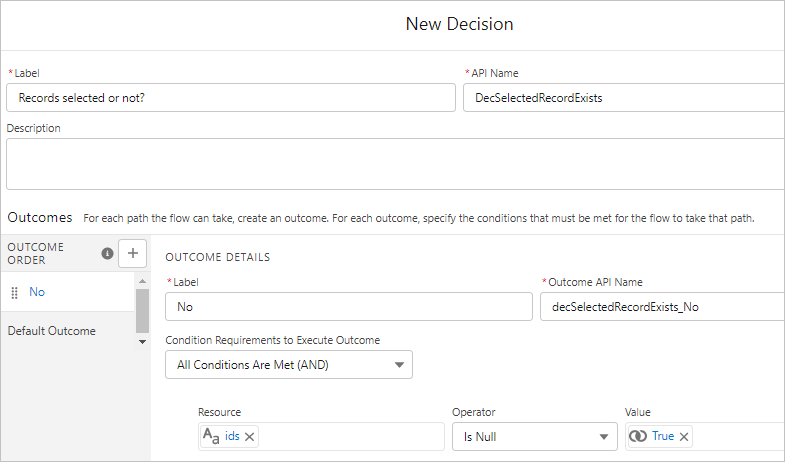
Set the properties.
Label: Records selected or not?
API Name: DecSelectedRecordExists
Label: No
Outcome API Name: decSelectedRecordExists_No
Condition Requirements to Execute Outcome: All Conditions Are Met (AND)
Recourse: {!ids} Operator: Is Null Value: {!$GlobalConstant.True}
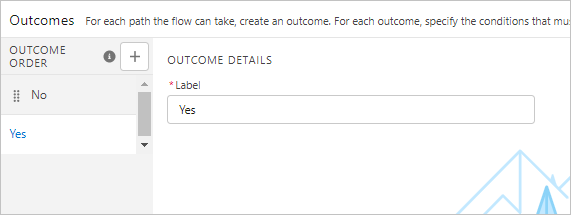
Click "Default Outcome" in the left sidebar.
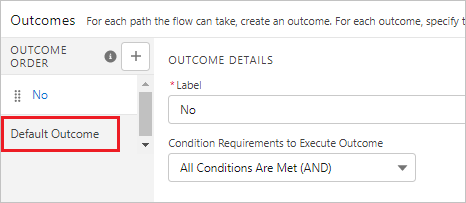
Set the properties.
Label: Yes
1e. End Screen
Click the "+" mark under "No" and select "Screen".
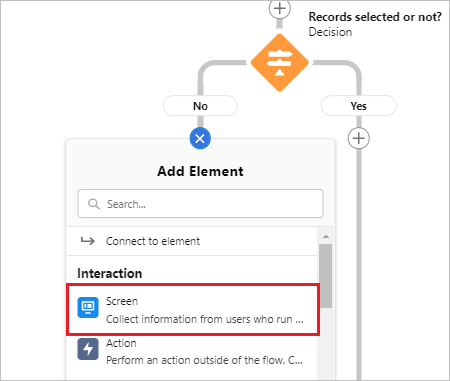
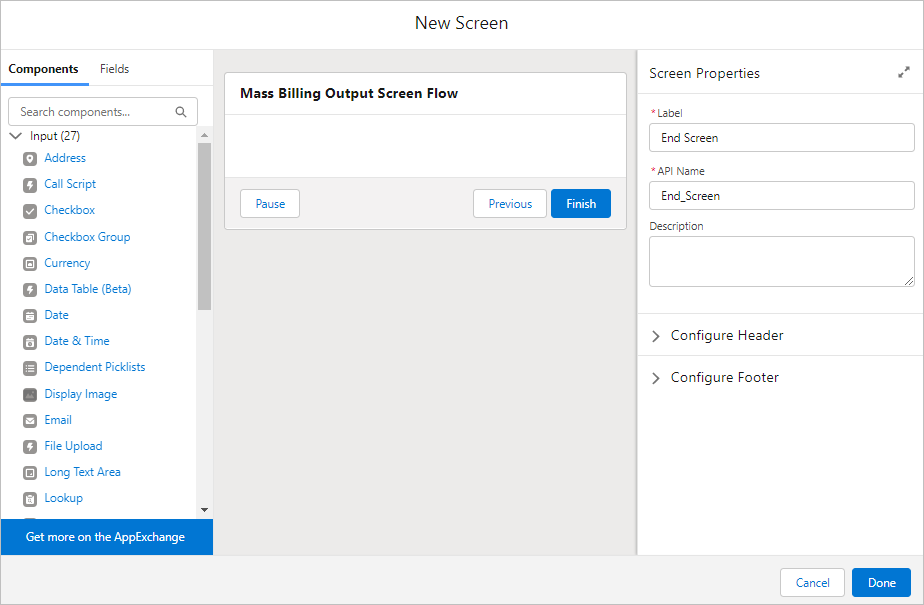
Set the properties.
Label: End Screen
API Name: End_Screen
Drag and drop "Display Text" from Components and set the properties.
API Name: dispNoRecordMsg
Text:
No records have been selected.
Please select at least one record and then execute.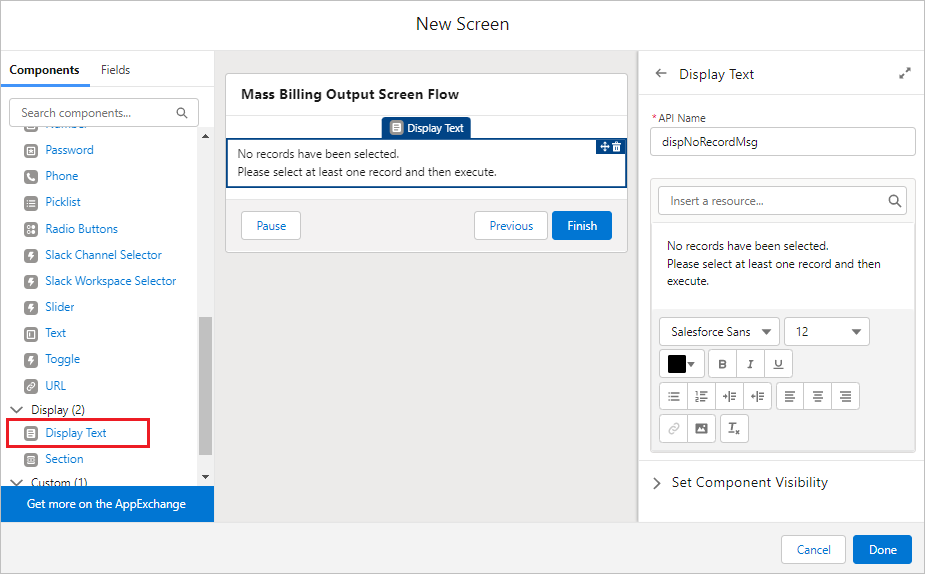
2. Set Total ids Count
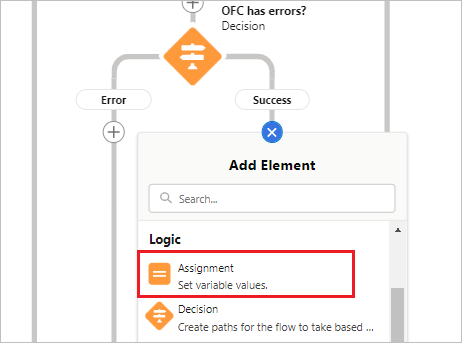
Click the "+" mark under "Yes" and select "Assignment".
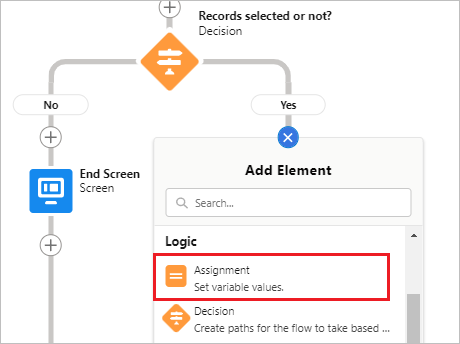
Set the properties.
Label: Set Total Ids Count
API Name: SetTotalIdsCount
Variable: {!varTotalIdsCount} Operator: Equals Count Value: {!ids}
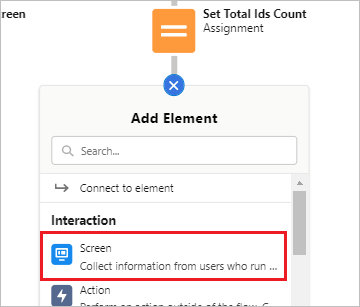
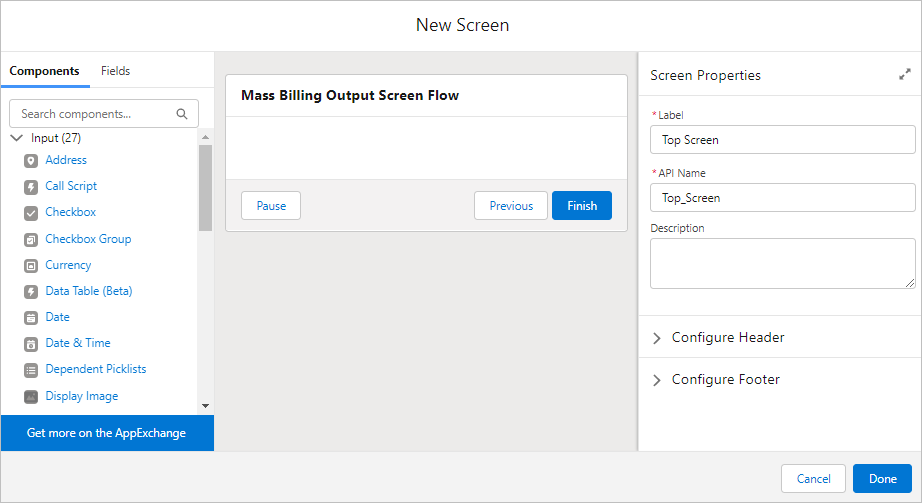
3. Top screen
Click the "+" mark under "Set Total Ids Count" and select "Screen".
Set the properties.
Label: Top Screen
API Name: Top_Screen
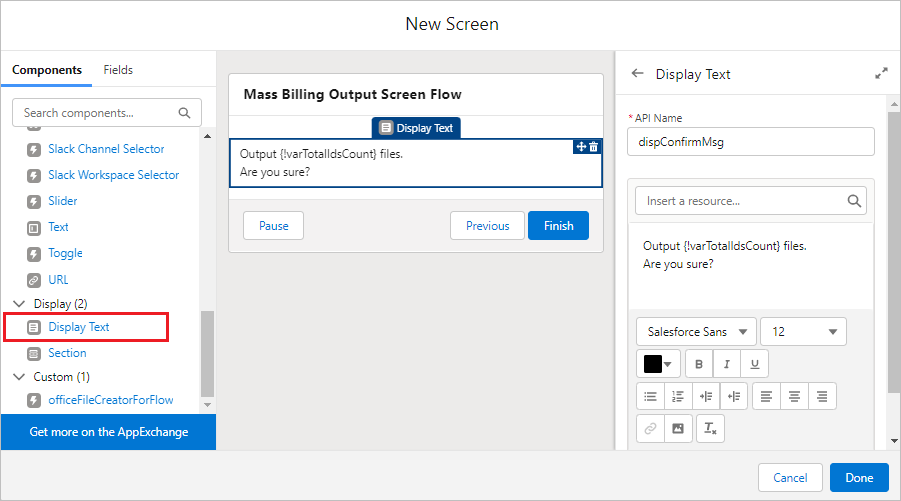
Drag and drop "Display Text" from Components and set the properties.
API Name: dispConfirmMsg
Text:
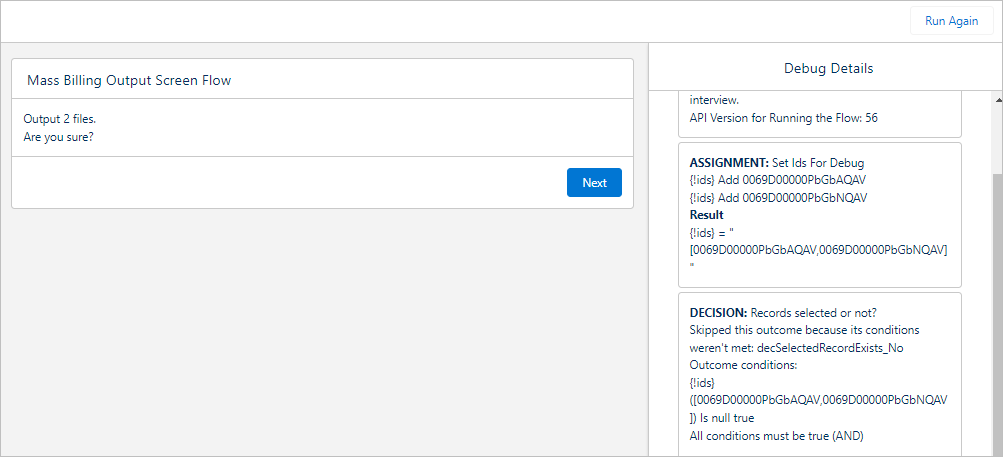
Output {!varTotalIdsCount} files.
Are you sure?
4. Loop ids
Click the "+" mark under "Top Screen" and select "Loop".
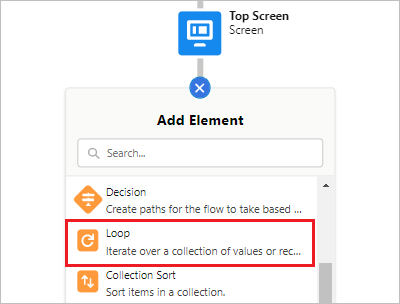
Set the properties.
Label: Loop ids
API Name: Loop_ids
Collection Variable: {!ids}
Direction: First item to last item

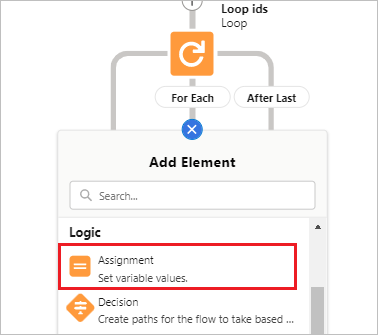
5. Add Execute Count
Click the "+" mark under "For Each" and select "Assignment".
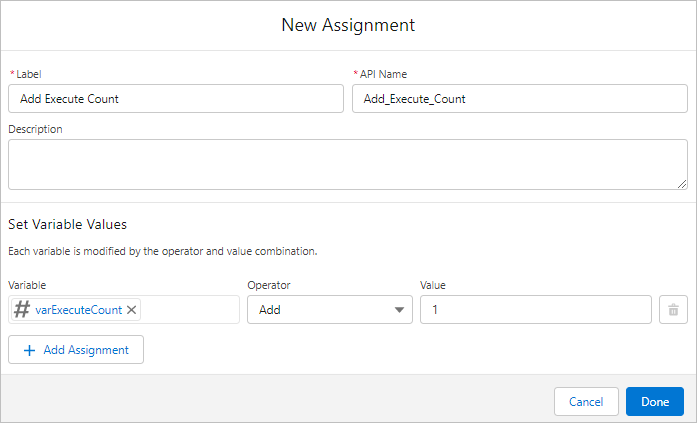
Set the properties.
Label: Add Execute Count
API Name: Add_Execute_Count
Variable: {!varExecuteCount} Operator: Add Value: 1
6. Output File
Click the "+" mark under "Add Execute Count" and select "Screen".
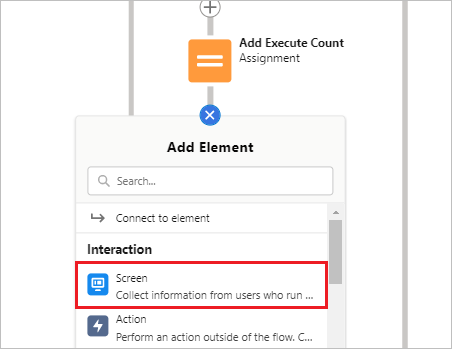
Set the properties.
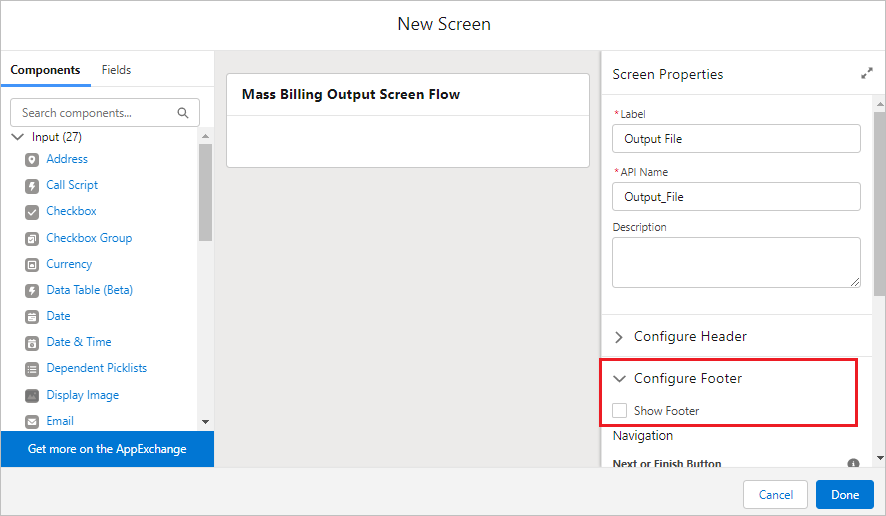
Label: Output File
API Name: Output_File
Show Footer: check off
Note: The footer is hidden so that users do not click the "Next" or "Previous" button while officeFileCreatorForFlow is running.
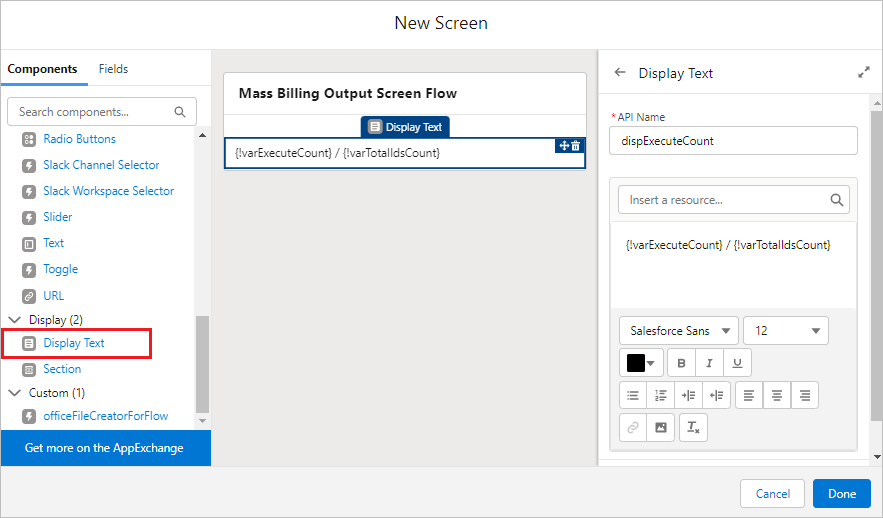
Drag and drop "Display Text" from Components and set the properties.
API Name: dispExecuteCount
Text: {!varExecuteCount} / {!varTotalIdsCount}
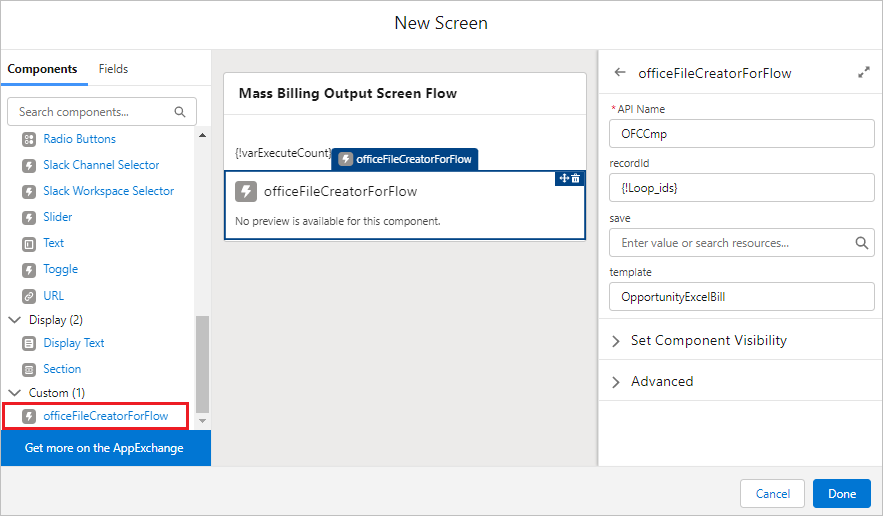
Drag and drop "officeFileCreatorForFlow" from Components under the display text "dispExecuteCount" and set the properties.
API Name: OFCCmp
recordId: {!Loop_ids}
save: Empty *To save the file, enter "file" or "att".
template: OpportunityExcelBill *Enter the Template Api Name of the OFC_Template.
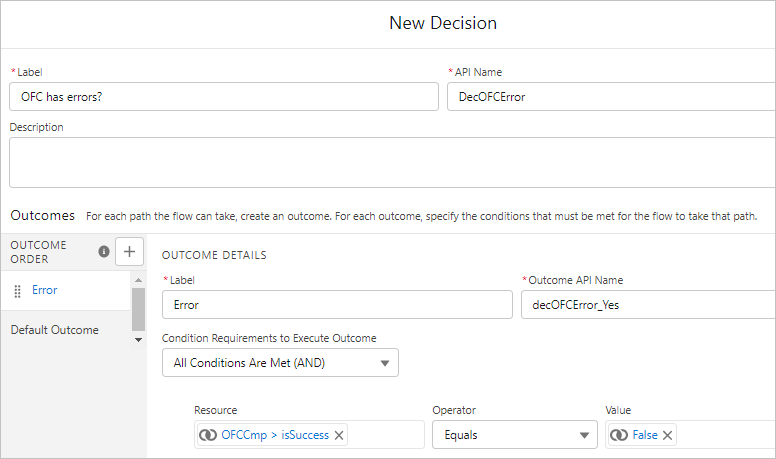
7. OFC error judgment
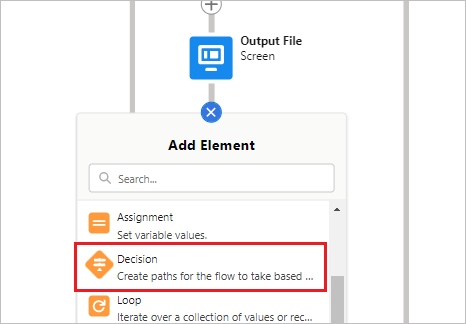
Click the "+" mark under "Output File" and select "Decision".
Set the properties.
Label: OFC has errors?
API Name: DecOFCError
Label: Error
Outcome API Name: decOFCError_Yes
Condition Requirements to Execute Outcome: All Conditions Are Met (AND)
Recourse: {!OFCCmp.isSuccess} Operator: Equals Value: {!$GlobalConstant.False}
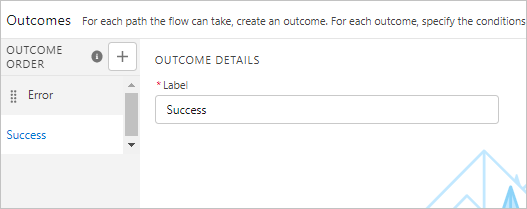
Click "Default Outcome" in the left sidebar.
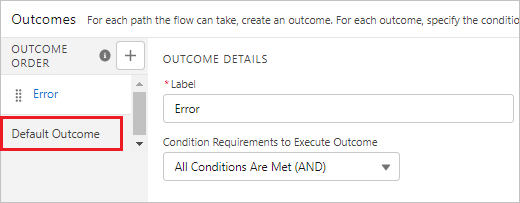
Set the properties.
Label: Success
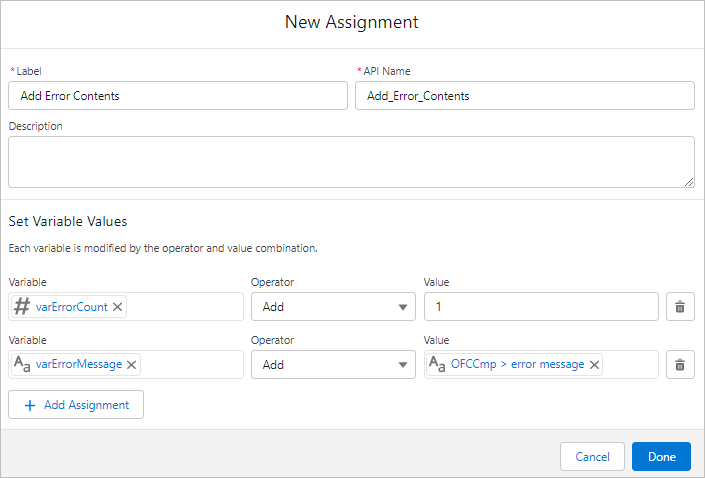
7e. Add Error Contents
Click the "+" mark under "Error" and select "Assignment".
Set the properties.
Label: Add Error Contents
API Name: Add_Error_Contents
Variable: {!varErrorCount} Operator: Add Value: 1
Variable: {!varErrorMessage} Operator: Add Value: {!OFCCmp.errorMessage}
*OFC error messages include a new line for each case, so if there are multiple errors, they will be displayed on a new line.
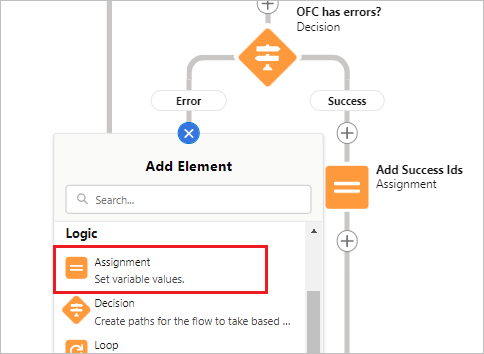
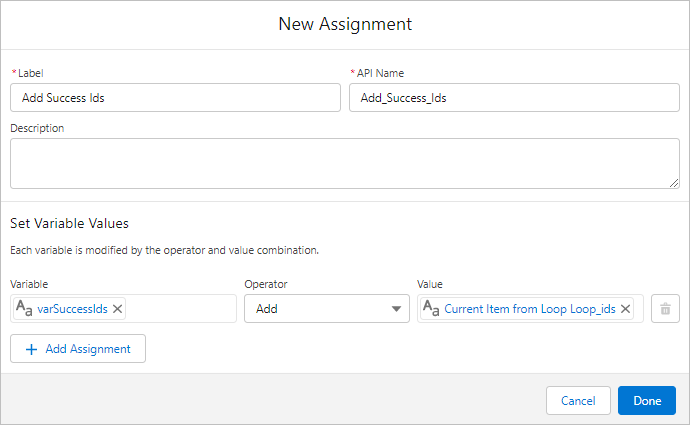
8. Add Success Ids
Click the "+" mark under "Success" and select "Assignment".
Set the properties.
Label: Add Success Ids
API Name: Add_Success_Ids
Variable: {!varSuccessIds} Operator: Add Value: {!Loop_ids}
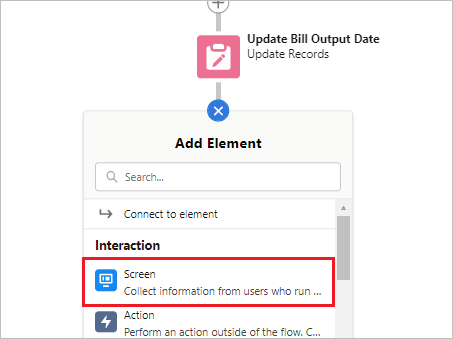
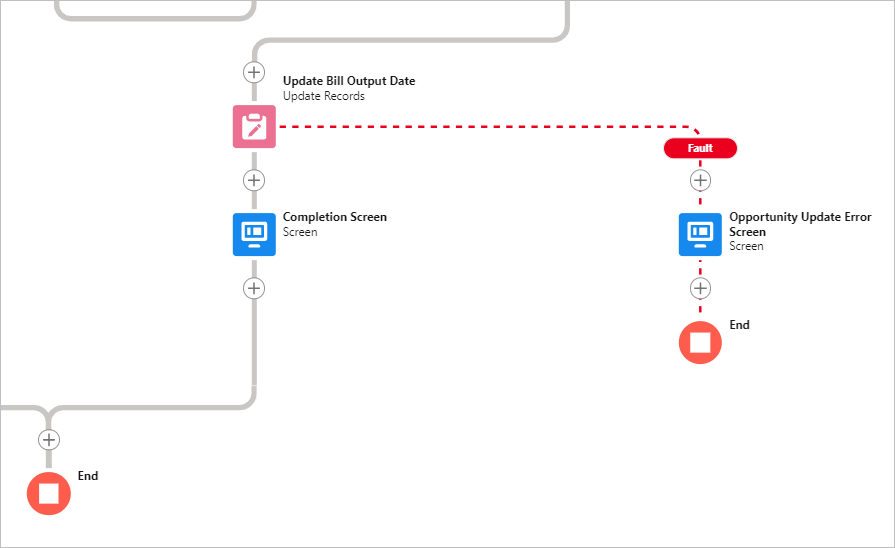
9. Update Bill Output Date
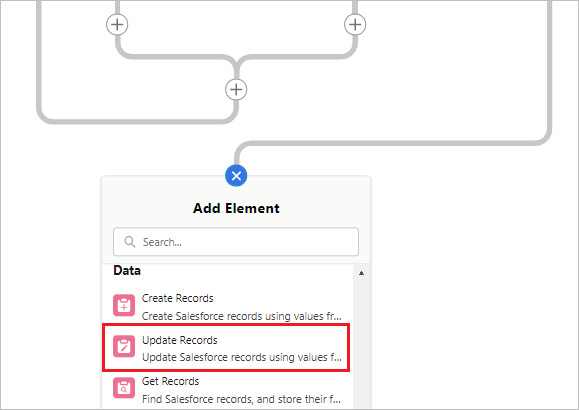
Click the "+" mark under "After Last".
Select "Update Records".
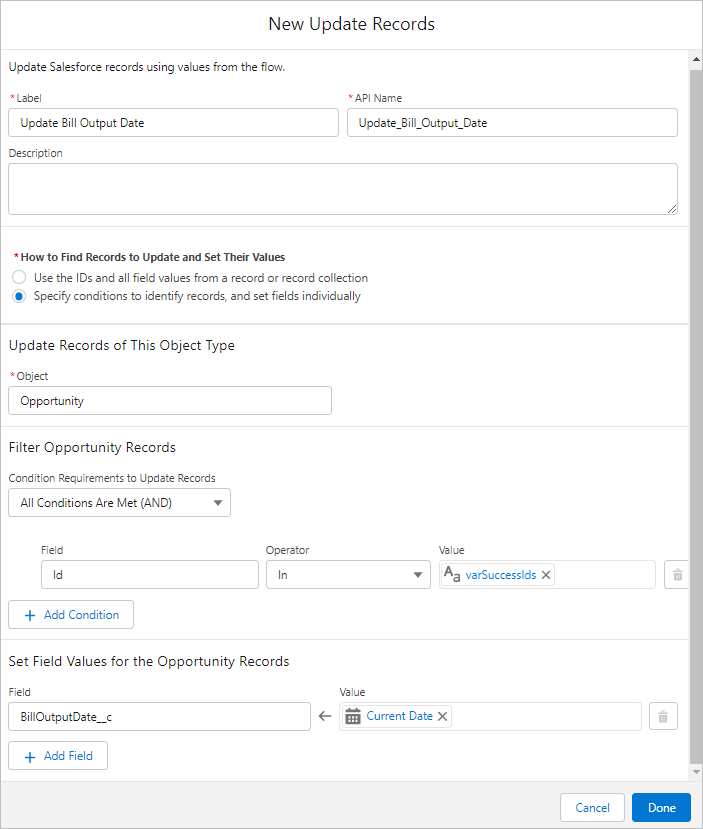
Set the properties.
Label: Update Bill Output Date
API Name: Update_Bill_Output_Date
How to Find Records to Update and Set Their Values: check on "Specify conditions to identify records, and set fields individually"
Object: Opportunity
Condition Requirements to Update Records: All Conditions Are Met (AND)
Field: Id Operator: In Value: {!varSuccessIds}
--------------------------------------------------------------------
Field: BillOutputDate__c Value: {!$Flow.CurrentDate}
*A custom field named Bill Output Date (API Name: BillOutputDate__c) is created in Opportunity.
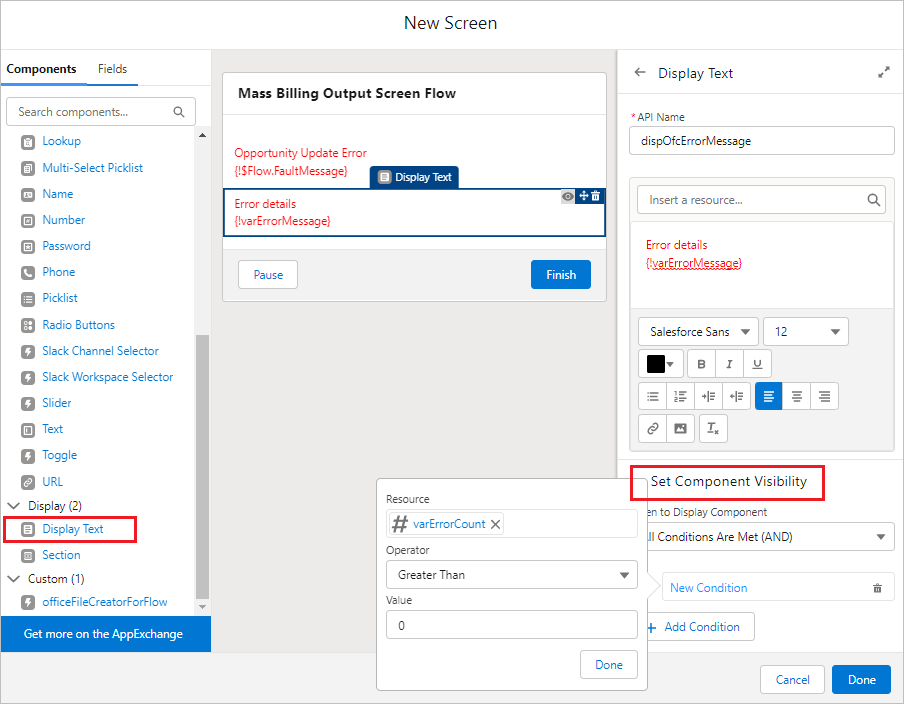
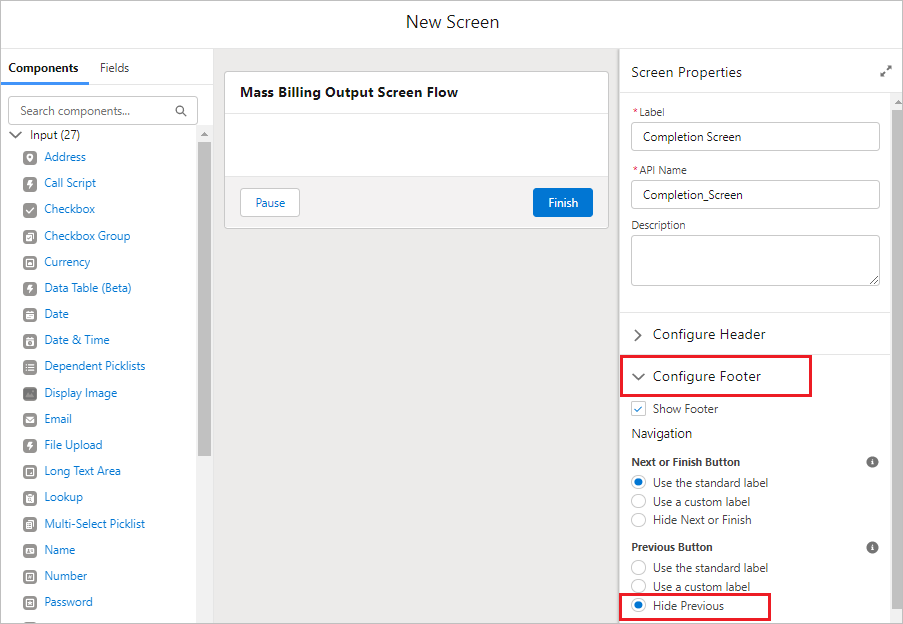
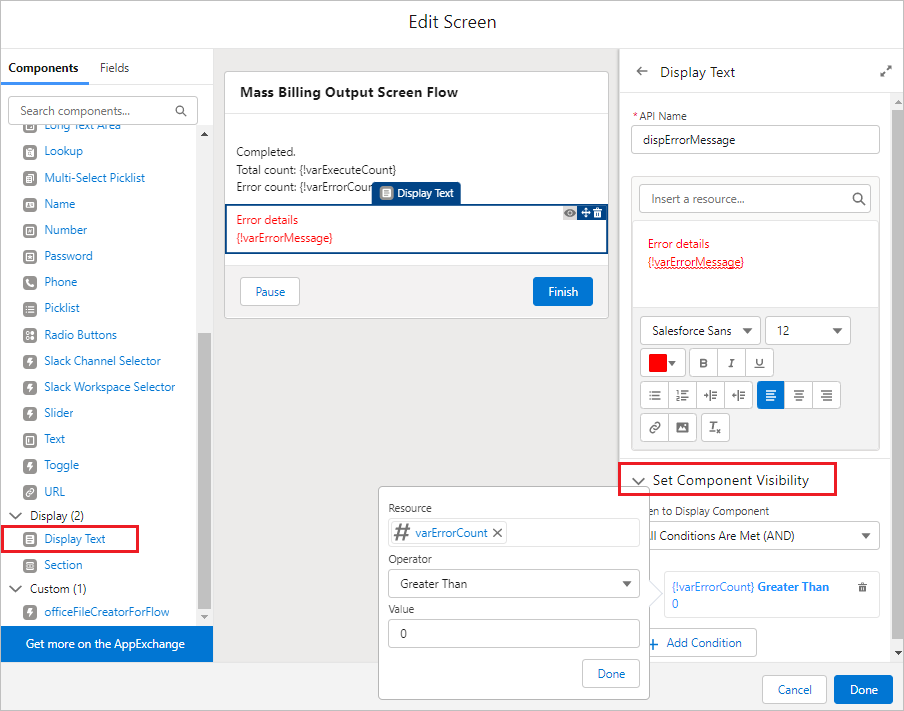
9e. Opportunity Update Error Screen
Click "Update Bill Output Date".

Click "Add Fault Path".

Click "+" mark under "Fault" and select "Screen".
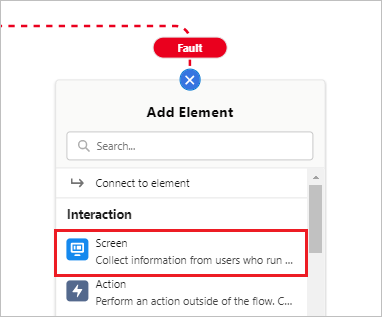
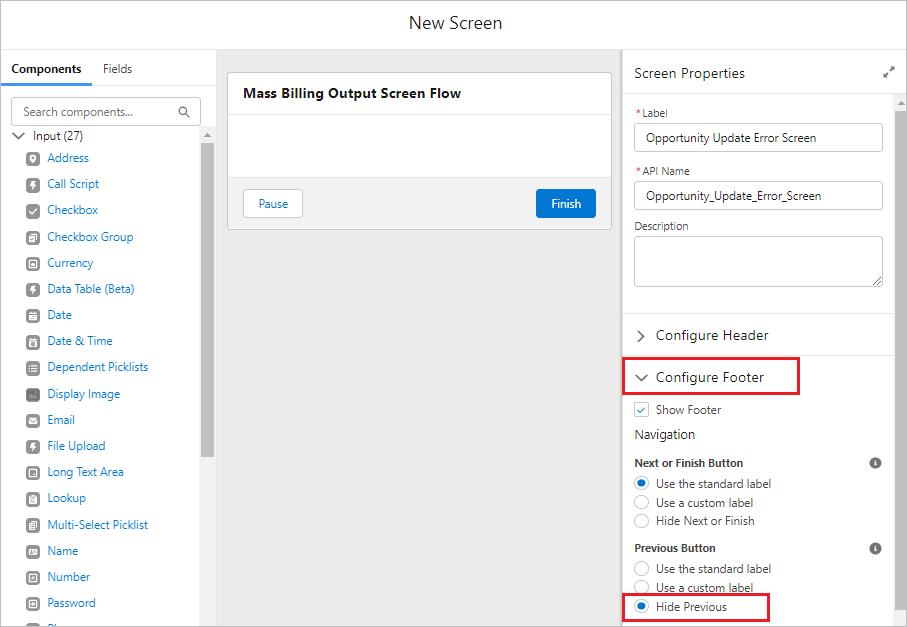
Set the properties.
Label: Opportunity Update Error Screen
API Name: Opportunity_Update_Error_Screen
Click "Configure Footer" and check "Hide Previous" in the "Previous button".
Drag and drop "Display Text" from Components and set the properties.
API Name: dispUpdateOpportunityErrorMsg
Text:
Opportunity Update Error
{!$Flow.FaultMessage}
Set text color to red from the color palette.

Drag and drop "Display Text" from Components under the display text "dispUpdateOpportunityErrorMsg" and set the properties.
API Name: dispOfcErrorMessage
Text:
Error details
{!varErrorMessage}
Set text color to red from the color palette.
Click "Set Component Visibility" and set the conditions.
When to Display Component: All Conditions Are Met (AND)
Resource: {!varErrorCount}
Operator: Greater Than
Value: 0
10. Completion Screen
Click the "+" mark under "Update Bill Output Date" and select "Screen".
Set the properties.
Label: Completion Screen
API Name: Completion_Screen
Click "Configure Footer" and check "Hide Previous" in the "Previous button".
Drag and drop "Display Text" from Components and set the properties.
API Name: dispCompletionMsg
Text:
Completed.
Total count: {!varExecuteCount}
Error count: {!varErrorCount}
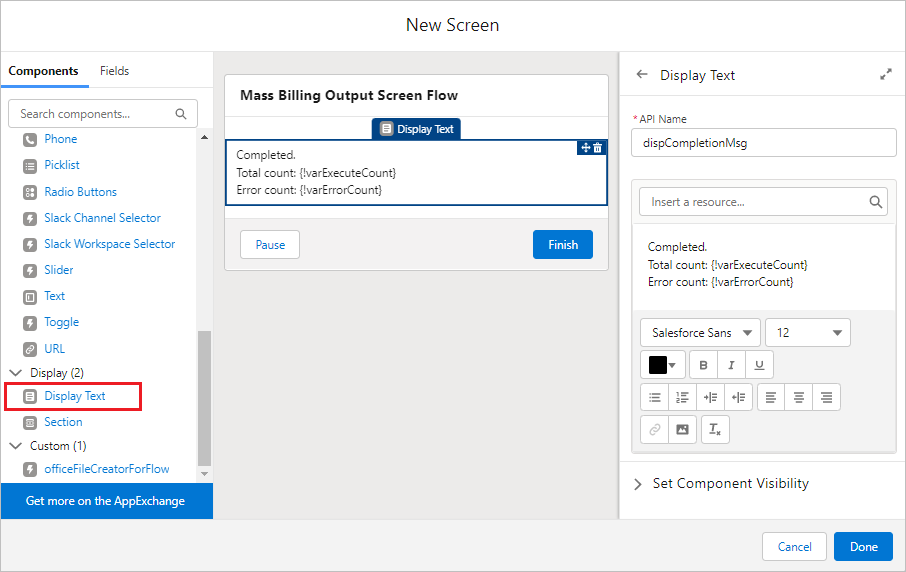
Drag and drop "Display Text" from Components under the display text "dispCompletionMsg" and set the properties.
API Name: dispErrorMessage
Text:
Error details
{!varErrorMessage}
Set text color to red from the color palette.
Click "Set Component Visibility" and set the conditions.
When to Display Component: All Conditions Are Met (AND)
Resource: {!varErrorCount}
Operator: Greater Than
Value: 0
The flow is complete. Good job.
Click the "Save" button.
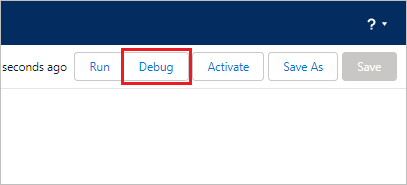
Debug the Flow
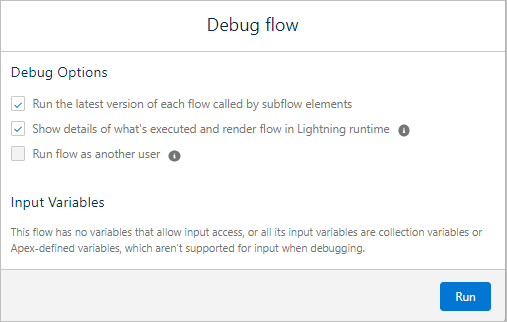
Click the "Debug" button.
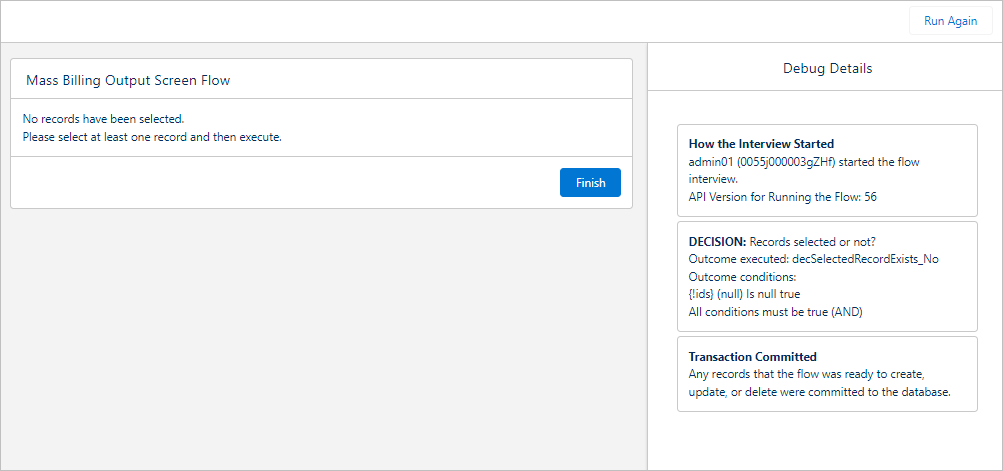
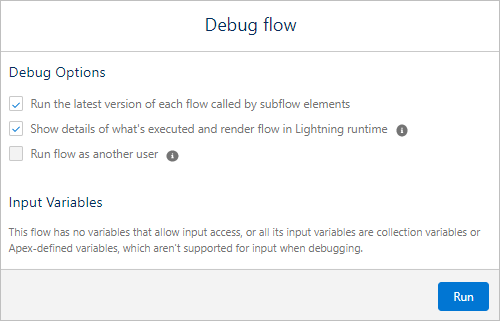
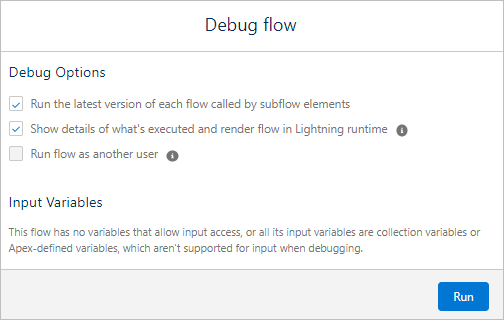
The following is displayed and there is no record Id entry field when debugging. The test will only be conducted with no record selected. First, test that no records are selected. Click the "Run" button.
The completion screen is displayed.
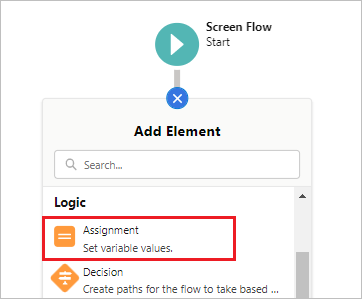
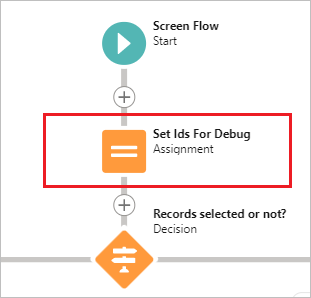
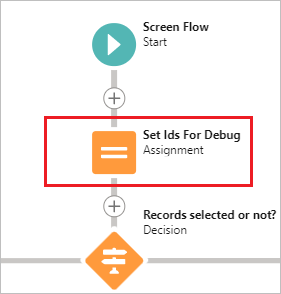
Next, assign a debug record Id to the ids variable for debugging only. When debugging is complete, delete the assignment. Click the "+" mark under "Screen Flow" and select "Assignment".
*This assignment will be deleted after debugging is completed.
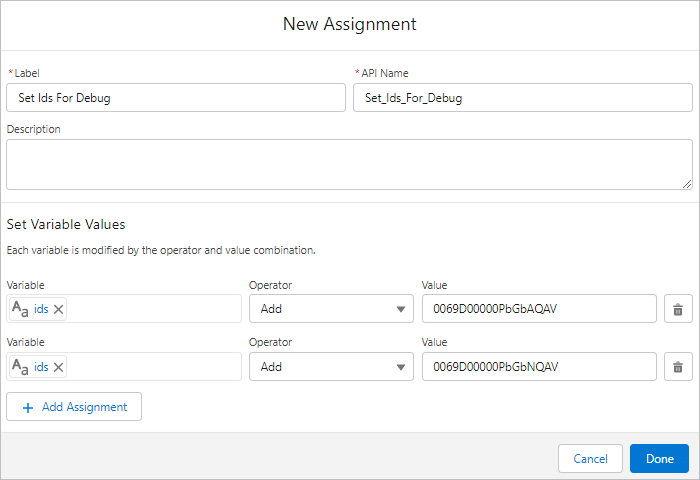
Set the properties.
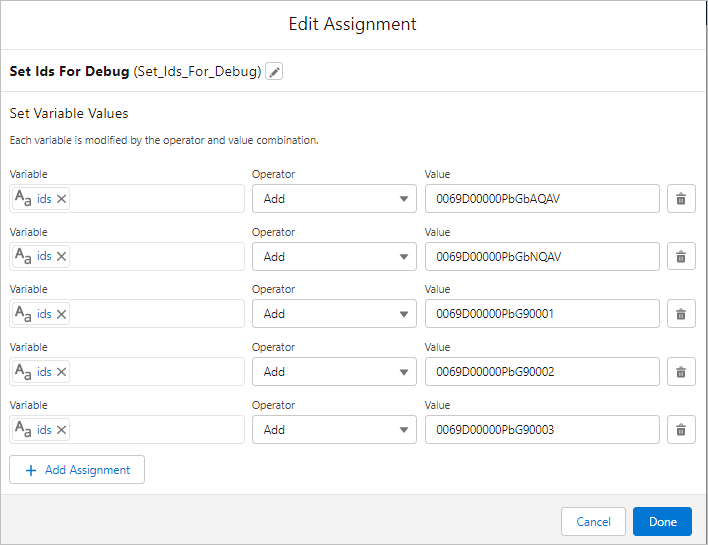
Label: Set Ids For Debug
API Name: SetIdsForDebug
Variable: {!ids} Operator: Add Value: *Set the Opportunity record Id for the test.
In the example, two test Opportunity record Id's are added.
Ensure that "Set Ids for Debug" is added under "Screen Flow".
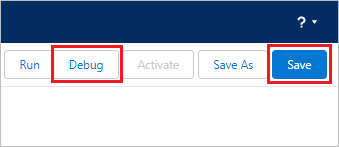
Click the "Save" button and then the "Debug" button.
Click the "Run" button.
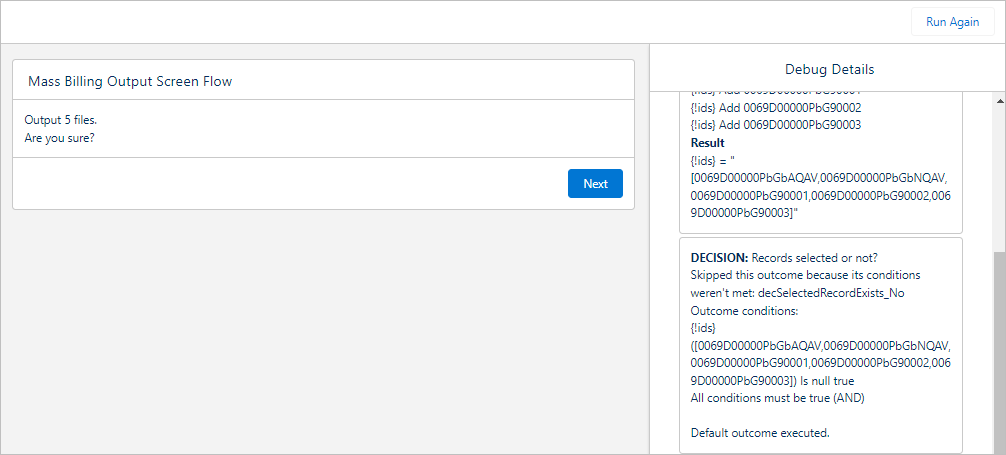
The debug screen will be displayed. Click the "Next" button.
Confirm that the files are output and the dates are set to the Bill Output Date in the Opportunity record screen.
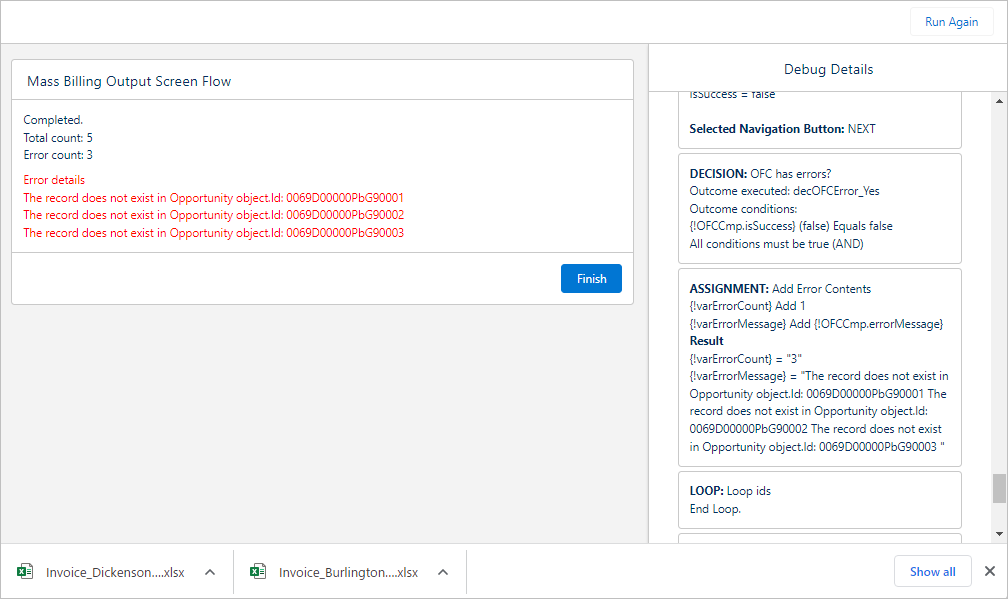
Next, test the case with errors. Return to the flow edit screen, click "Assign Id Set for Debugging" and add non-existent record Id's.
Variable: {!ids} Operator: Add Value: *Set the record Id of the Opportunity Id that does not exist.
In the example, 3 error Opportunity record Id's are added.
Click the "Save" button and then the "Debug" button.
Click the "Run" button.
Click the "Next" button.
Three error messages are displayed.
After debugging is complete, click "Set Ids for Debug".
Click "Delete Element".
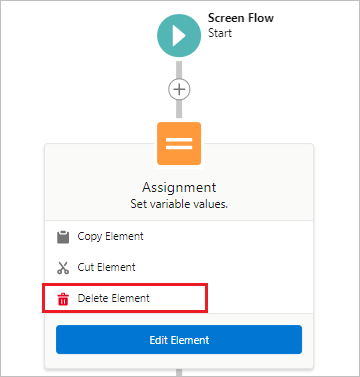
Confirm that it has been deleted.
Click the "Save" button and then the "Activate" button. Close the flow screen.
Create Custom Button
Create a custom button for outputting files on the List view.
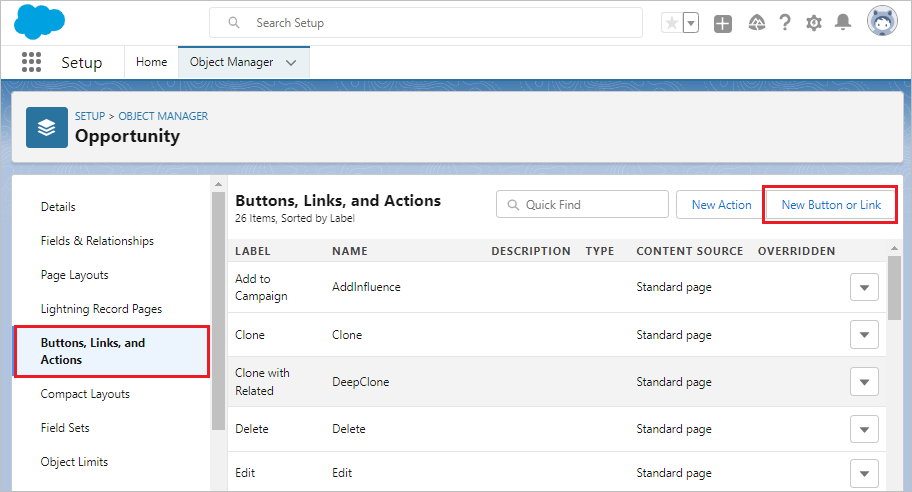
Open the target object from the Object Manager in Setup. Click "Buttons, Links, and Actions" in the left sidebar, then click the "New Button or Link" button.
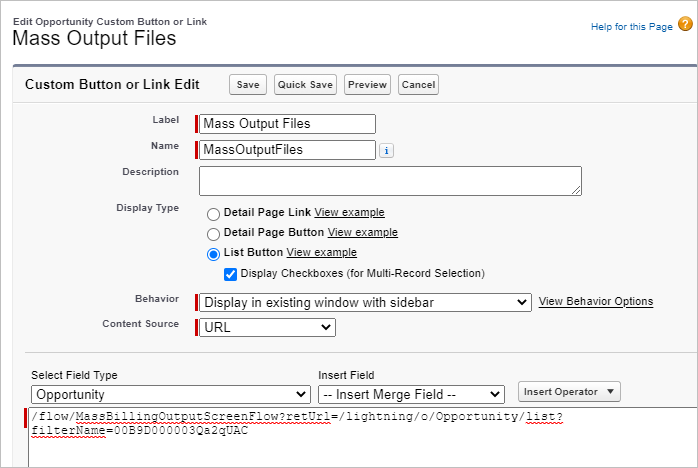
Set the properties.
Label: Mass Output Files
Name: MassOutputFiles
Display Type: List Button
Display Checkboxes (for Multi-Record Selection): check on
Behavior: Display in existing window with sidebar
Content Source: URL
URL: /flow/Flow API Name?retUrl=/lightning/o/Object API Name/list?filterName=List View Id
*"retUrl" is the URL to transition from the flow screen to the list view after the flow is completed.
*List view Id is the Id after "filterName=" in the URL of the list view screen.
In the example, the following is set.
/flow/MassBillingOutputScreenFlow?retUrl=/lightning/o/Opportunity/list?filterName=00B9D000003Qa2qUAC
Click "List View Button Layout" on the left sidebar, then click "▼" and then "Edit".
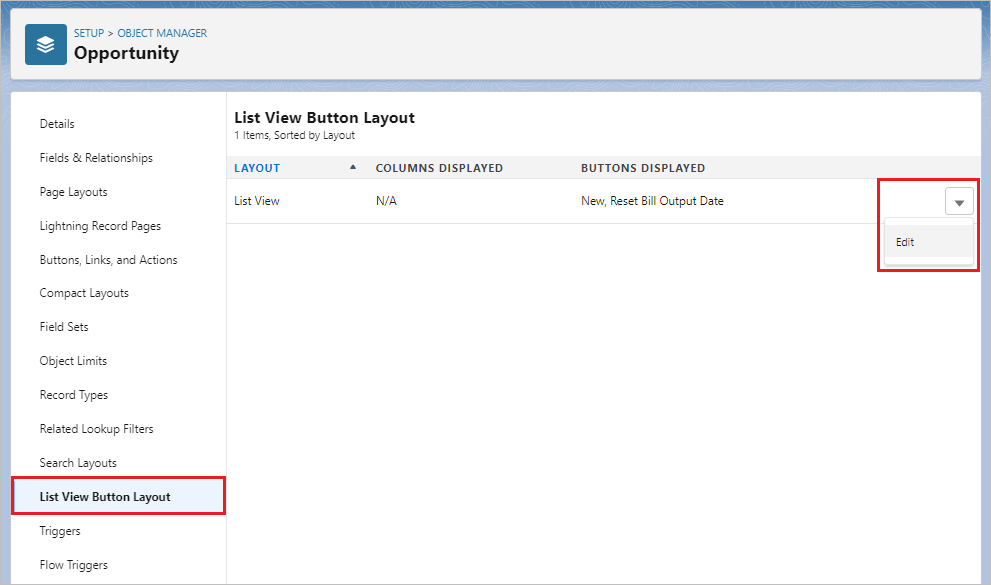
Select the created button and click "Add", then click the "Save" button.

Run the Flow
From the list view, when the flow is executed, the file is output and the Bill Output Date is updated.